Bird’s Eye
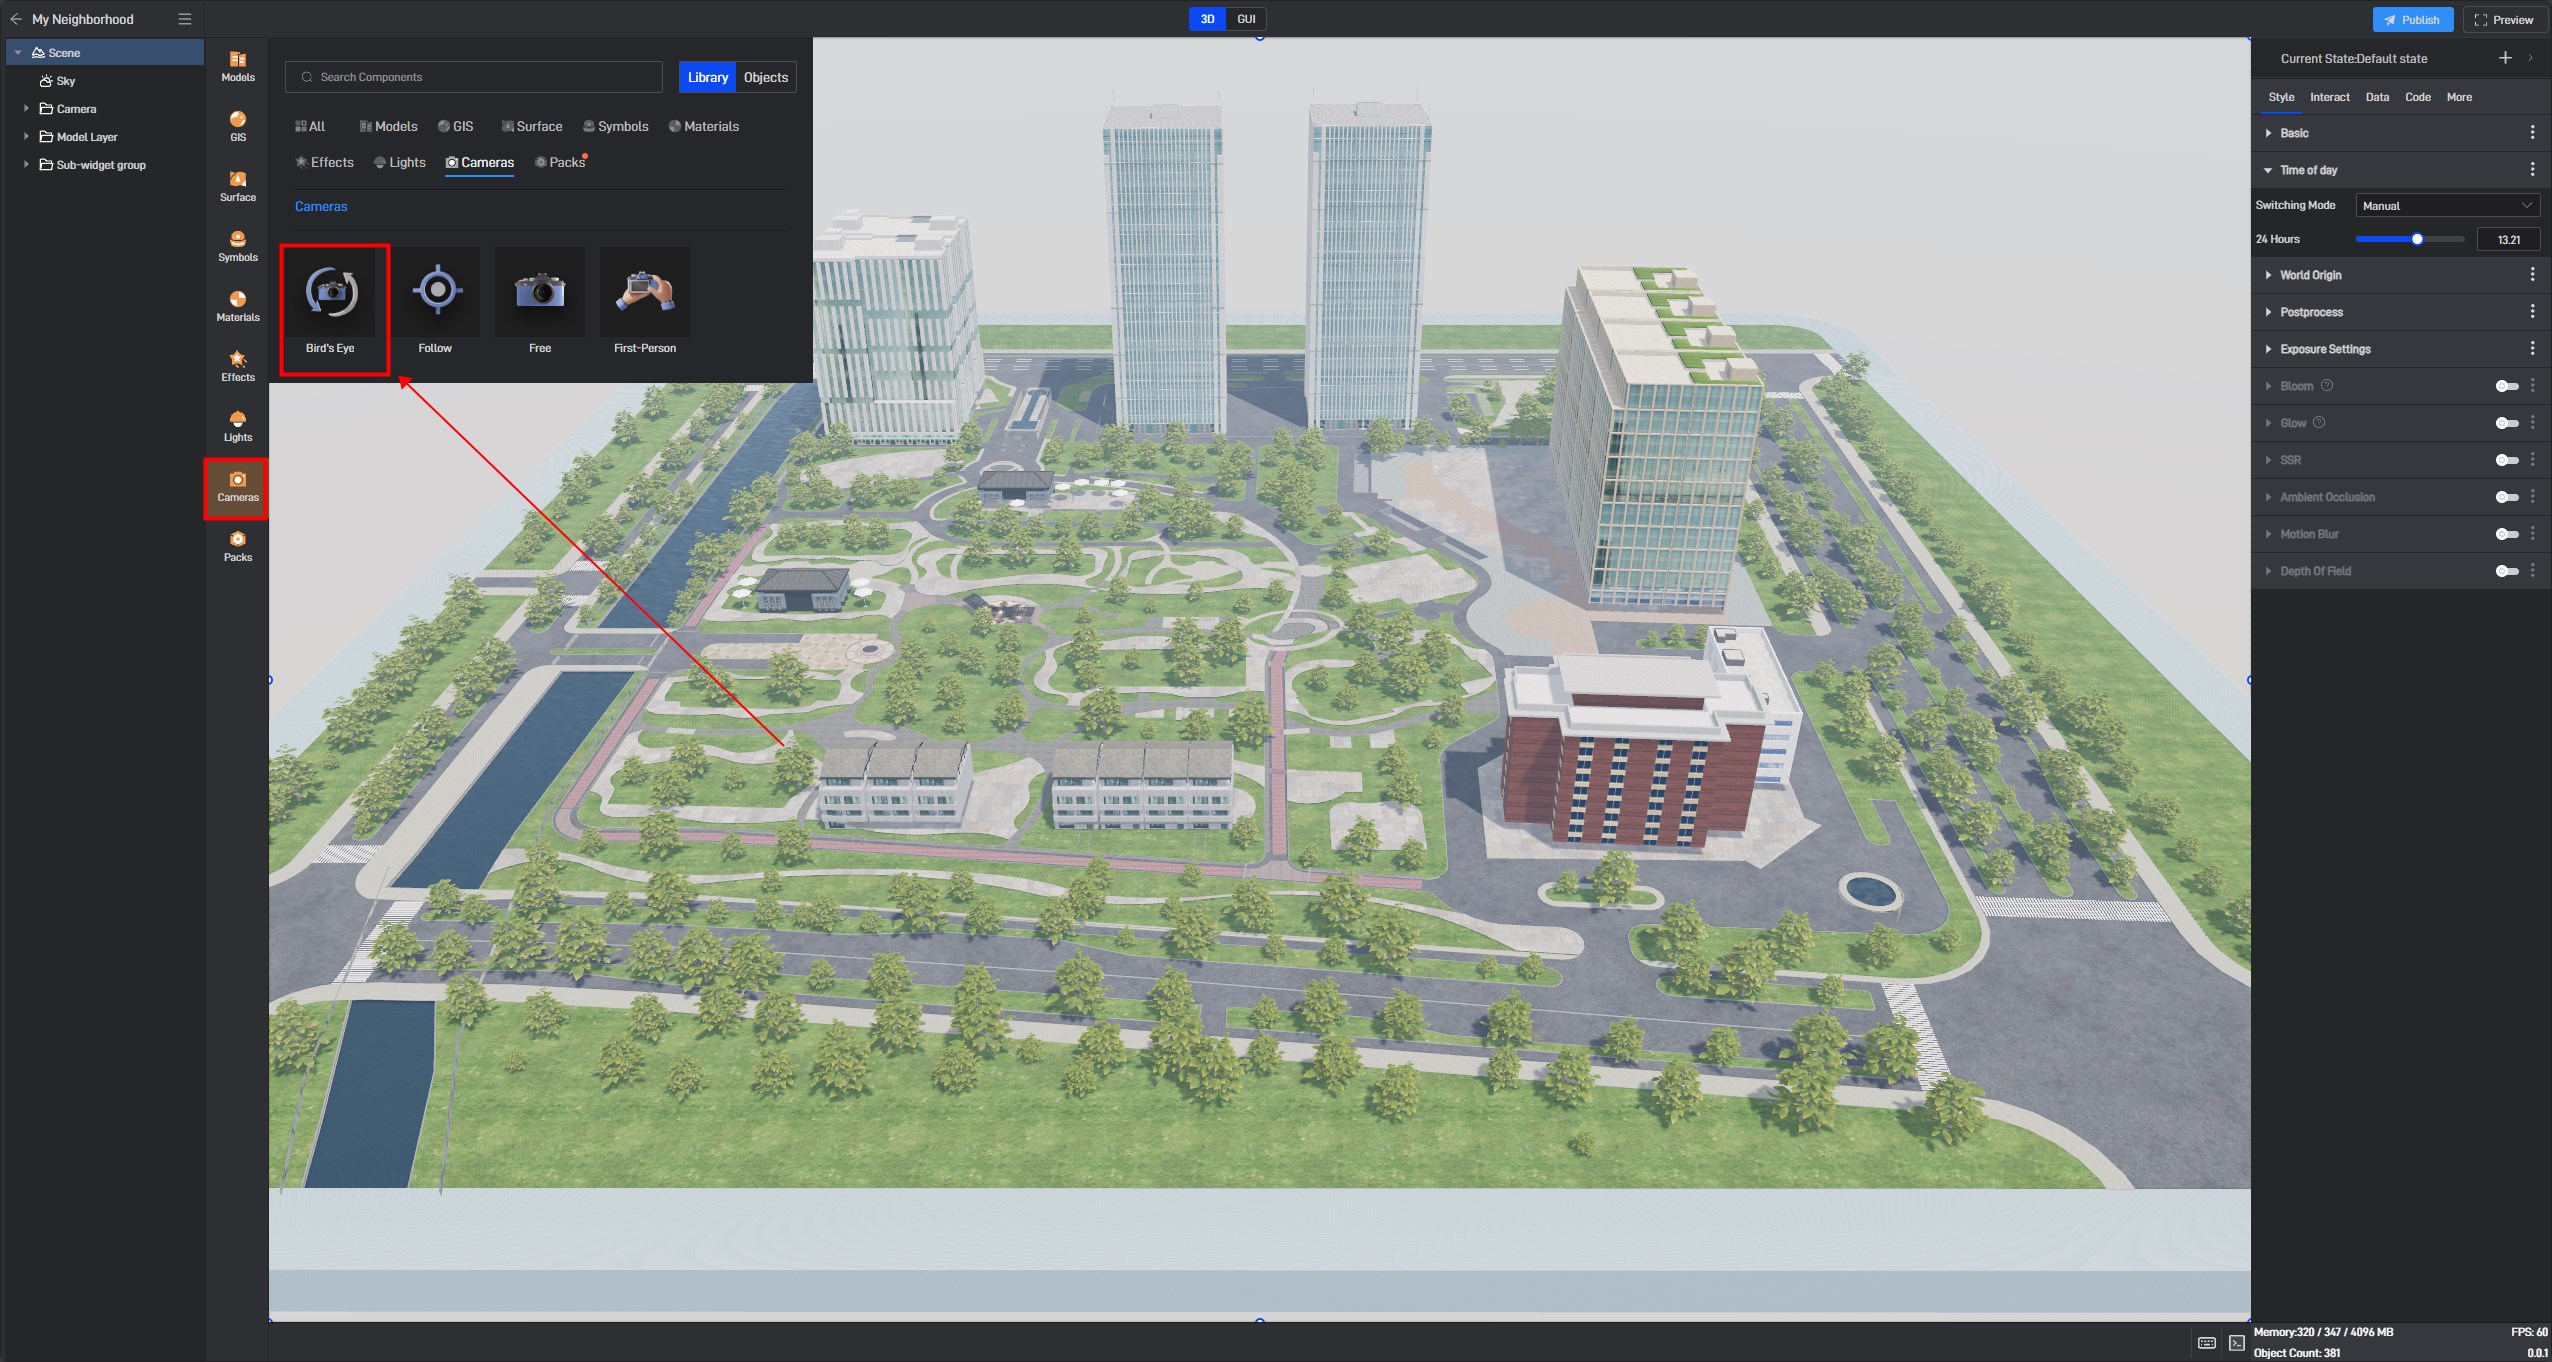
In the Wings Engine scene editing interface, the system automatically creates a main camera. In the **”Camera” **component layer on the left side, you can see a bird’s eye camera, which is the main camera. The bird’s eye camera provides a broad view from above, typically used to display an overview of the entire system.
1. Adding a Bird’s Eye Camera
There are two ways to add a bird’s eye camera: one way is that the system automatically creates it when the scene is created; the other way is to add it from the “Camera” menu on the left sidebar.
2. Basic Settings
In the scene editing interface, you can make some basic settings for the bird’s eye camera, such as Z-axis distance, zoom limit, vertical angle limit, etc. The following details these settings.
2.1 Z-axis Distance
This refers to the visible distance in the Wings Engine scene, also known as the** nearest** and **farthest **plane.
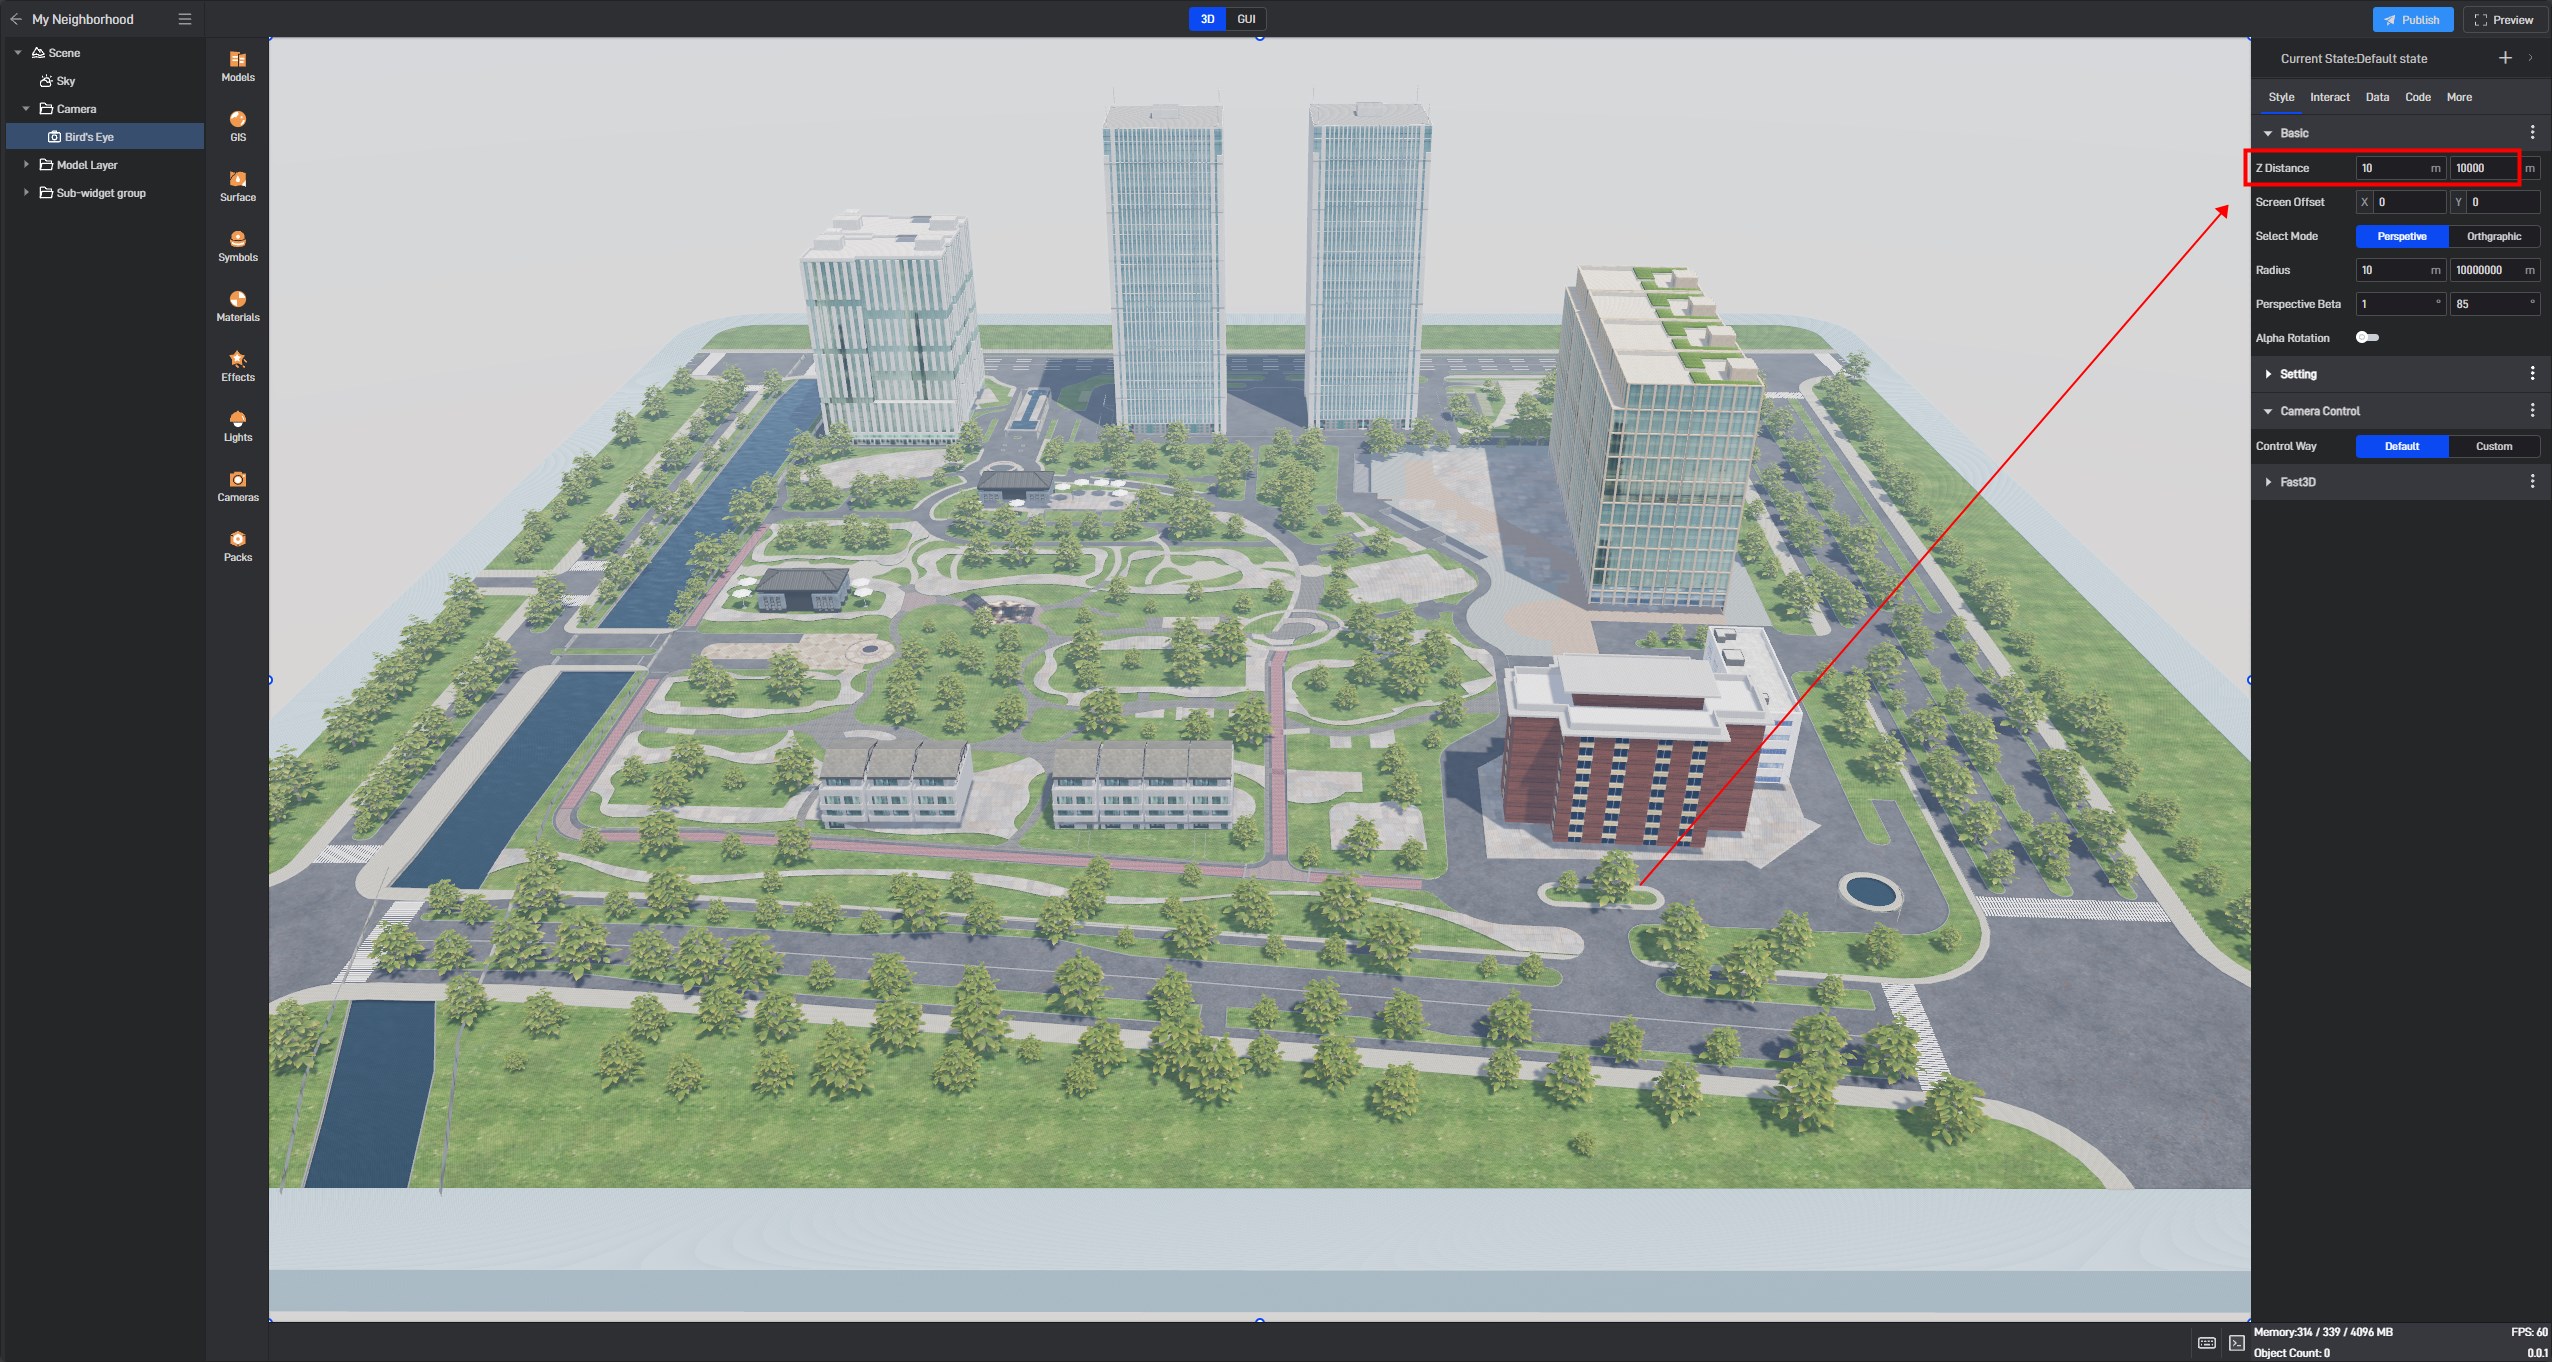
Tip: The smaller the difference between the two values, the better, as this affects many aspects of performance, especially shadow quality. Typically, the minimum is set to 1 meter, and the maximum can be set according to the situation.
2.2 Radius
This refers to the distance limits when zooming in and out of the scene using the mouse wheel.
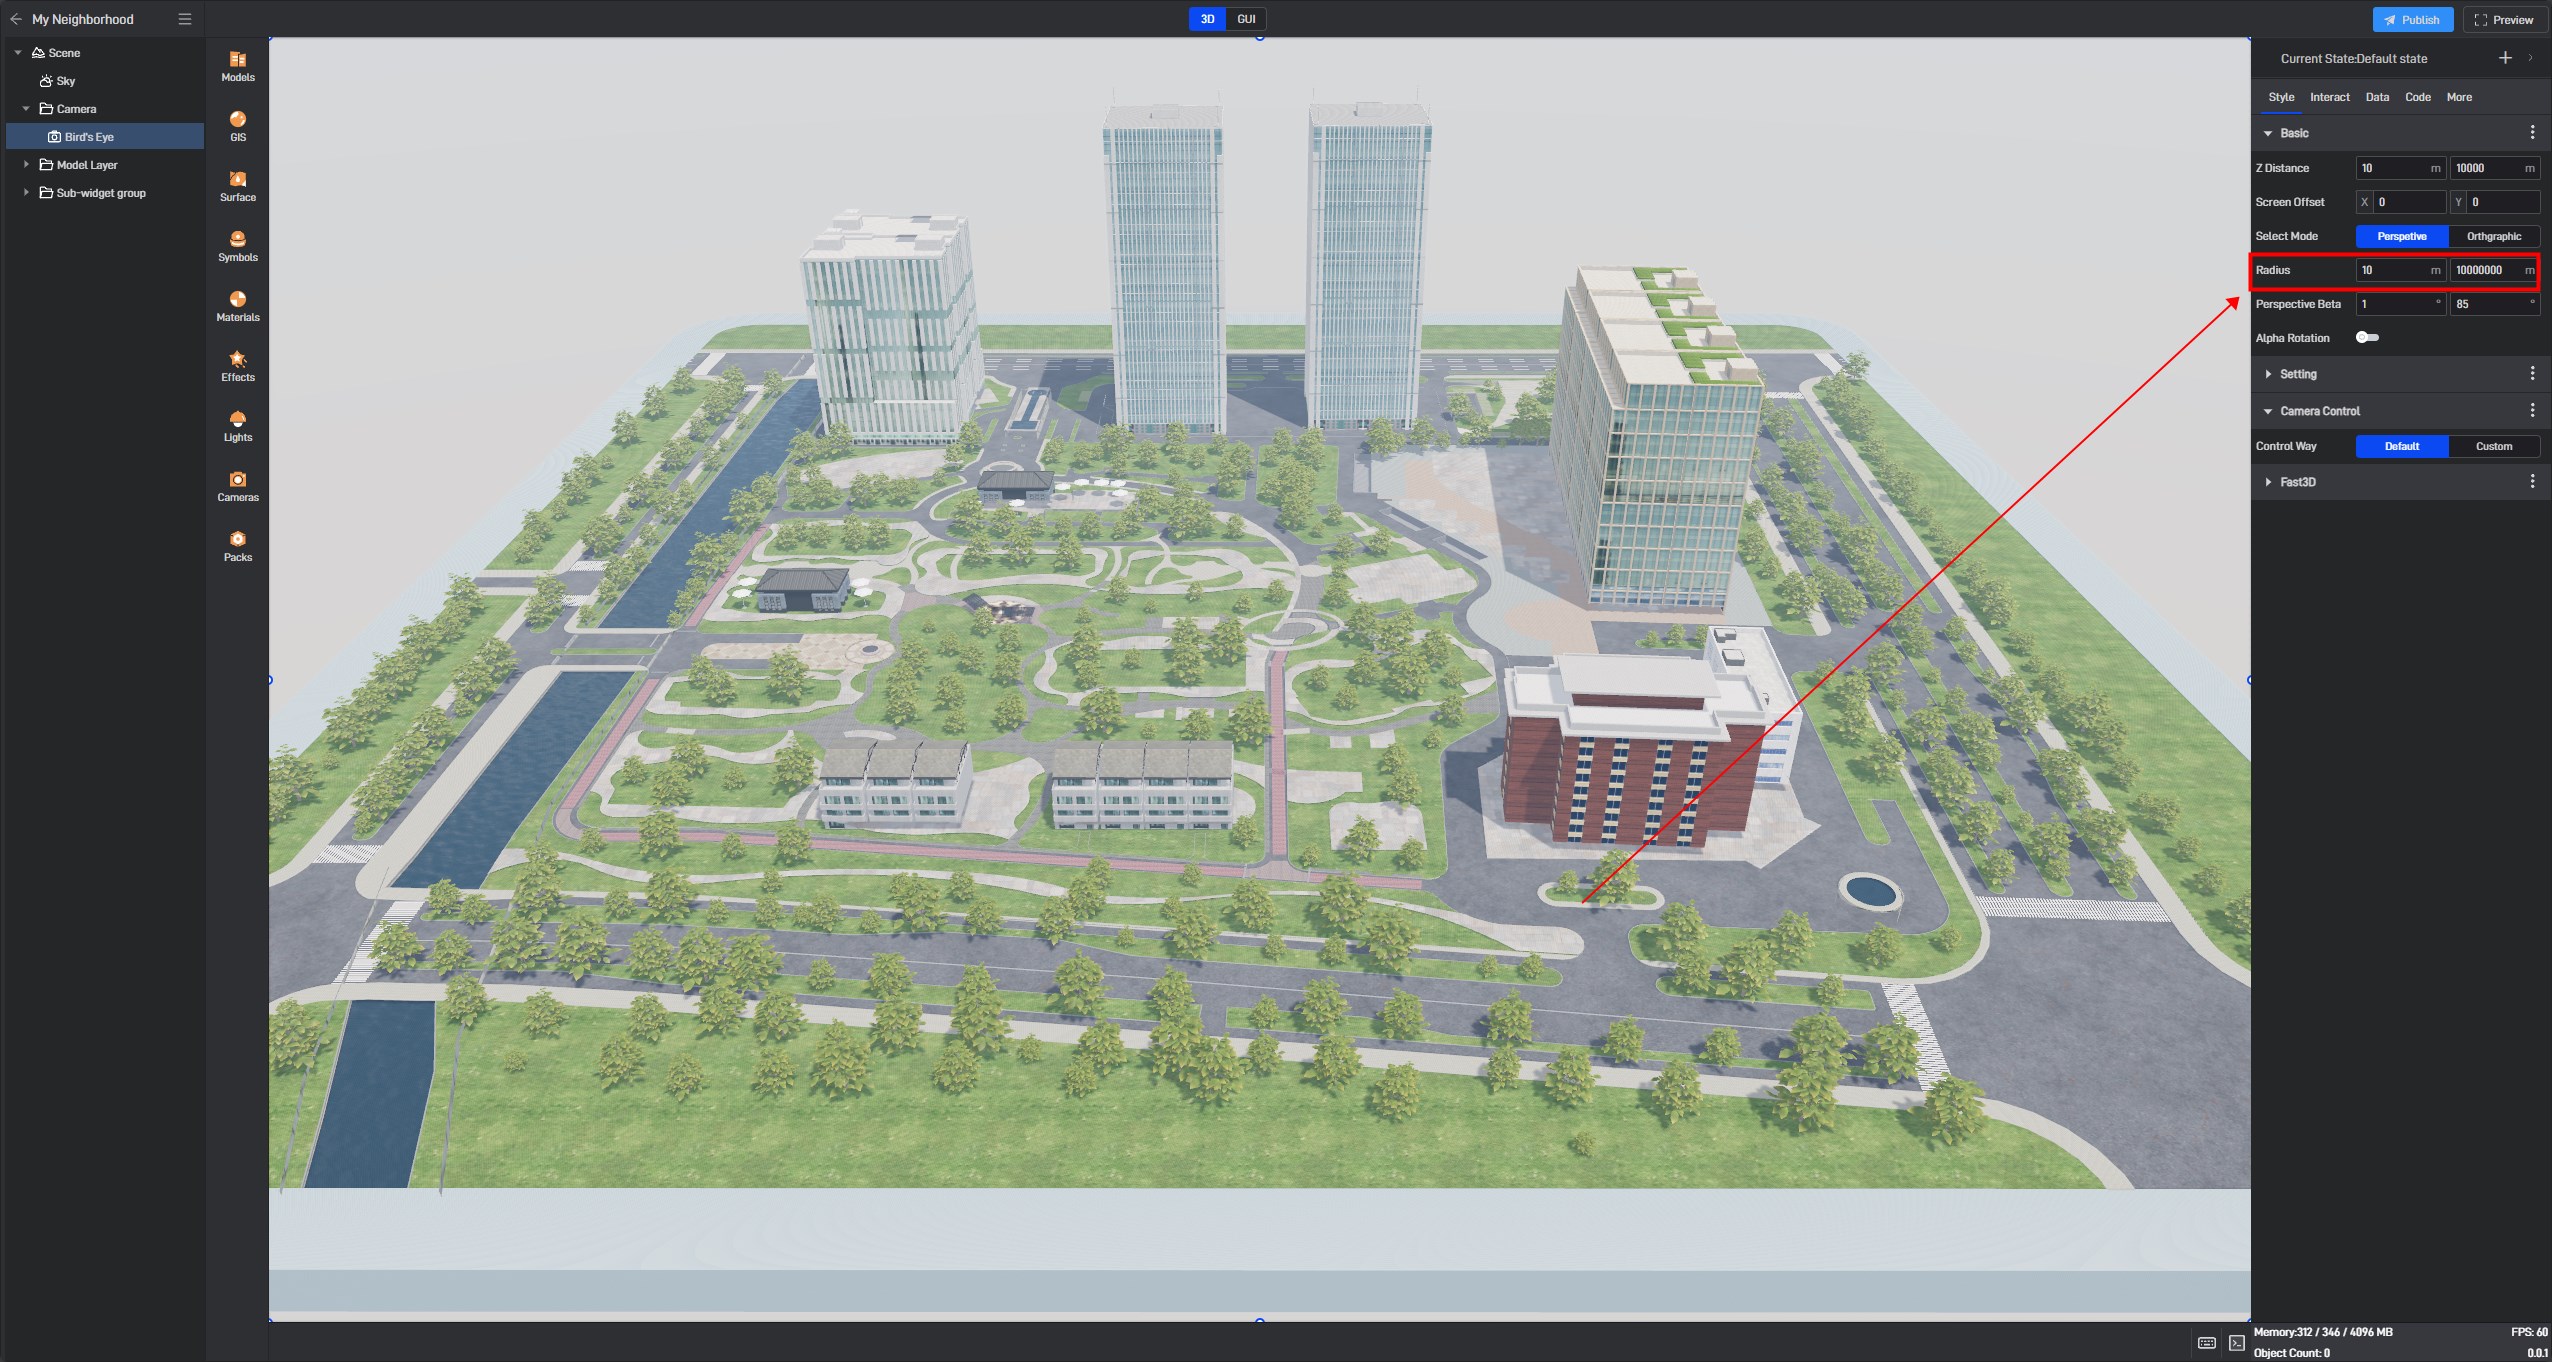
Example of controlling scene zoom with the mouse wheel:

2.3 Vertical Angle Limit
This refers to the range of the maximum and minimum angle limits centered on the** “0”** point of the Z-axis in the scene. The default settings are a minimum angle of 0° and a maximum angle of 85°, which can be adjusted as needed.
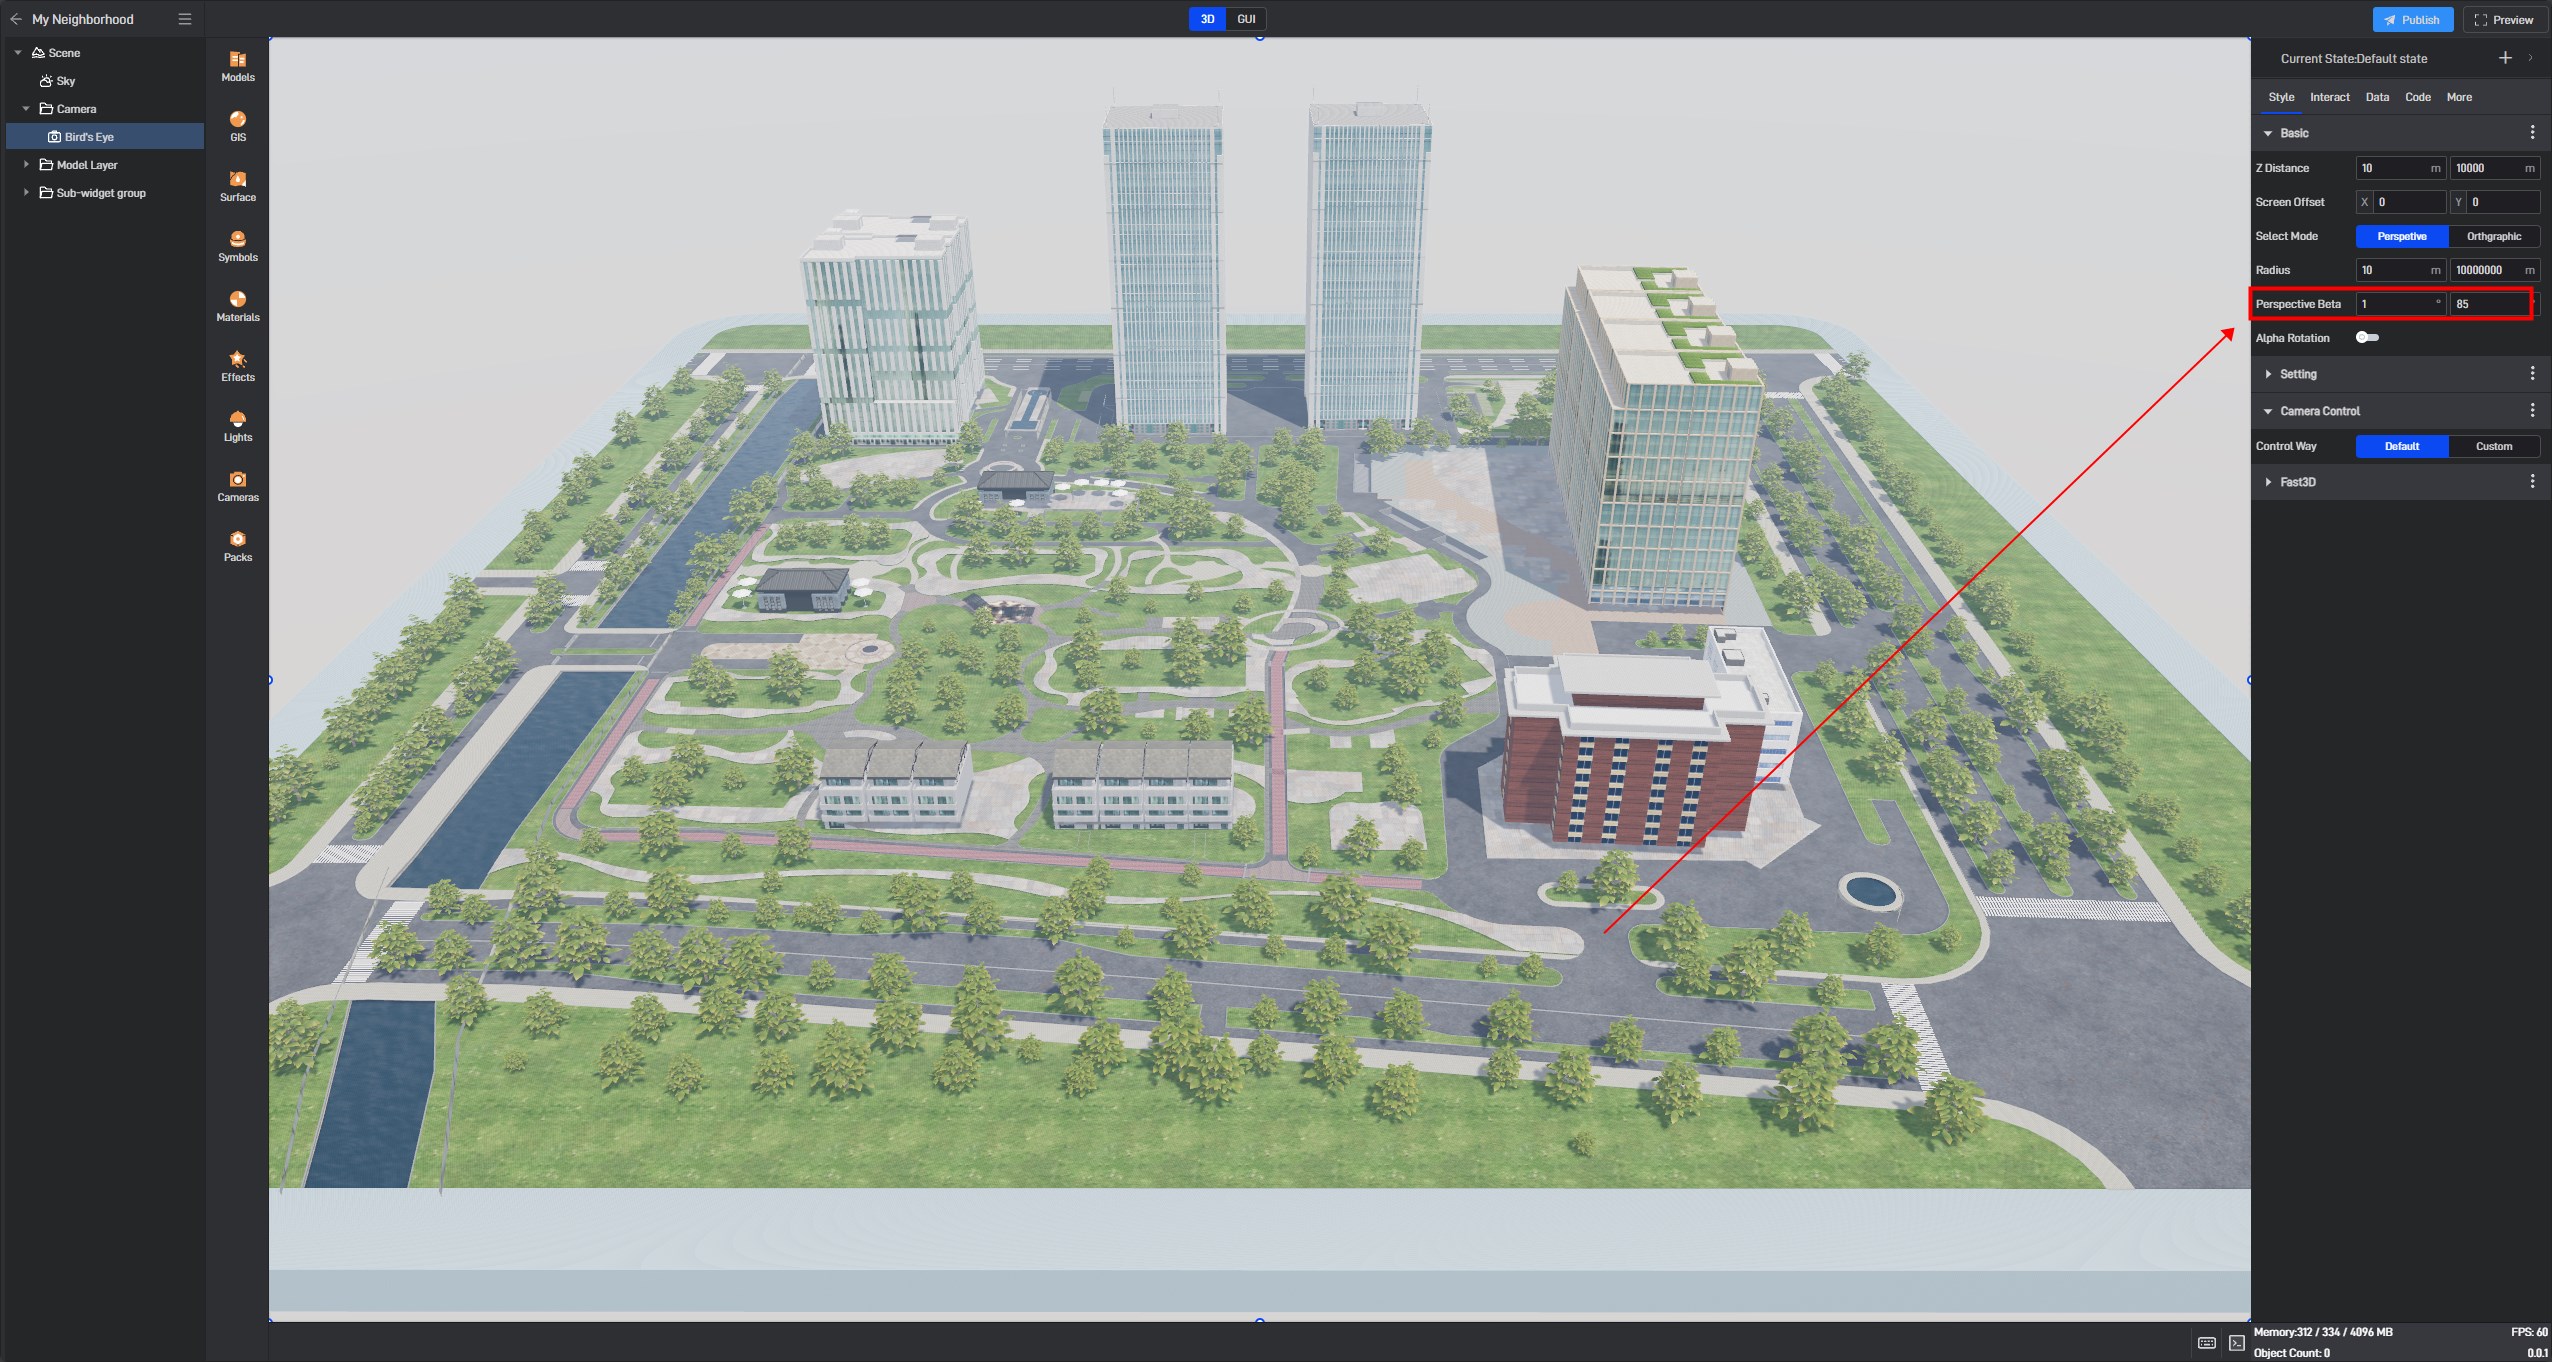
Example of vertical angle limit effect:

2.4 Auto-Rotation
When enabled, the scene will automatically rotate clockwise around the “origin”. This is usually used when displaying products. The default is off.
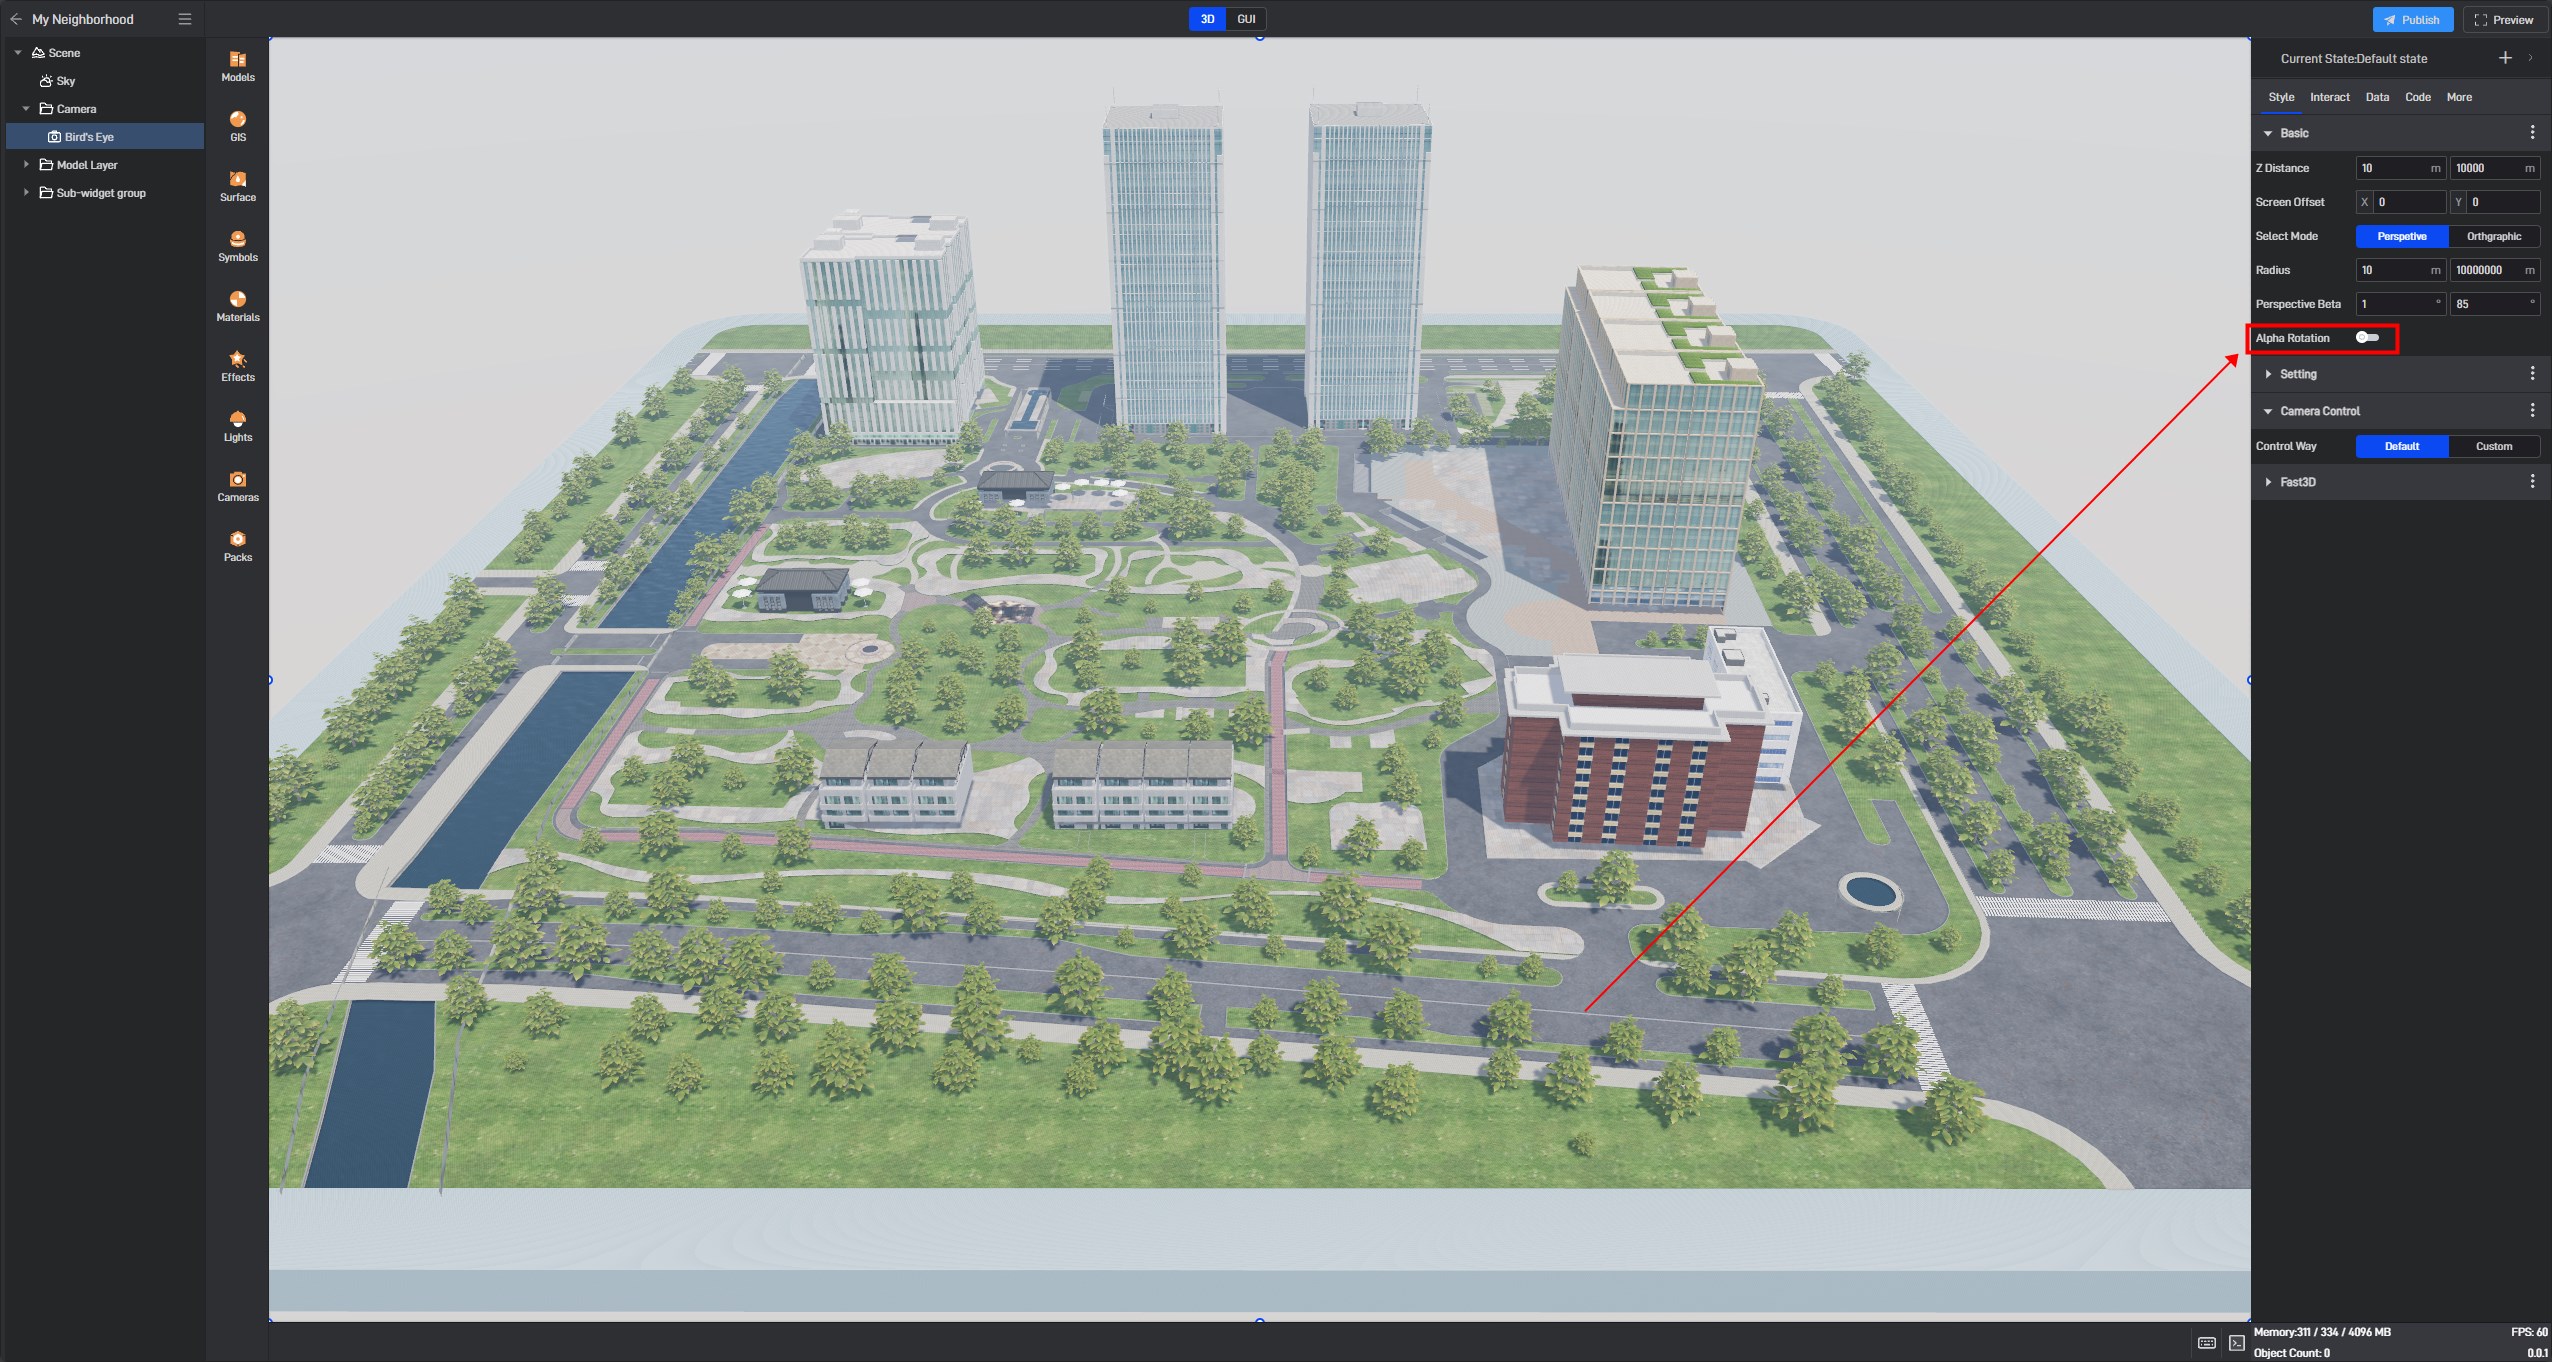
Example of auto-rotation effect:

3. Perspective Settings
3.1 Initial Perspective
You can set the Perspective that appears each time the project is opened.
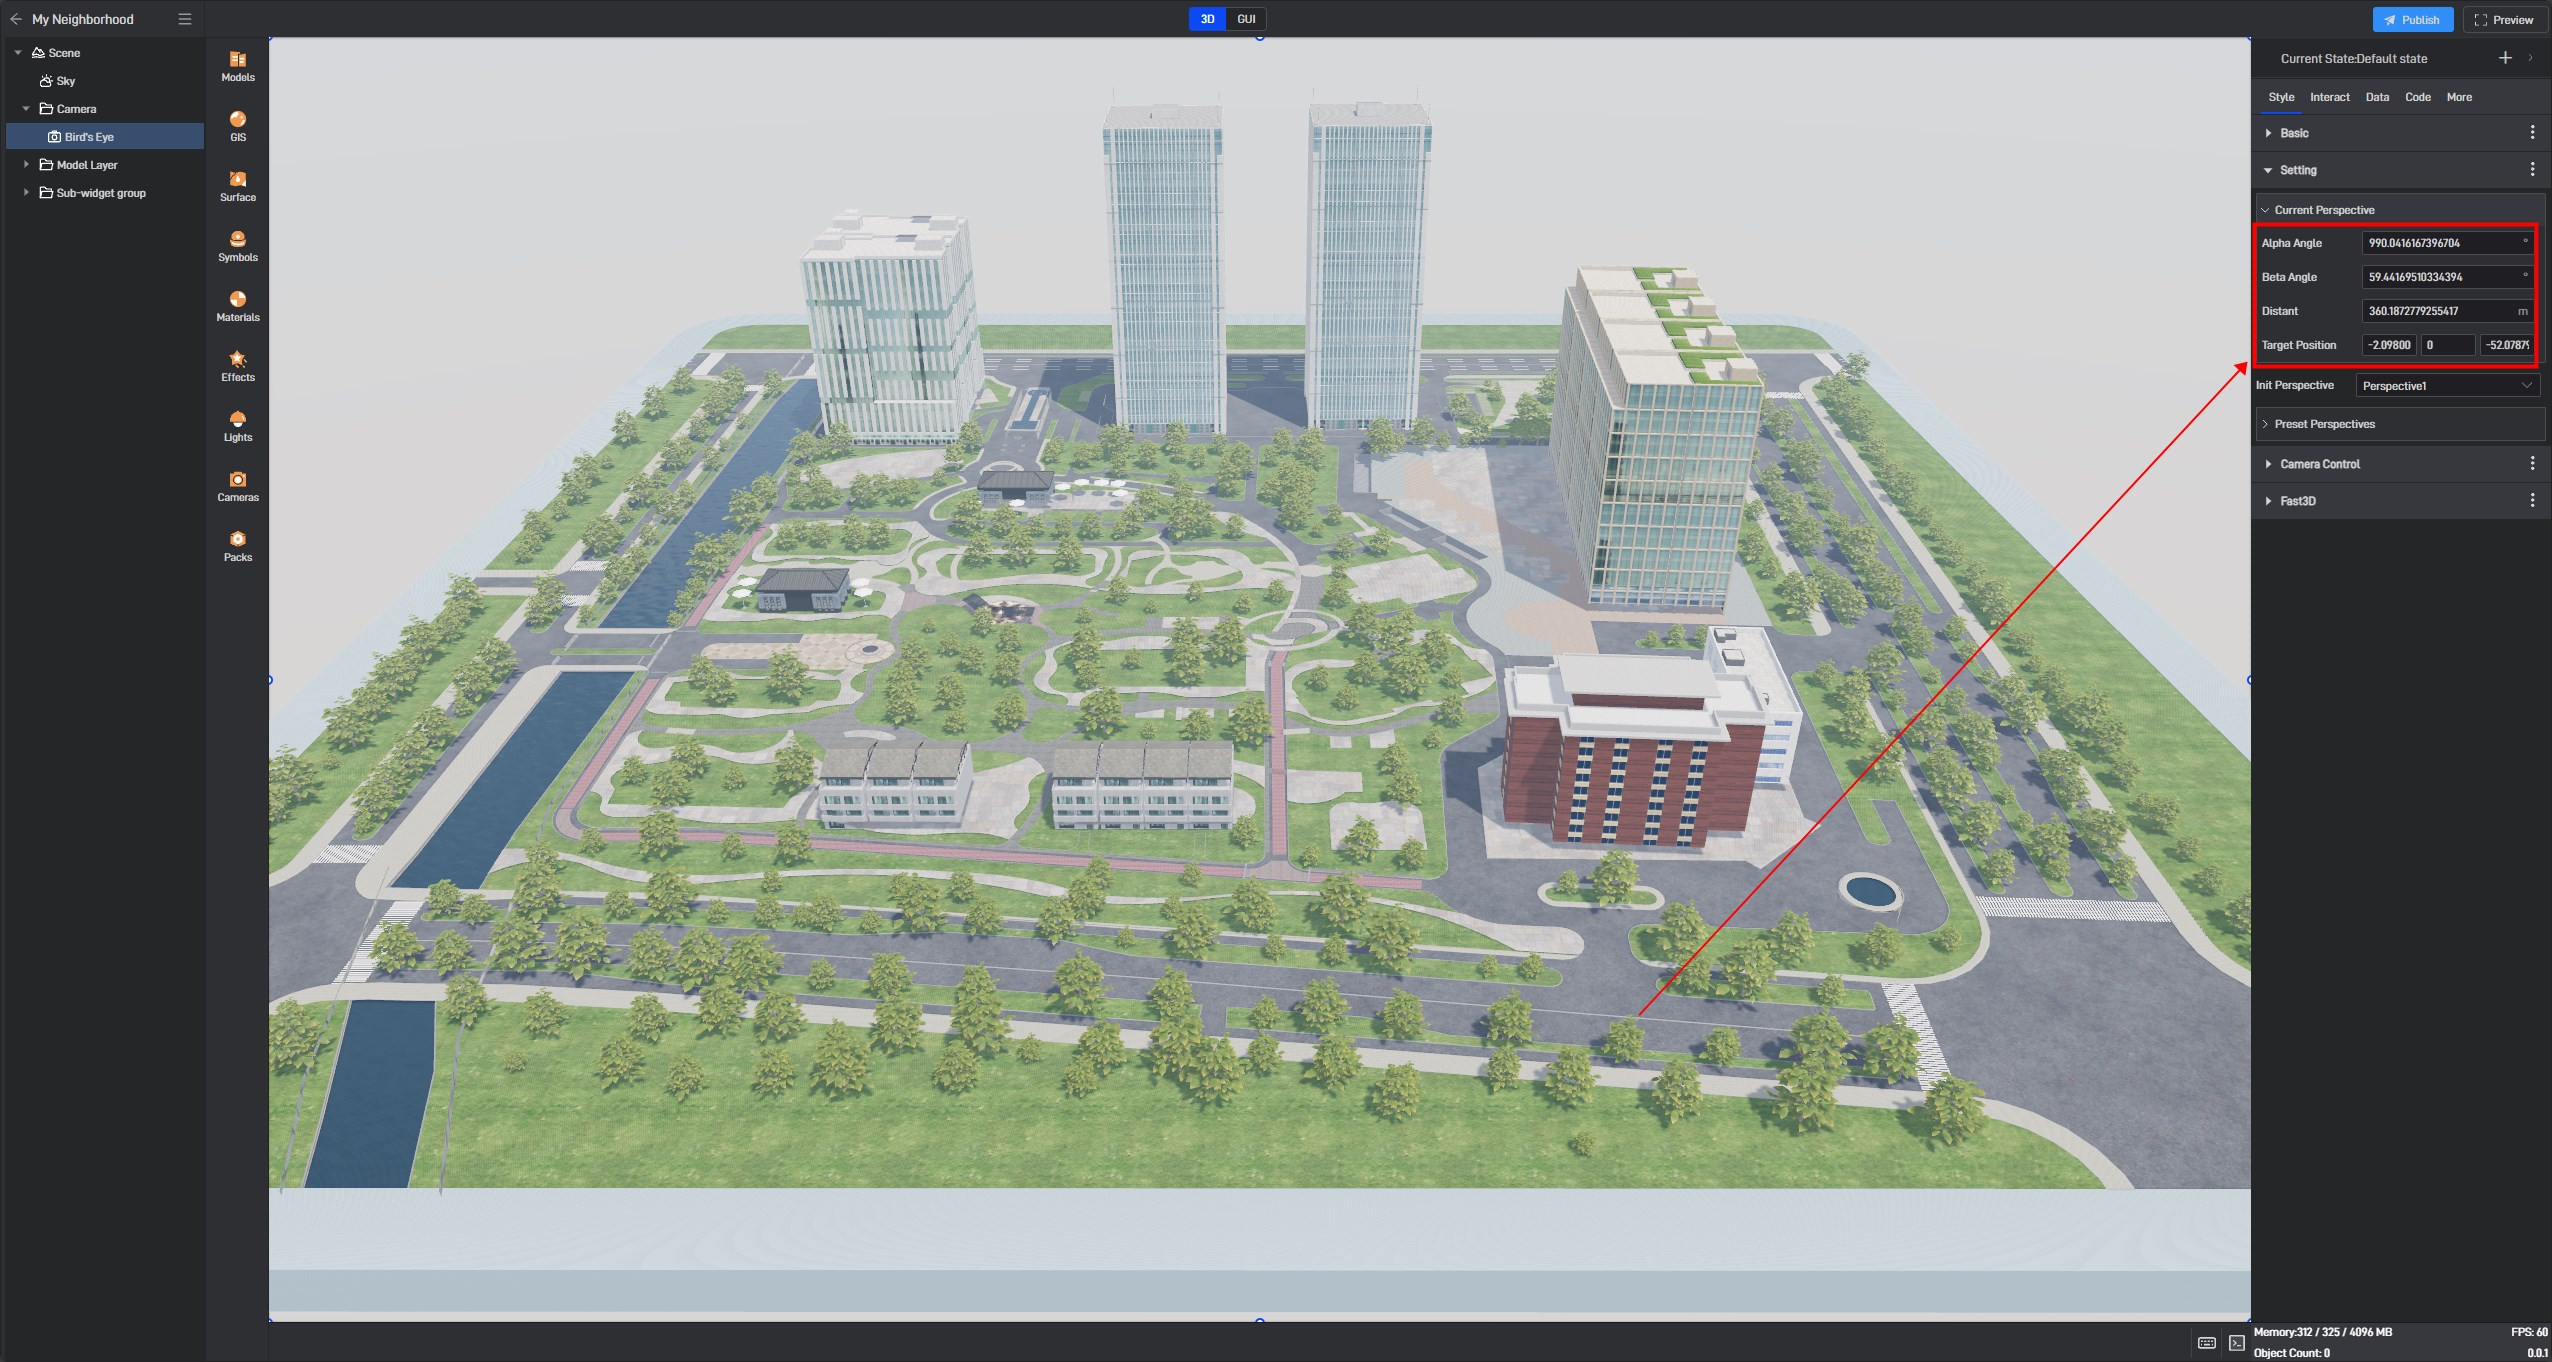
3.2 Preset Perspective
By default, there is only one option for the current Perspective.
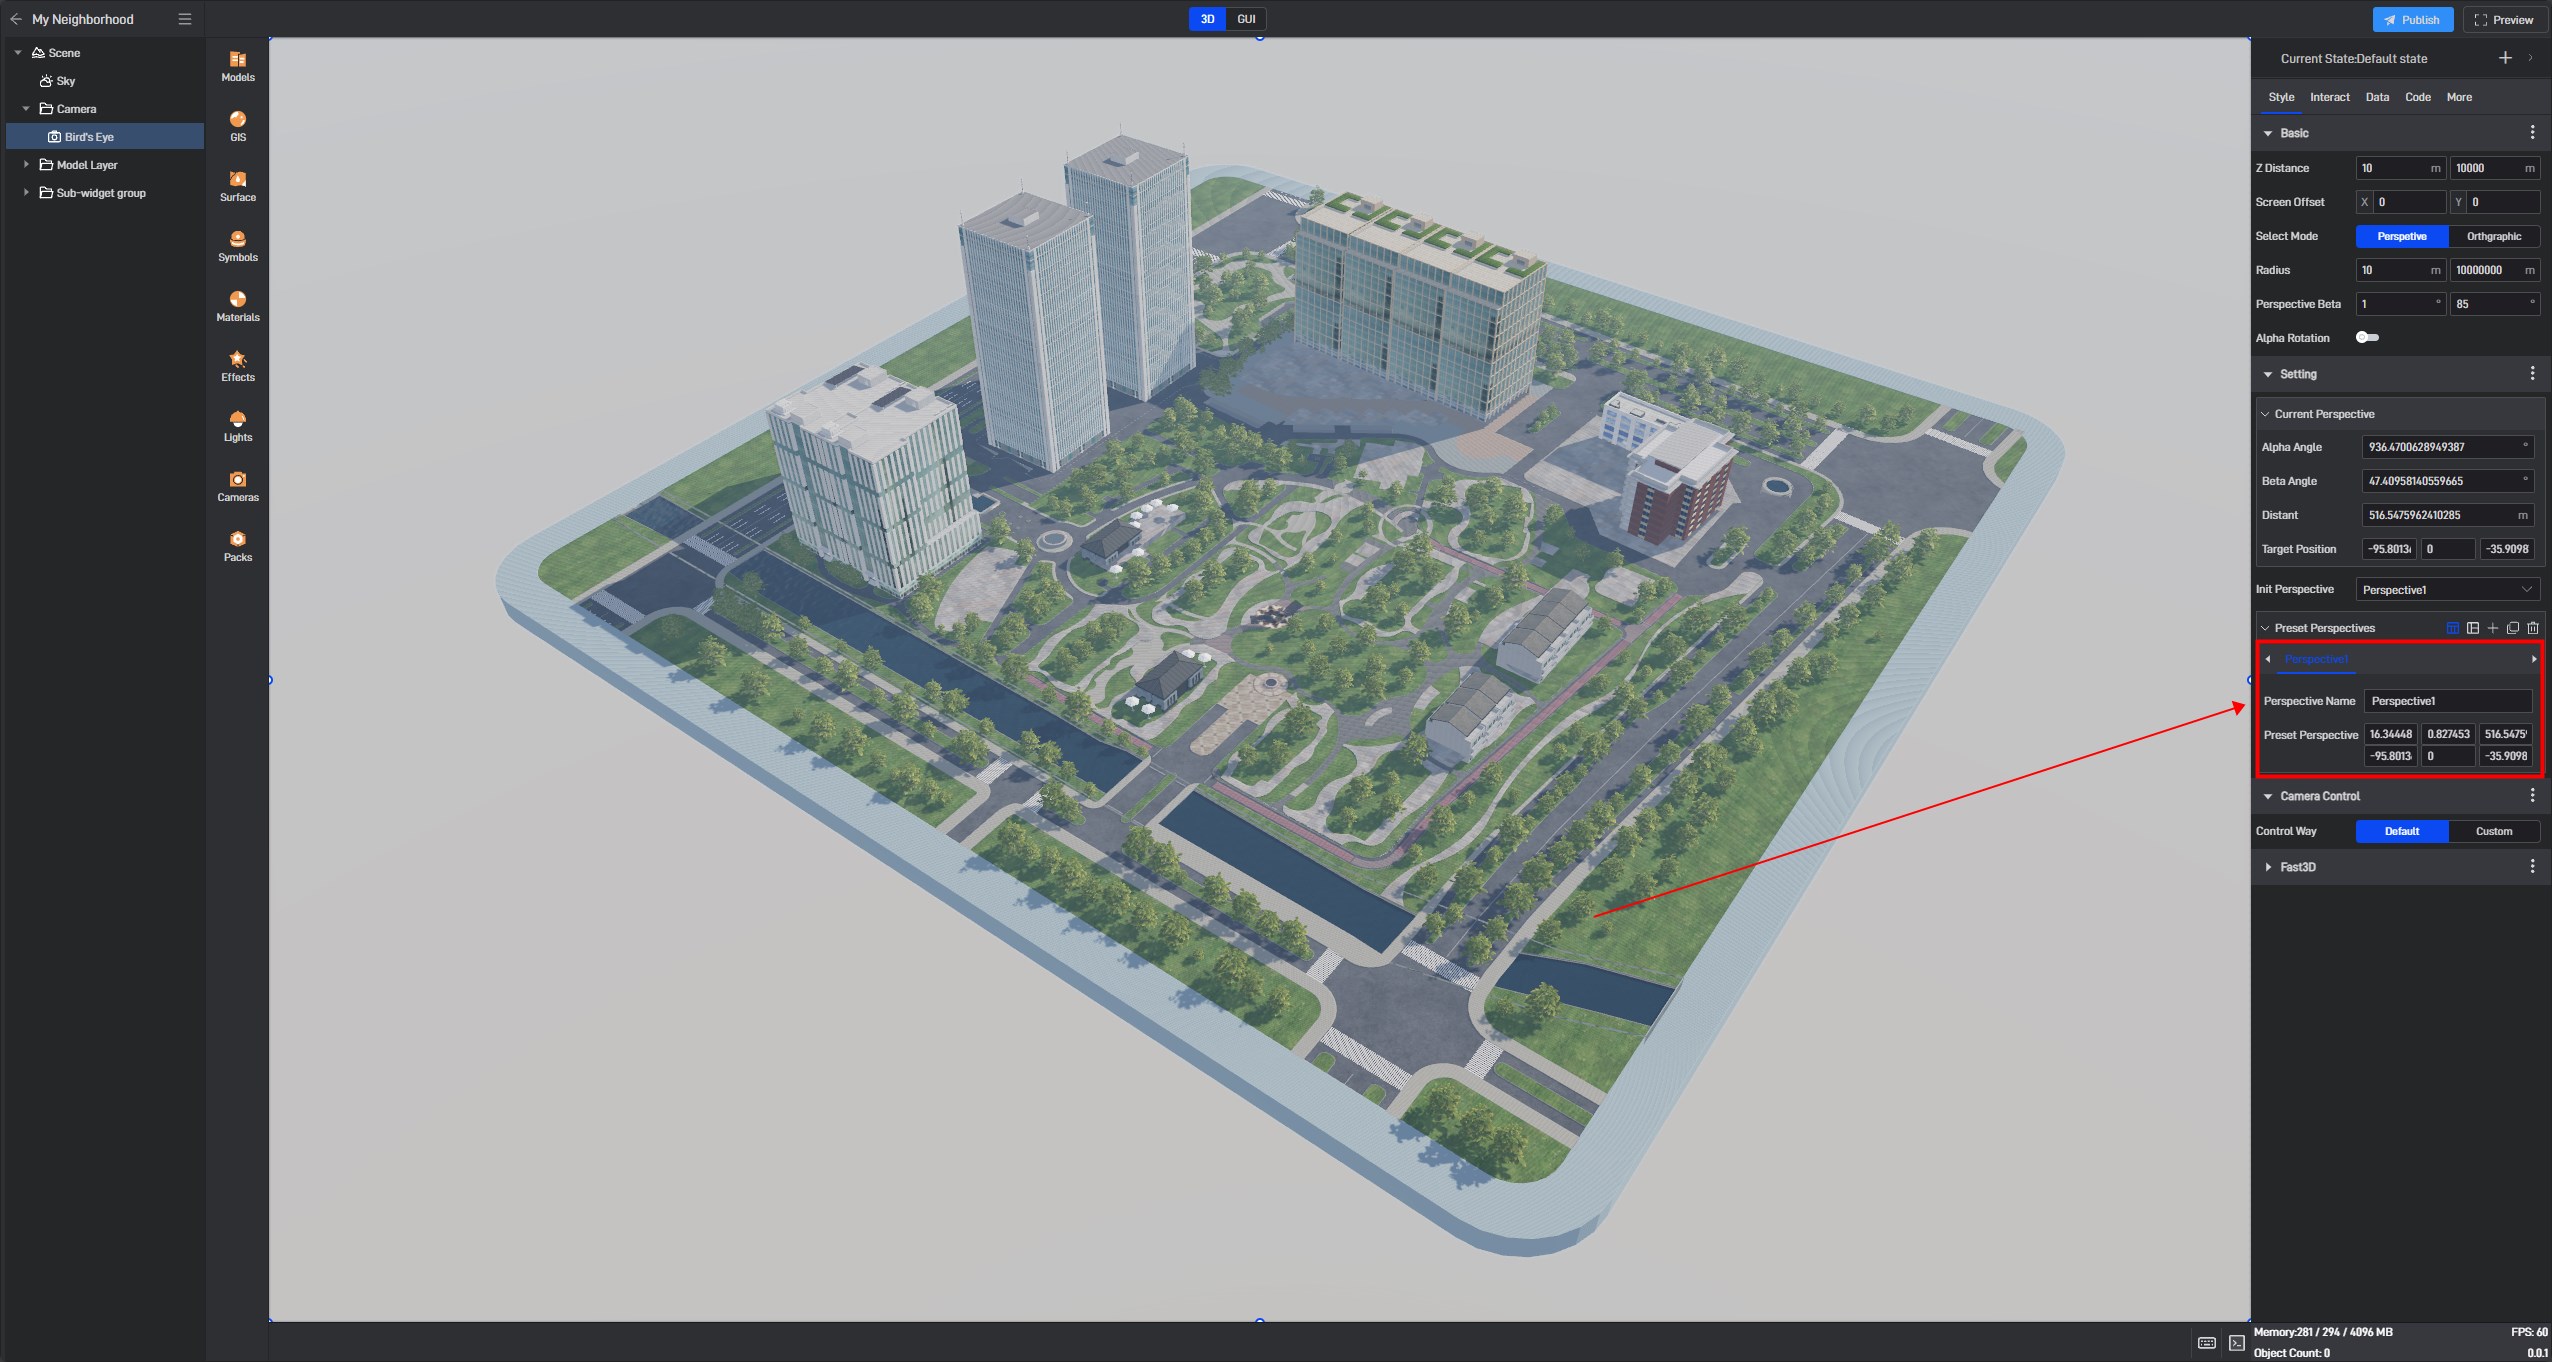
3.2.1 Capture Current Perspective
After adjusting the zoom to the desired perspective using the mouse, you can click the three dots** (extended settings menu)** next to the preset perspective to select **”Capture Current Perspective” **and save the current perspective in the preset perspective for easy use in future perspective animations.
Example of preset perspective 1:
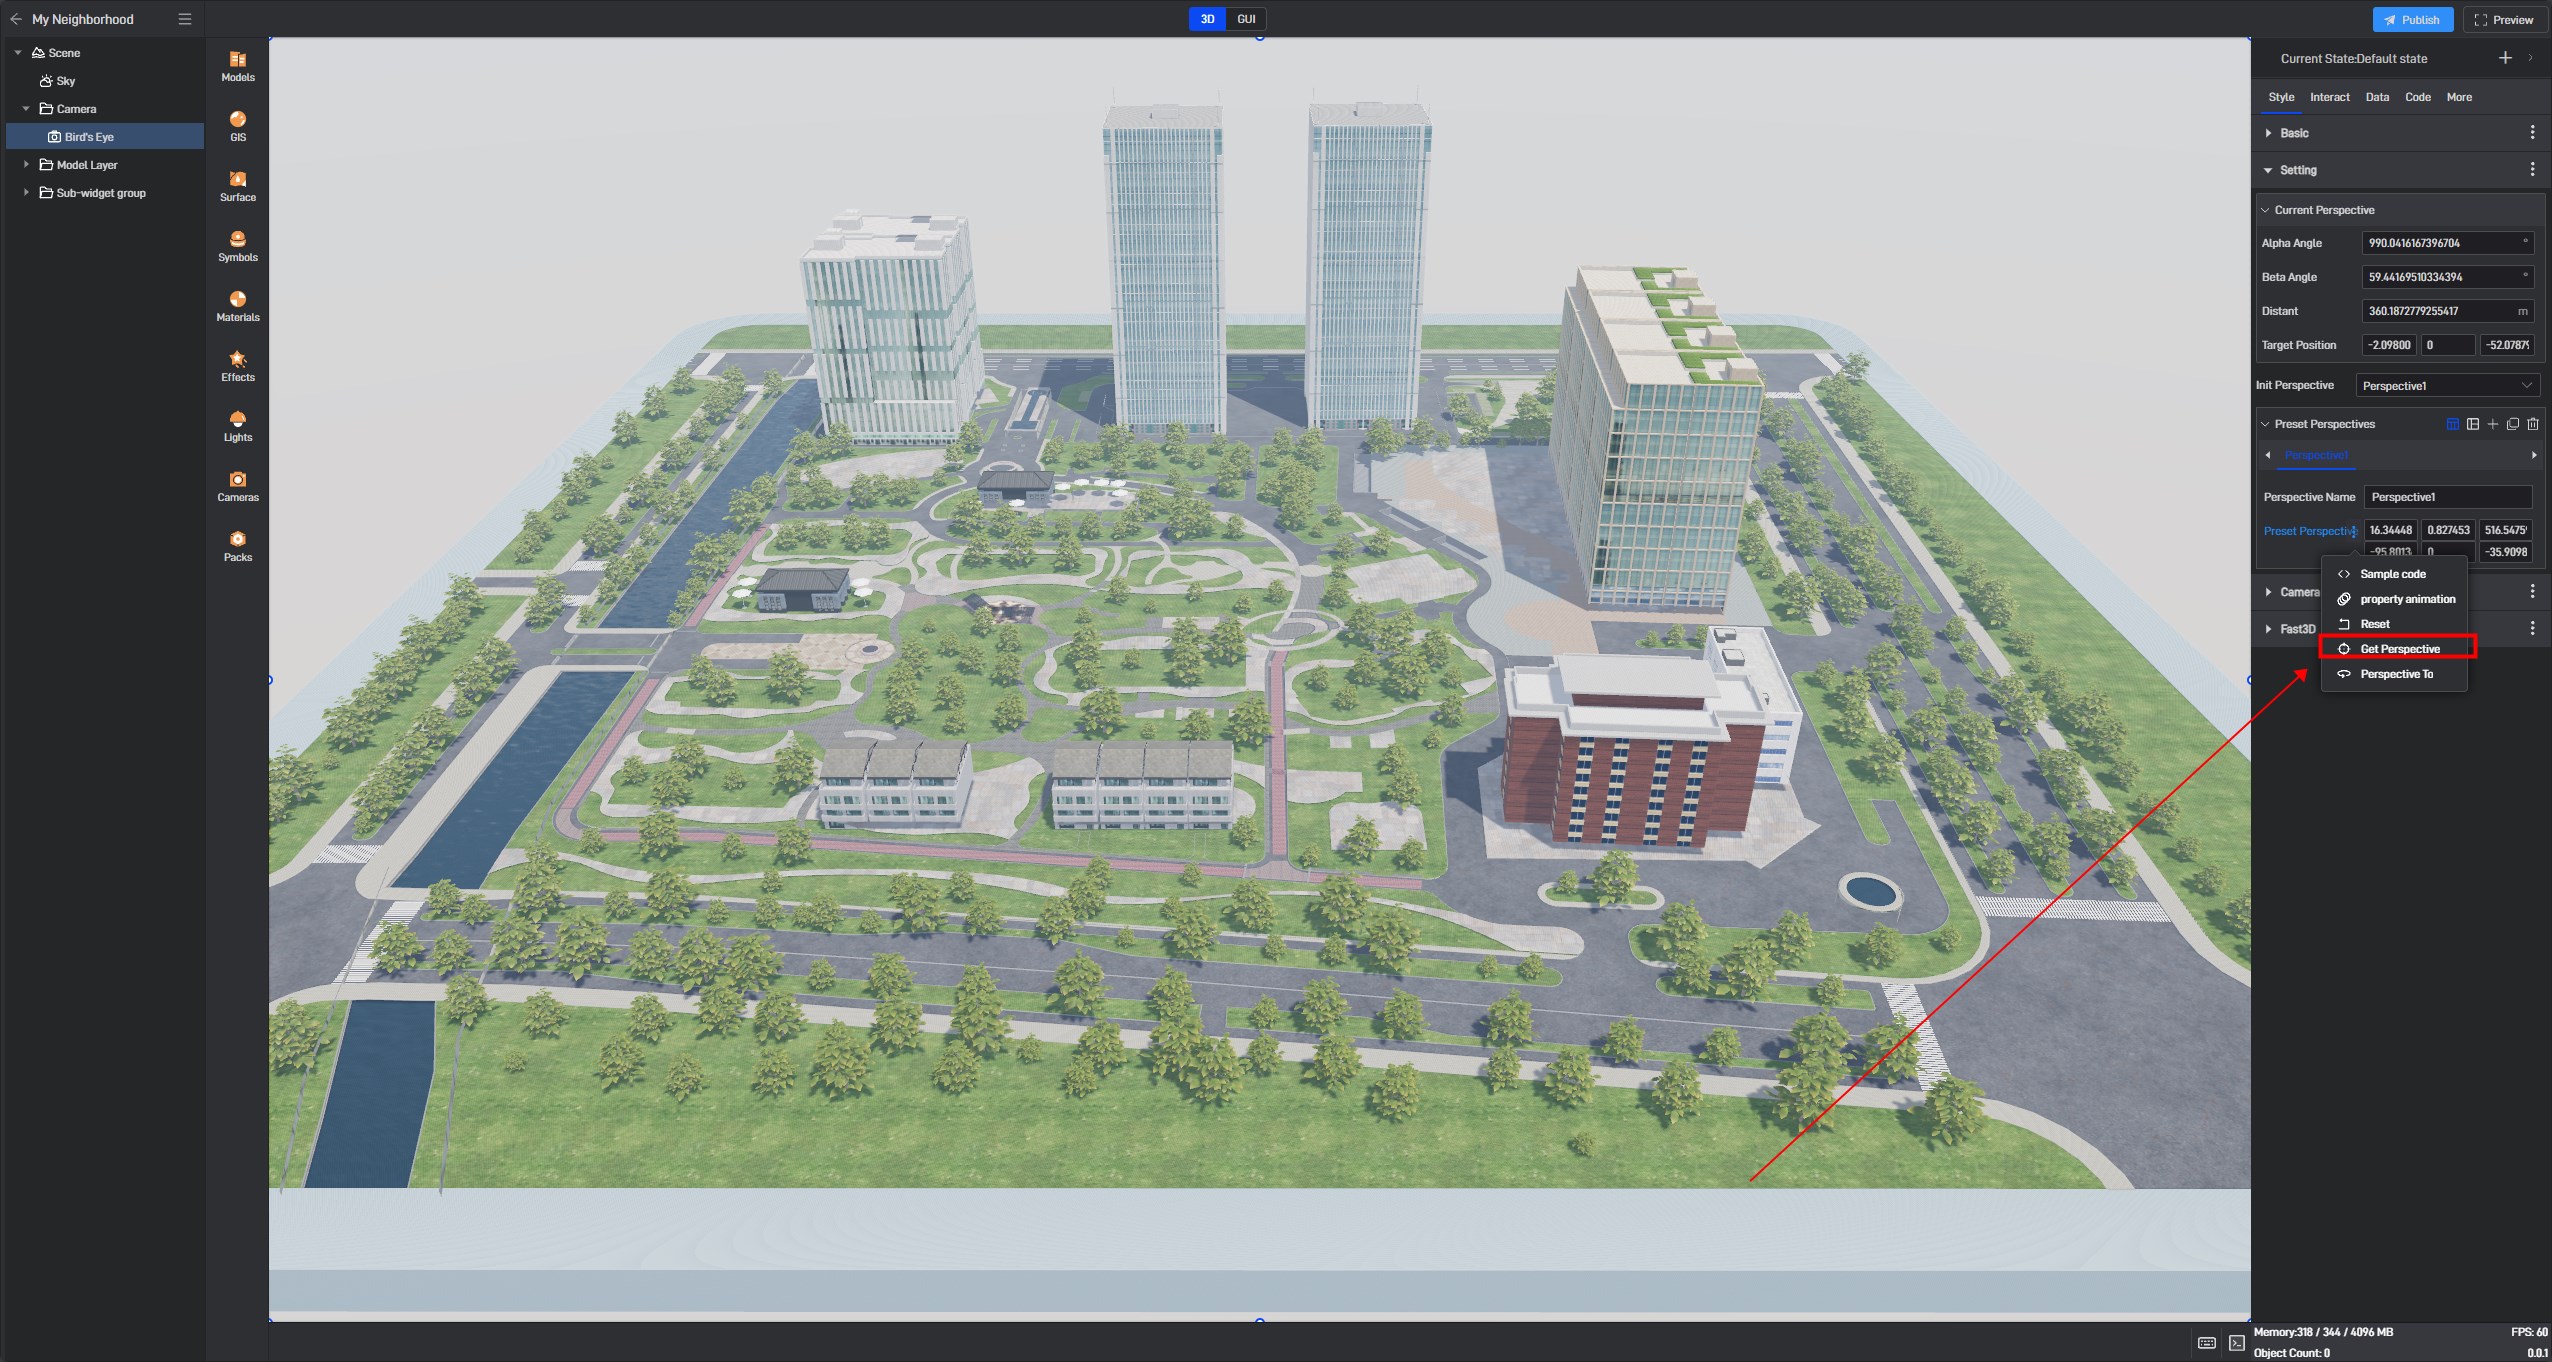
Click the “+” on the right side of the preset perspective to add a new preset perspective.
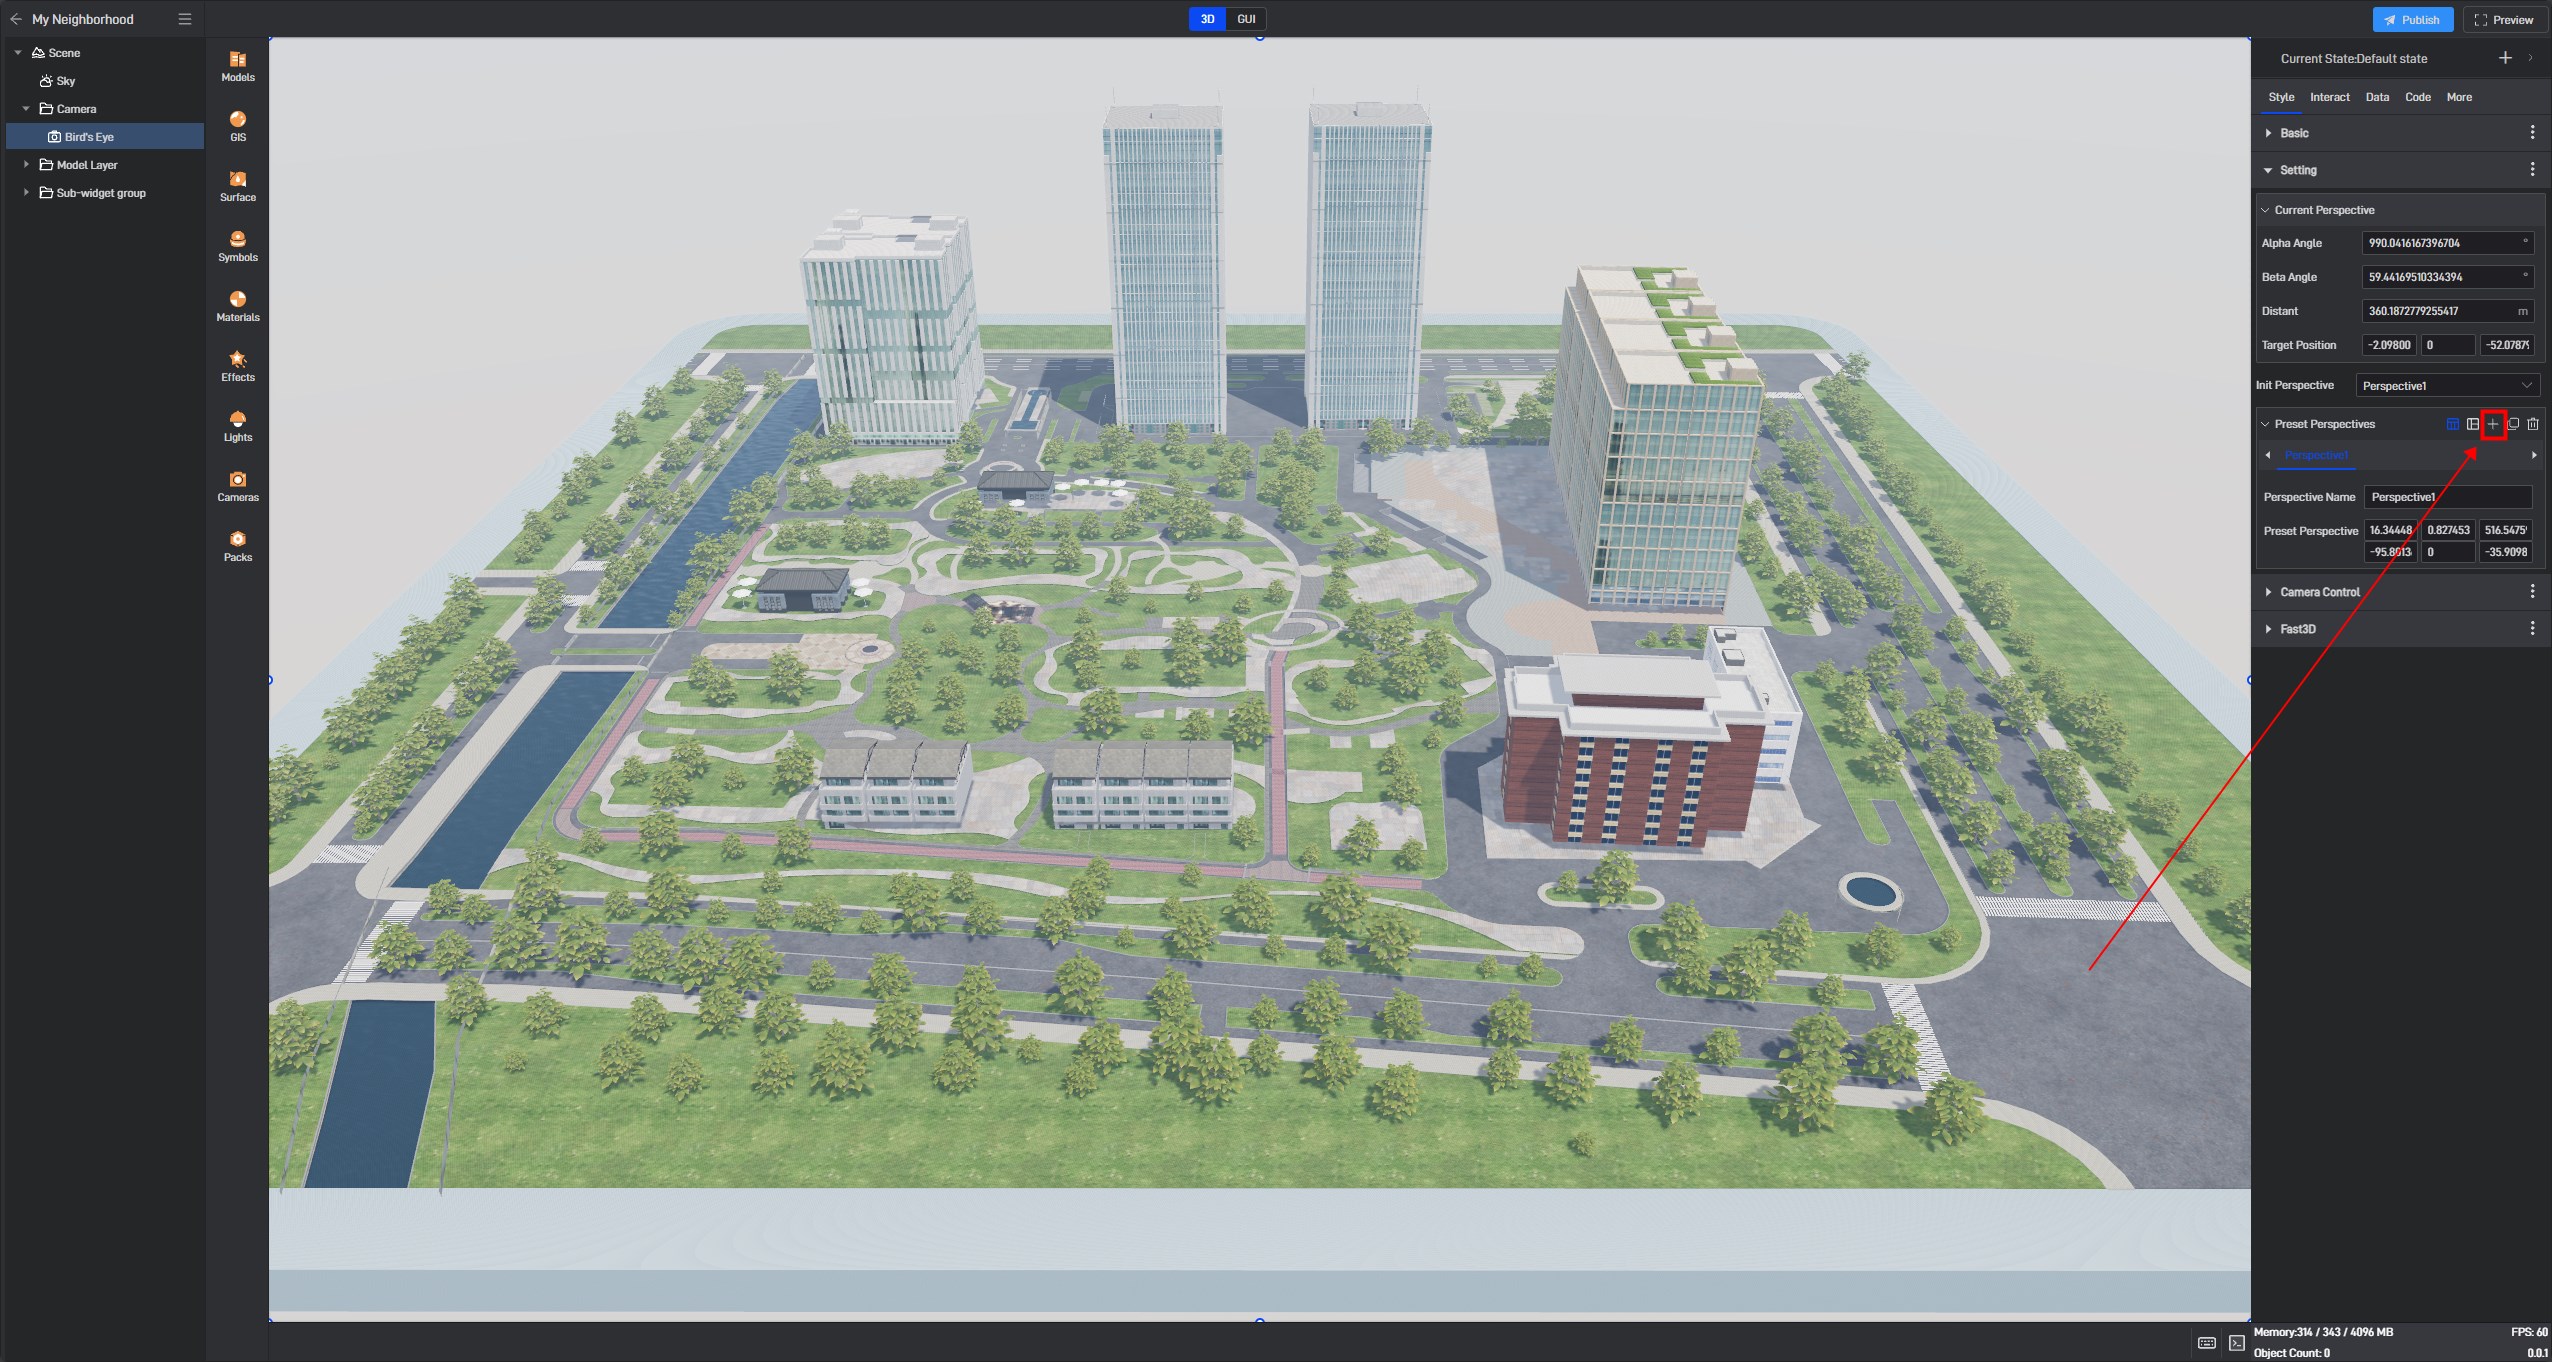
Example of preset perspective 2:
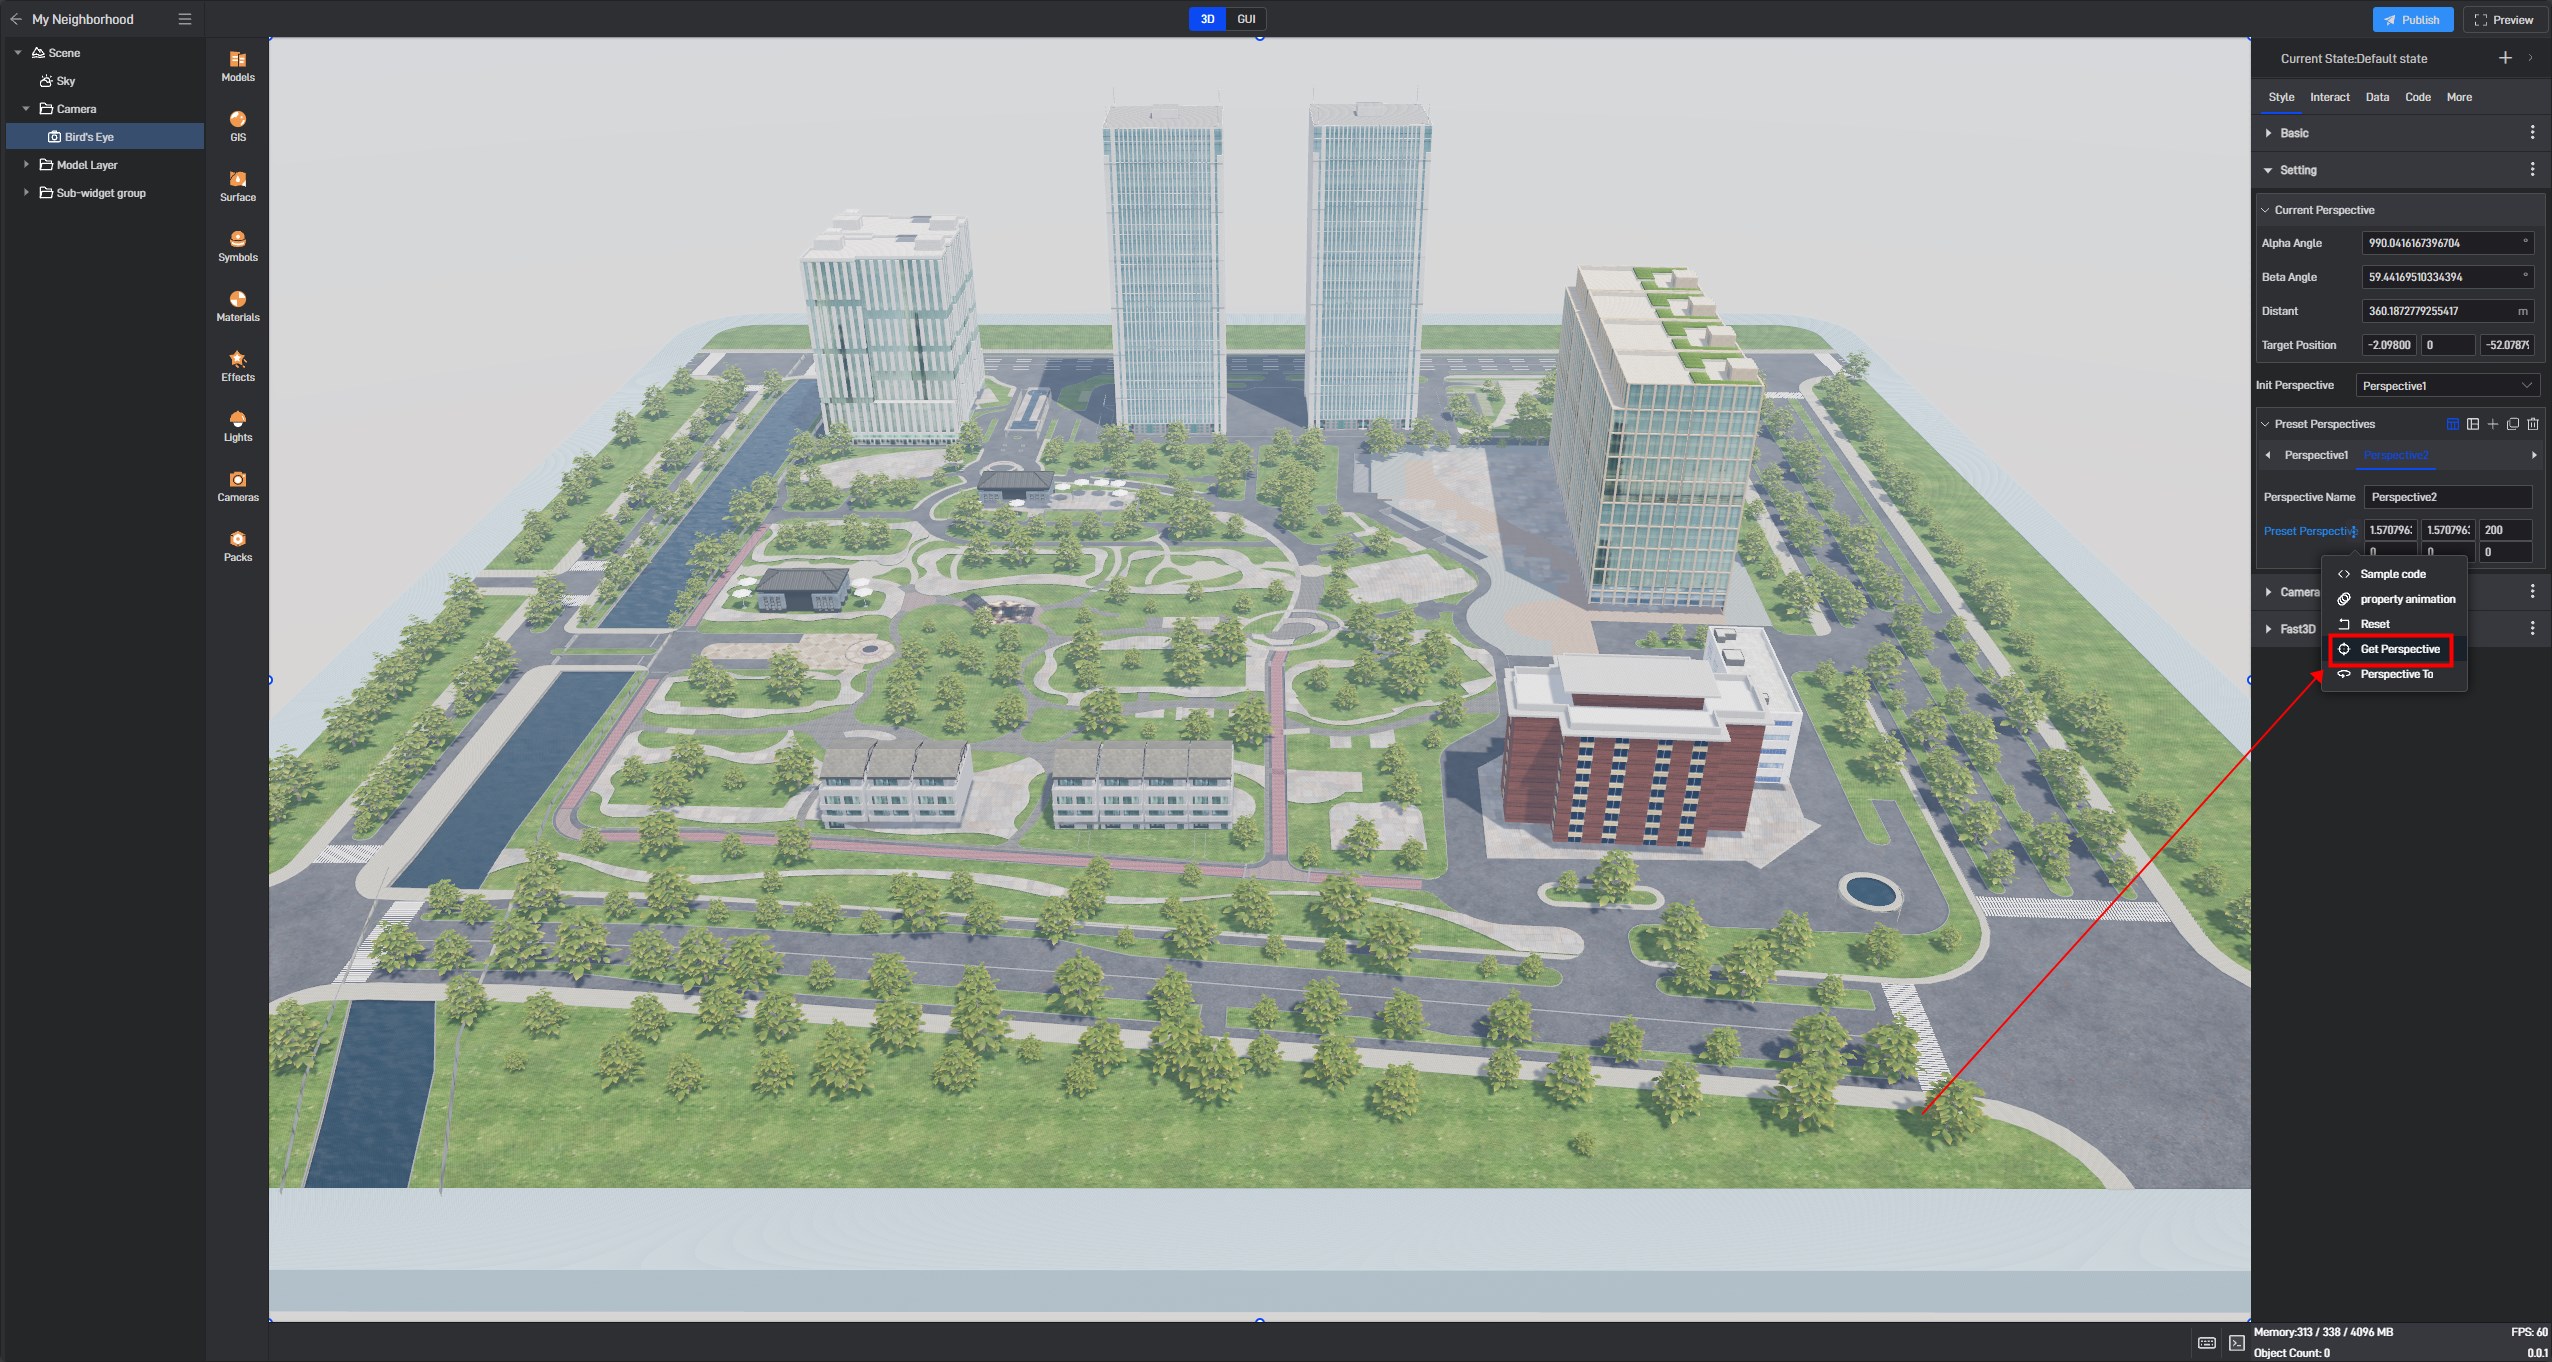
3.2.2 Switching Perspective

3.2.3 Button Interaction for Perspective Switching
Add a button component and interaction, as shown below:
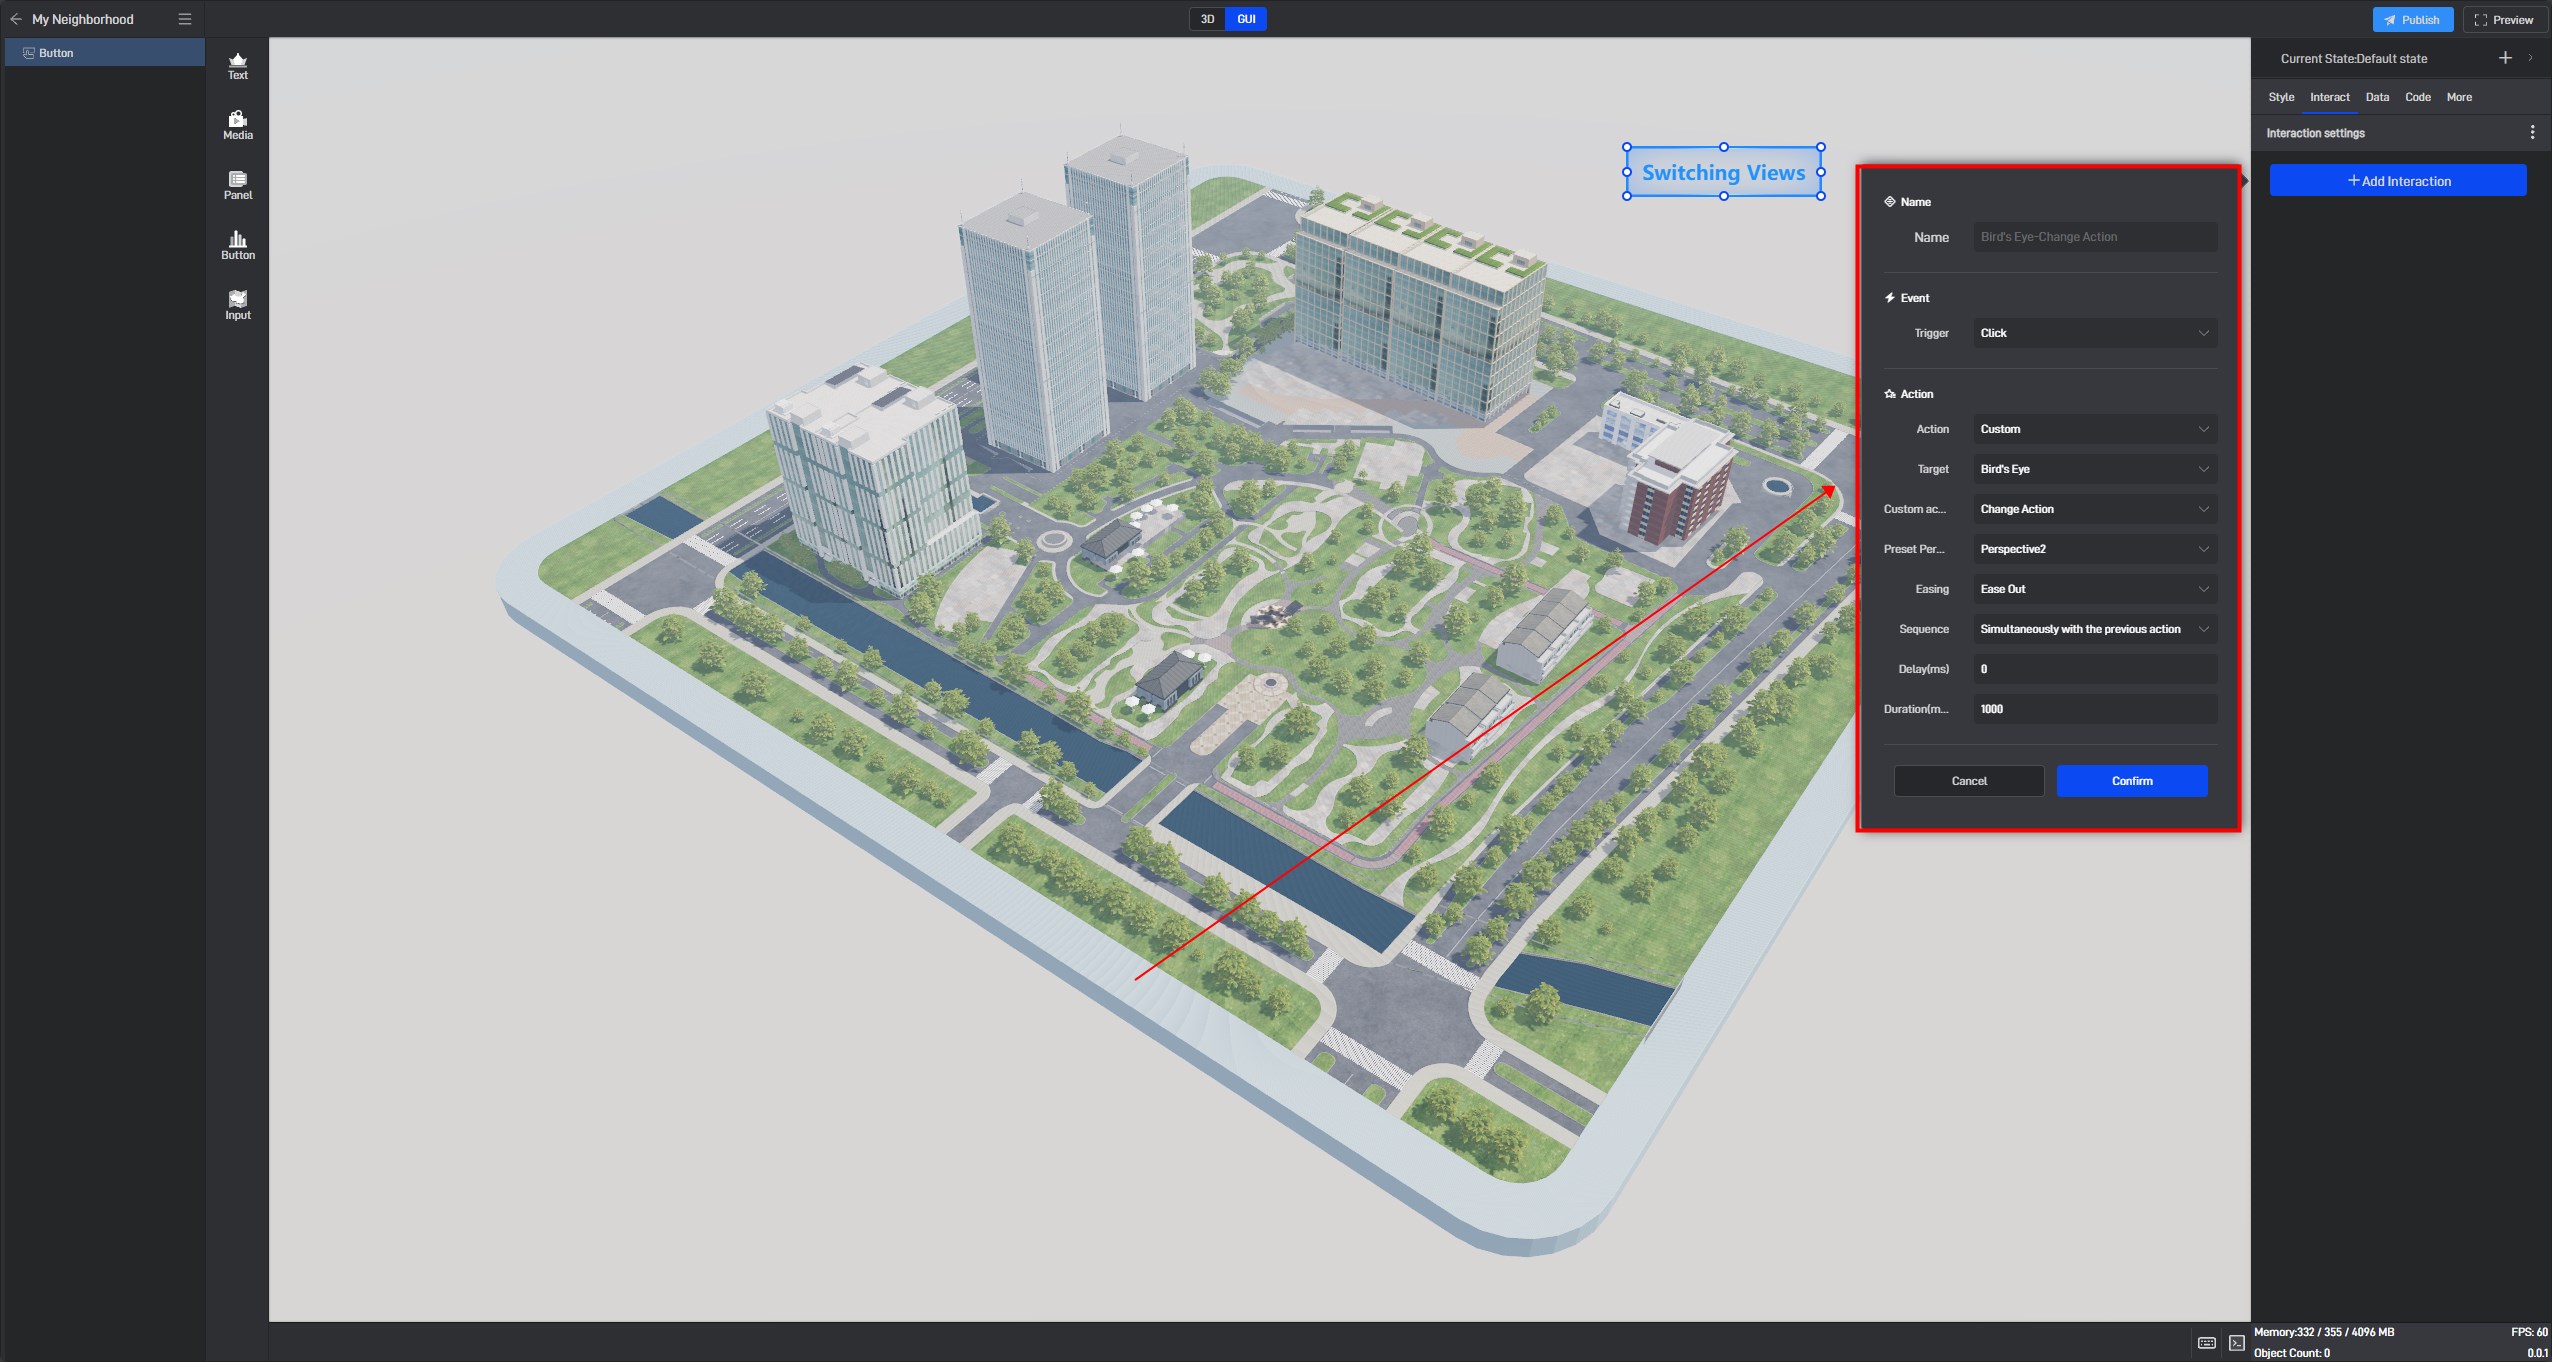
Example of button interaction for perspective switching:

4. Space Perspective
Display in the GIS scene.
4.1 Adding Preset Perspective 1
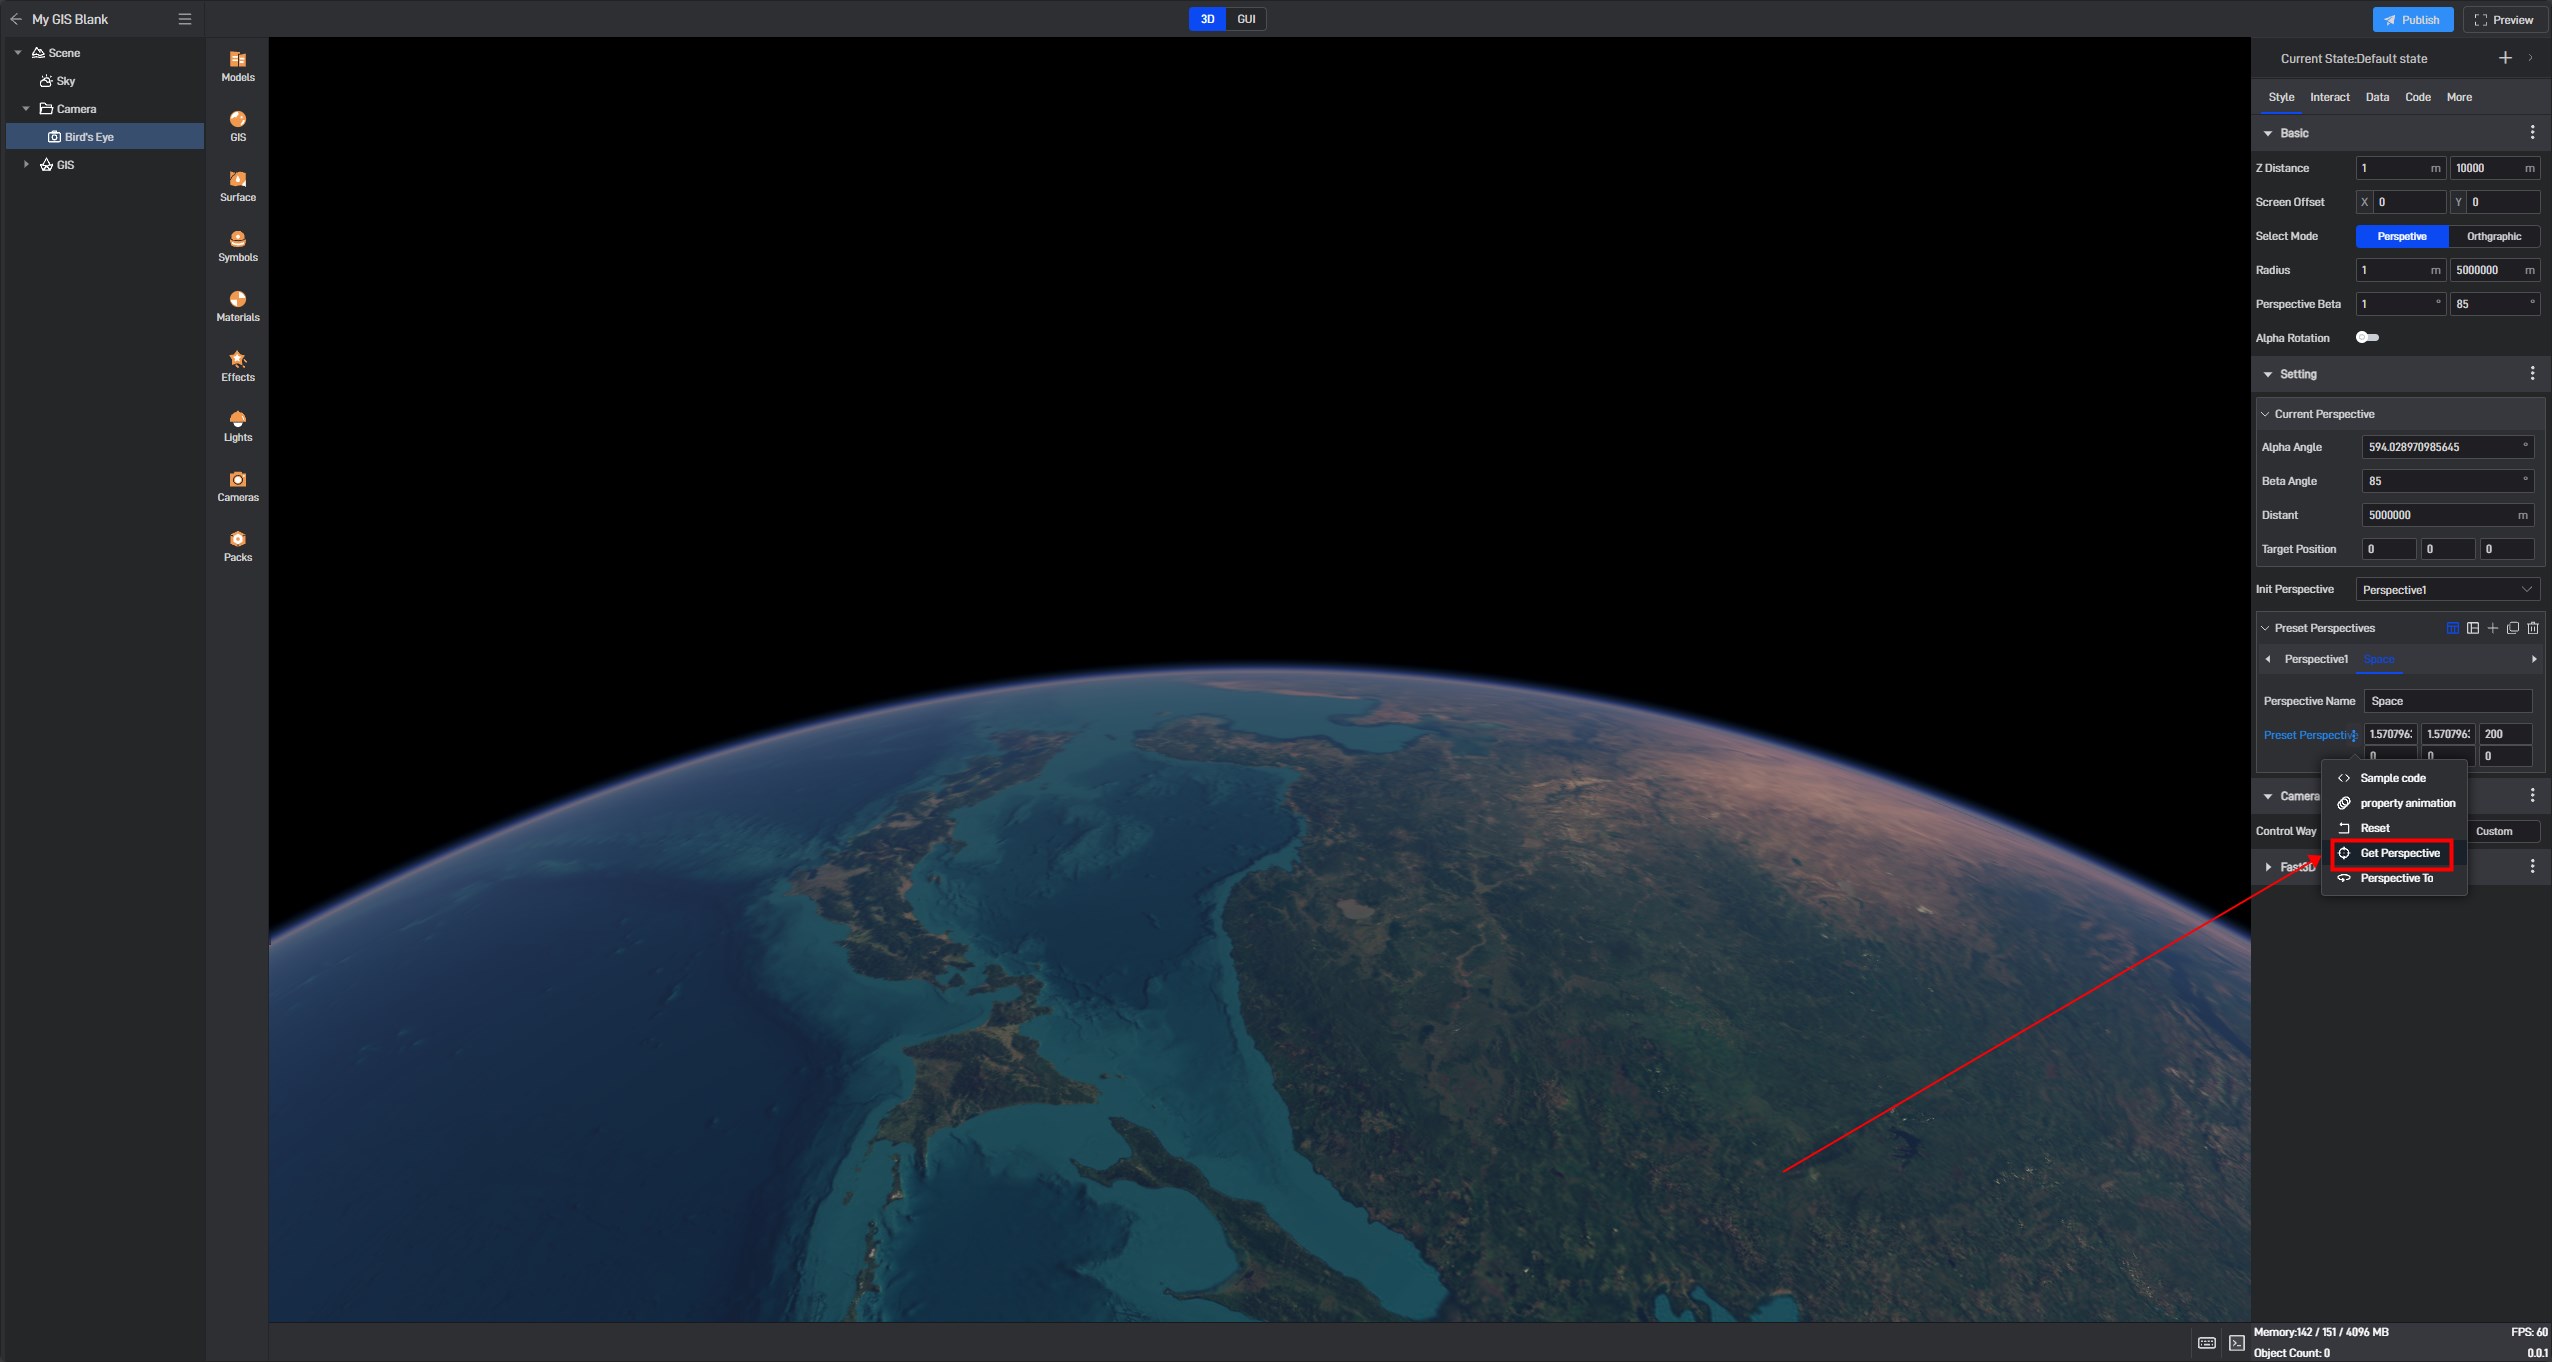
Adjust the zoom limit to the maximum, such as “5000000”, and zoom out to the exterior of the Earth, as shown below:
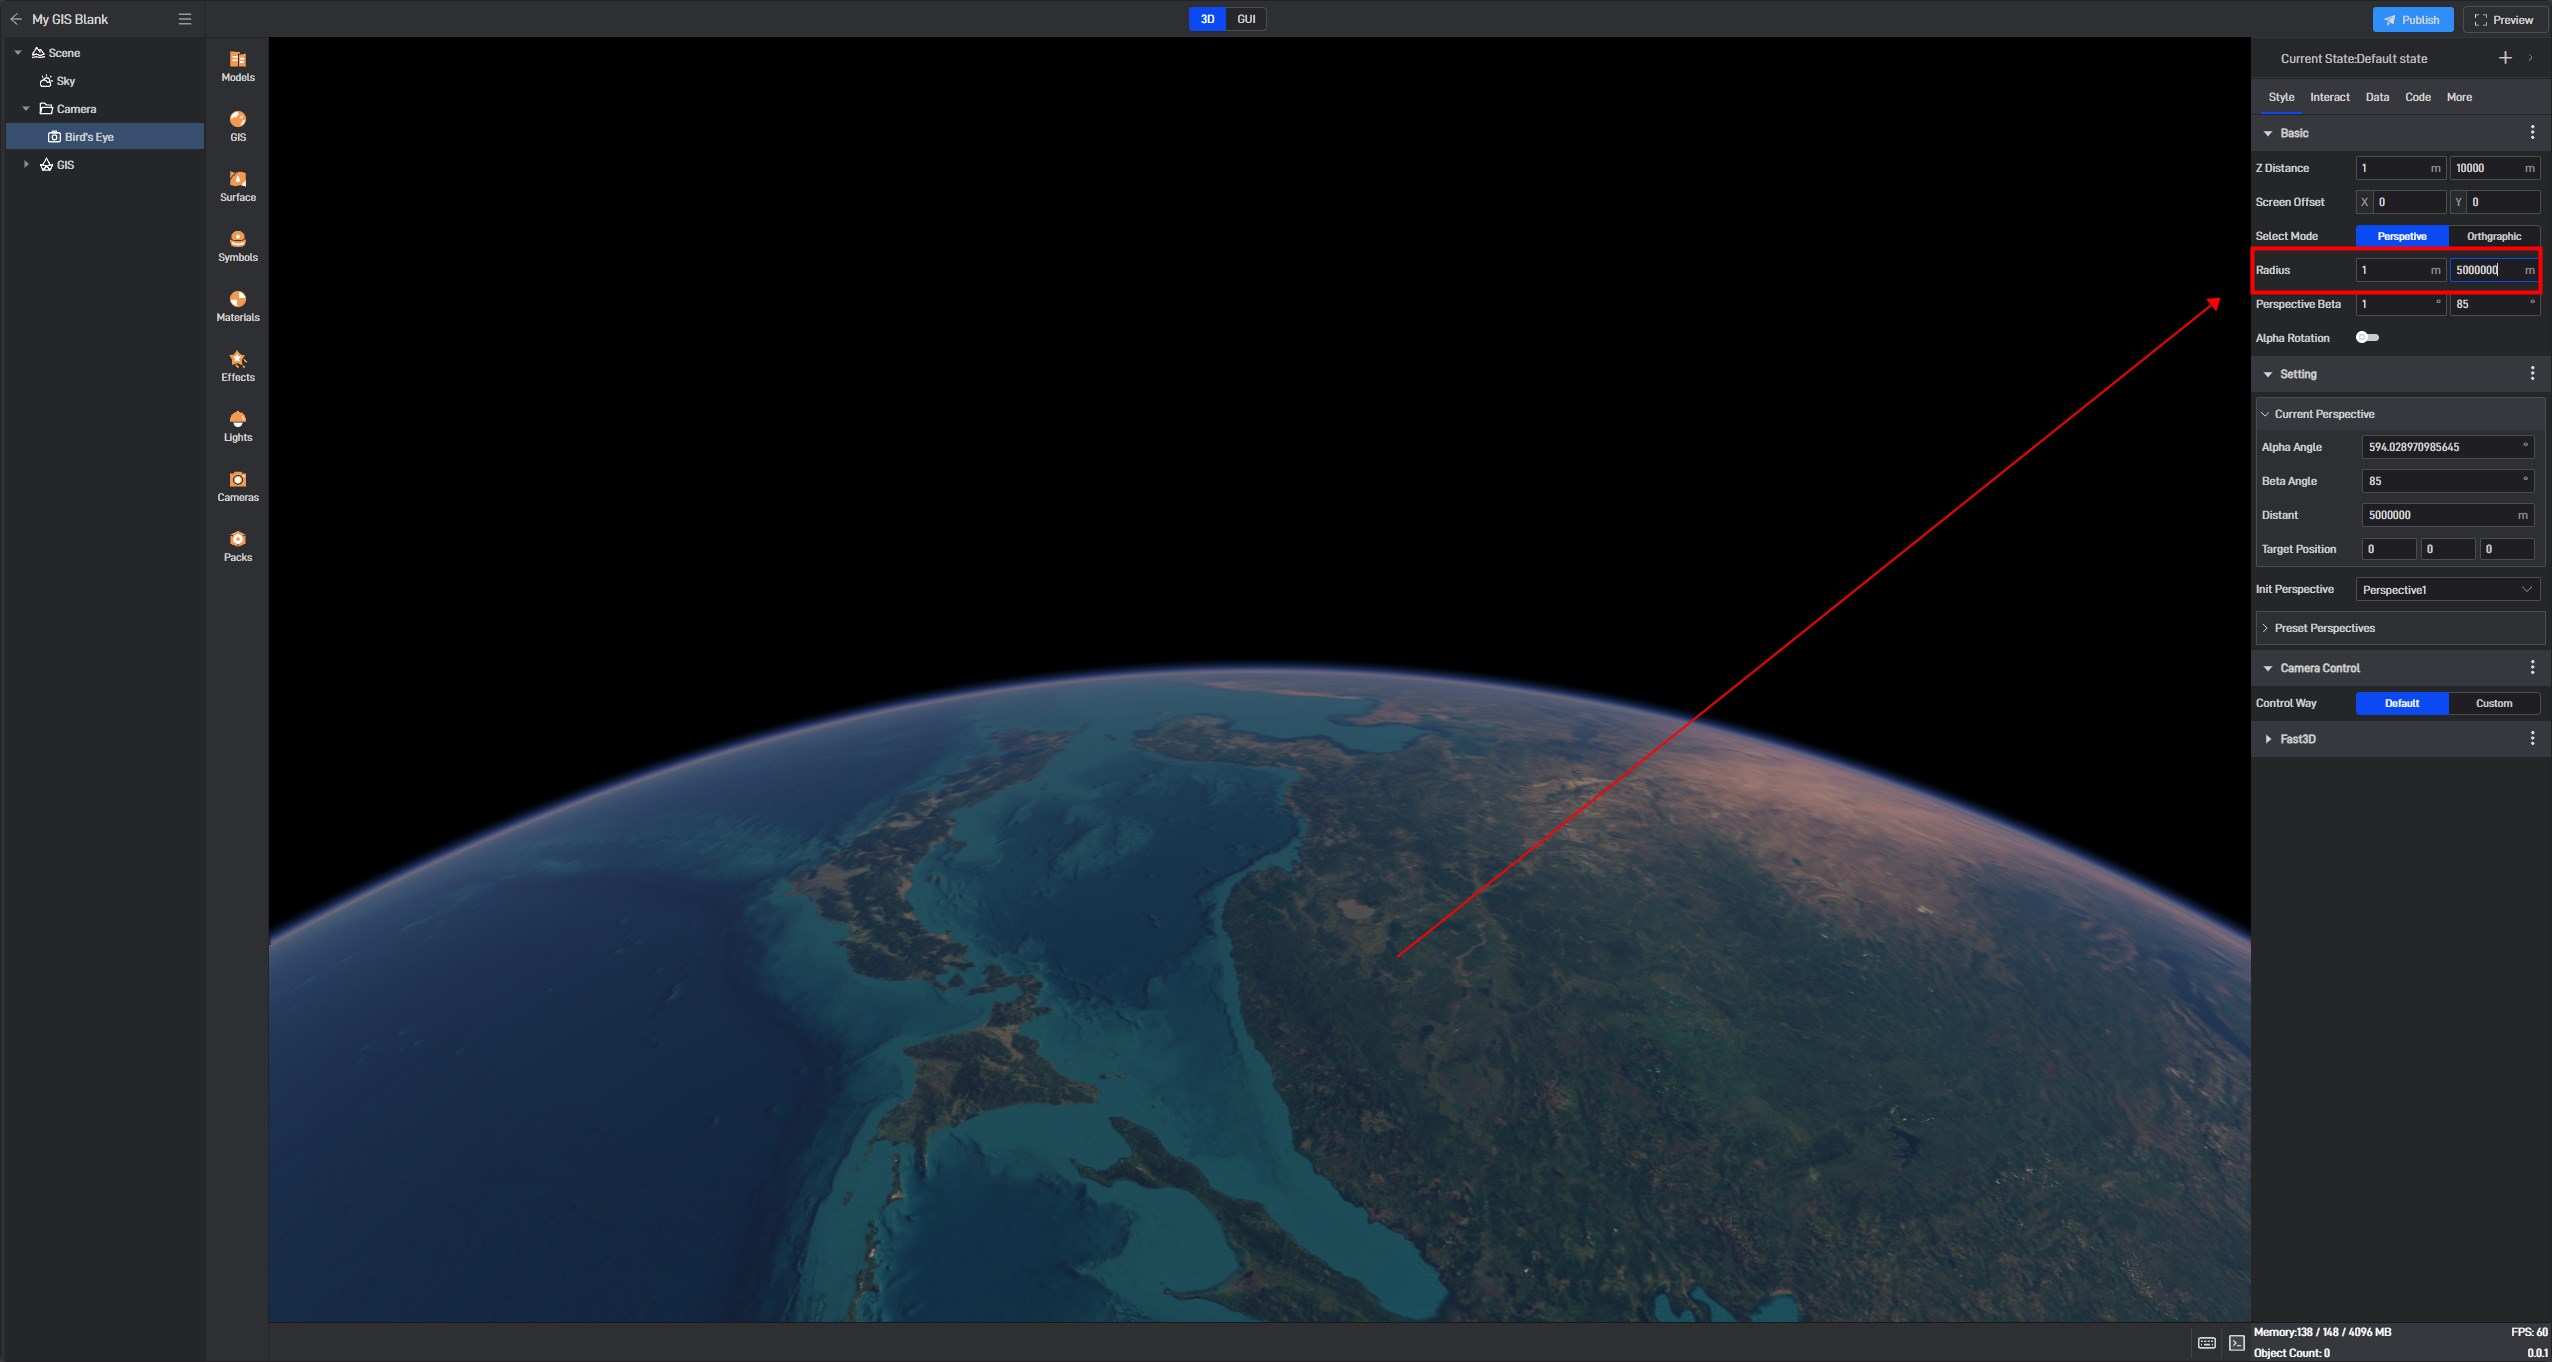
Capture the exterior perspective of the Earth, as shown below:
4.2 Adding Preset perspective 2
Zoom the GIS layer in to the ground level, as shown below:
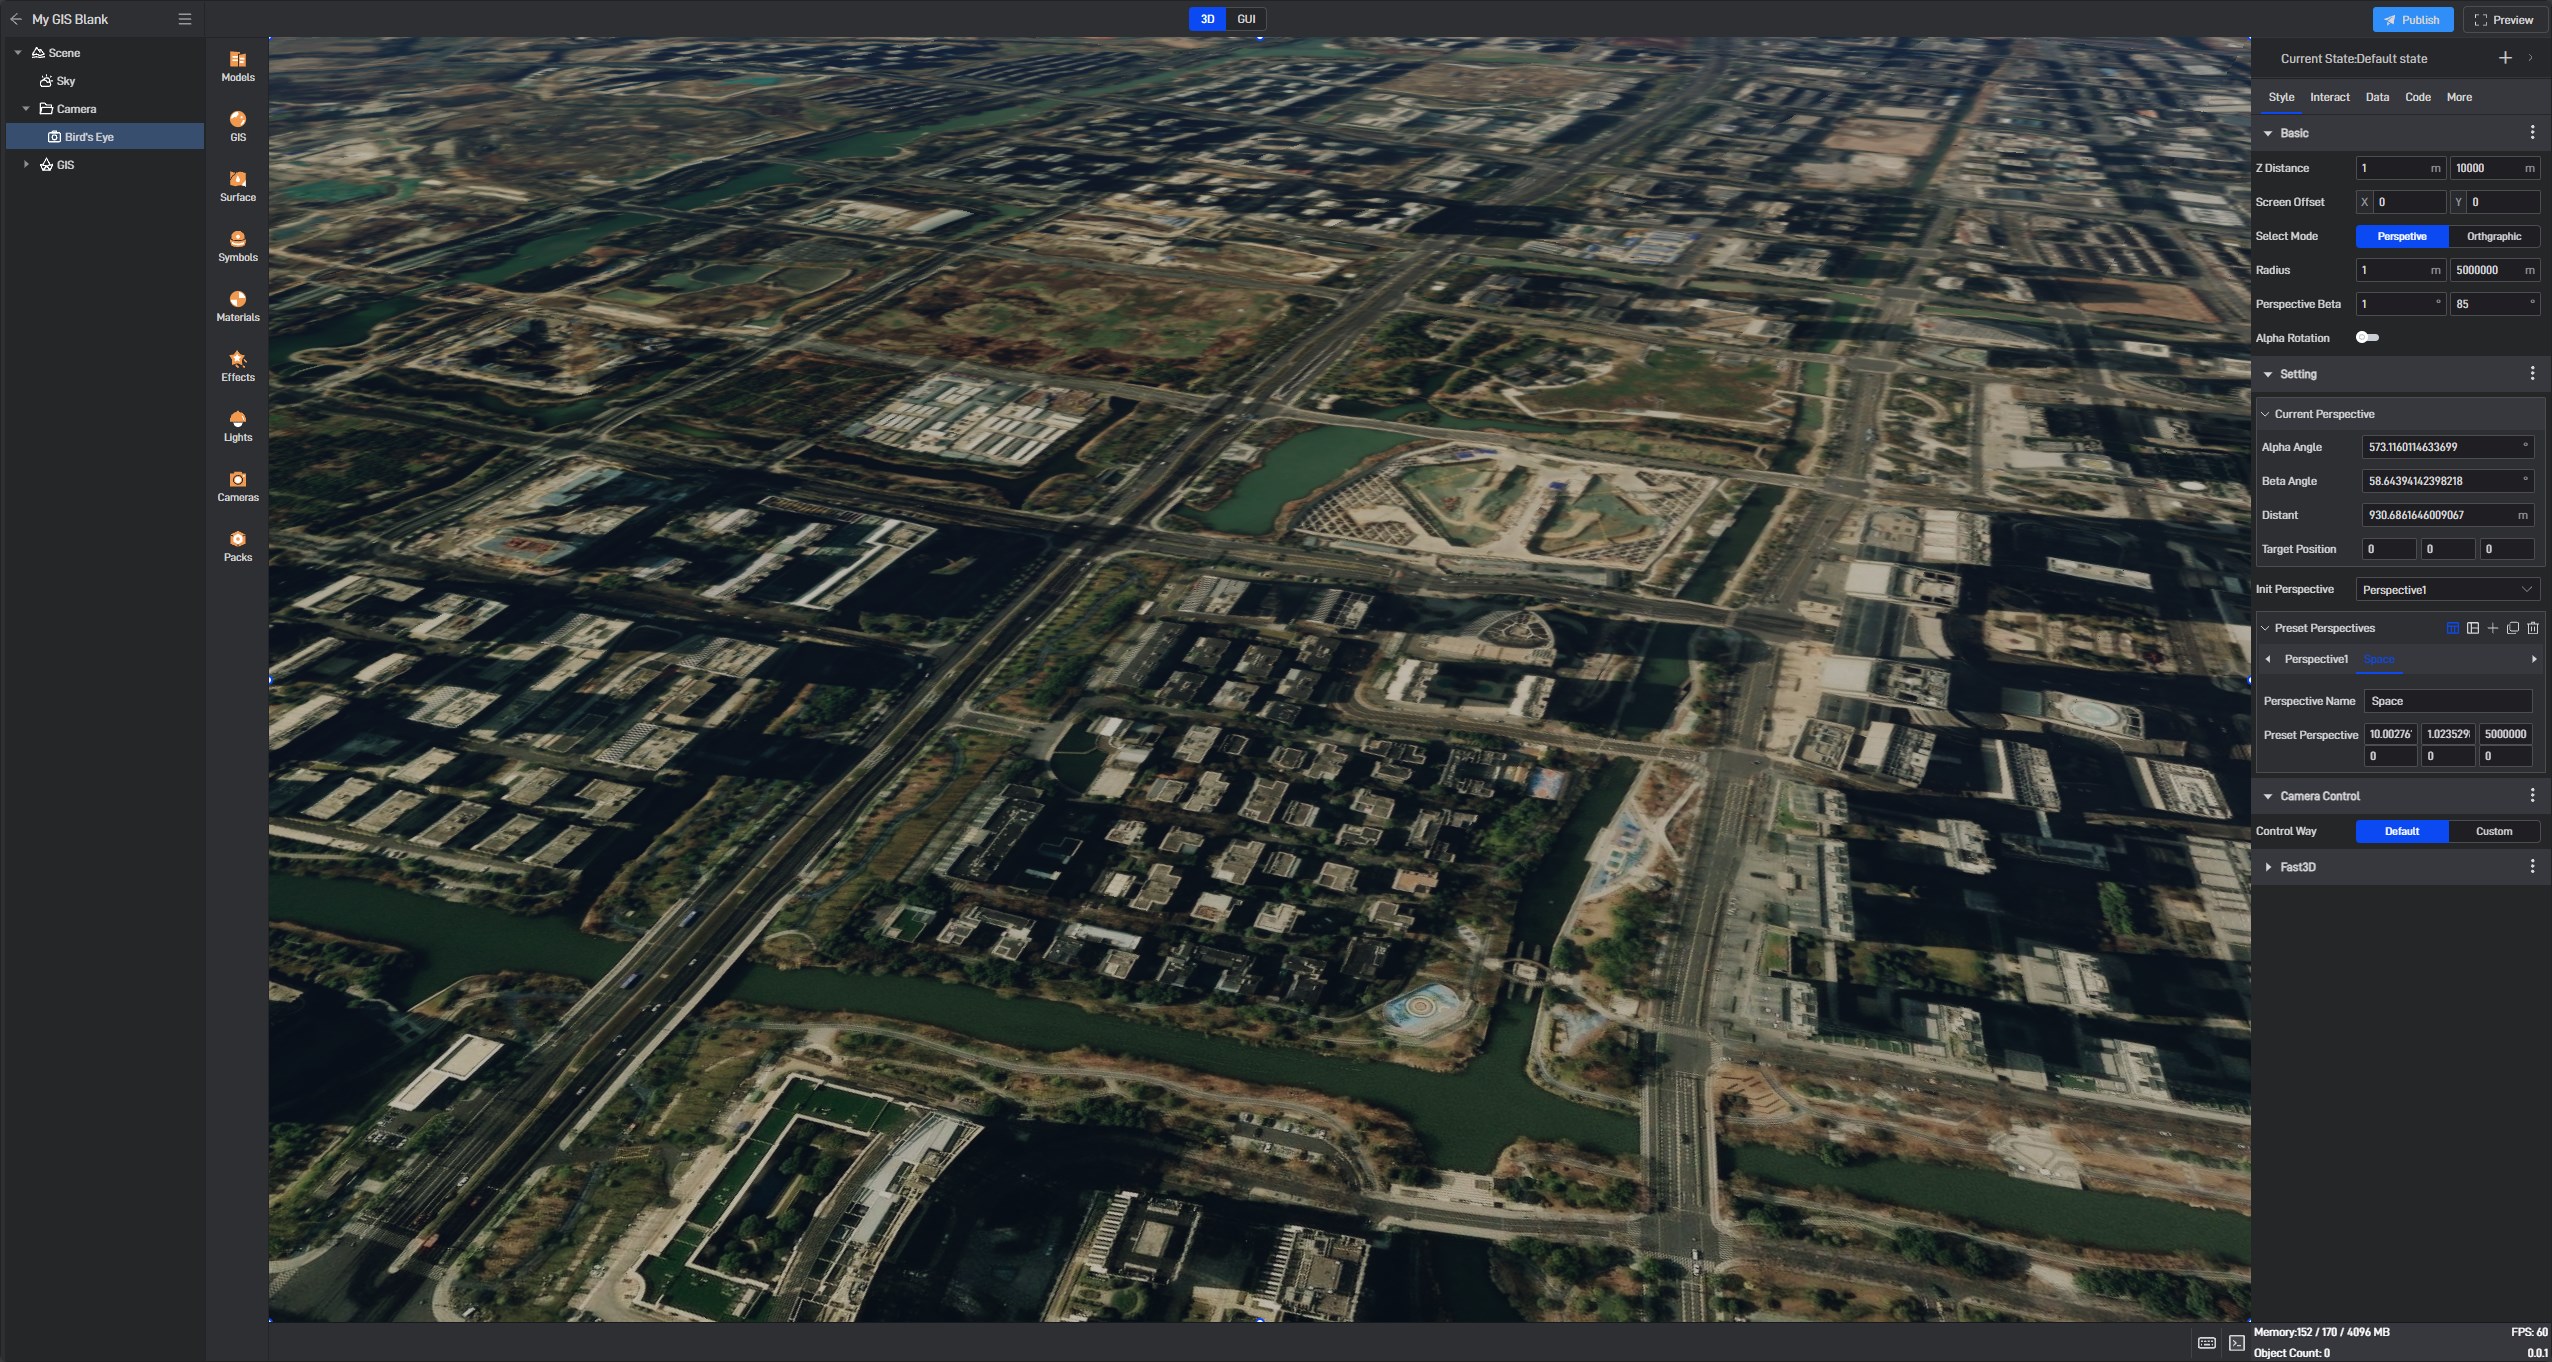
Capture the current perspective, as shown below:

4.3 Switching perspective
4.4 Button Interaction for perspective Switching
Add a button component and interaction, as shown below:
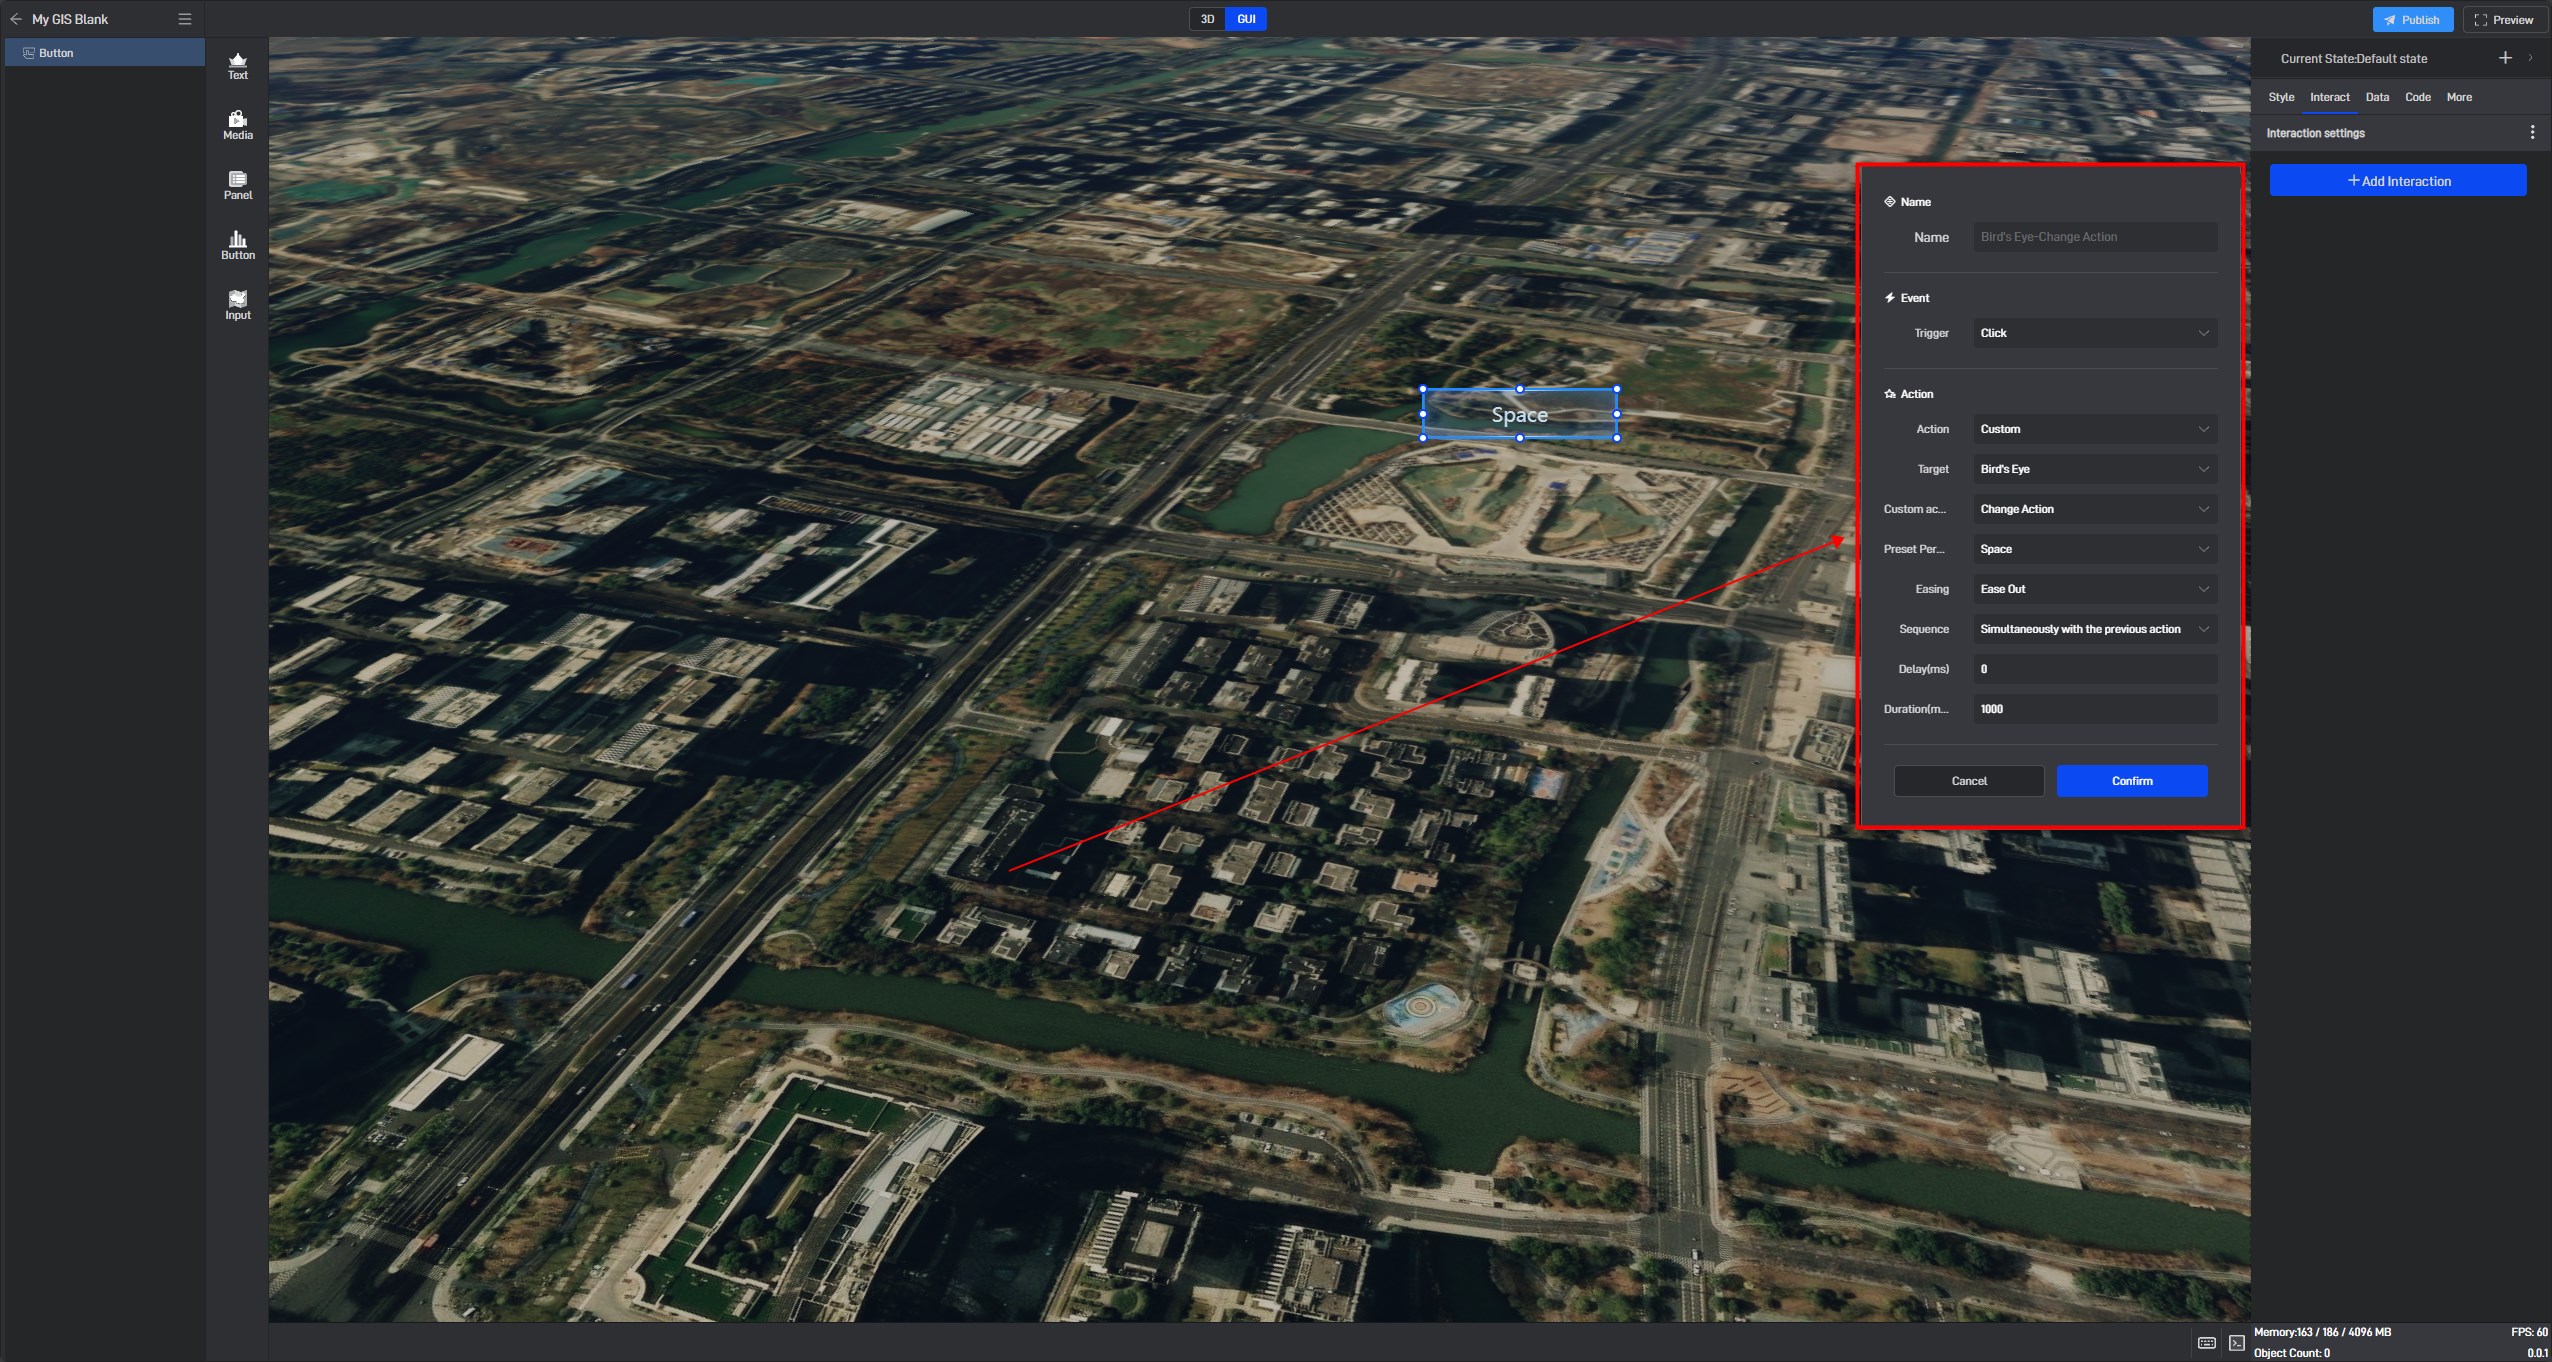
Example of button interaction for perspective switching:
