Wings Engine

iFrame Embed Development

Although Wings Engine provides a secondary development interface, which can easily extend the functionality of existing components through code, there are still times when we need a completely free development environment, such as introducing a third-party component library, writing CSS and HTML by ourselves, etc. In this case, we can use the iFrame embedding method.

Embed iFrame widget

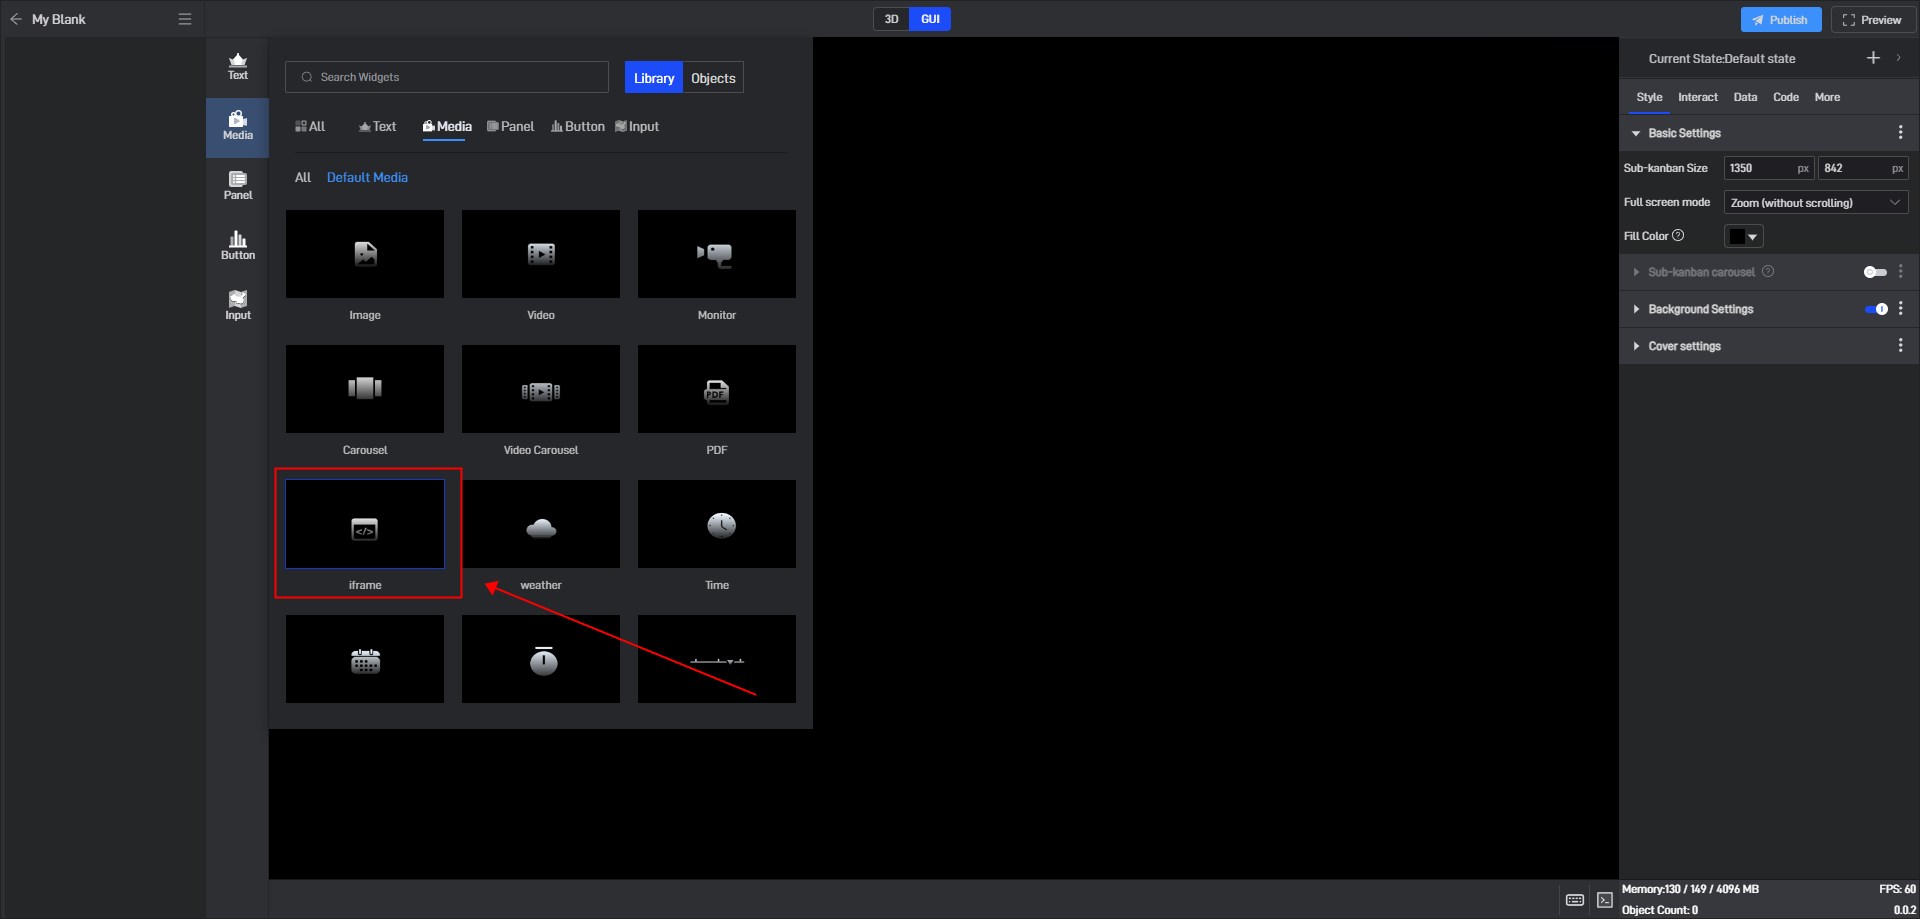
First insert an iFrame widget:
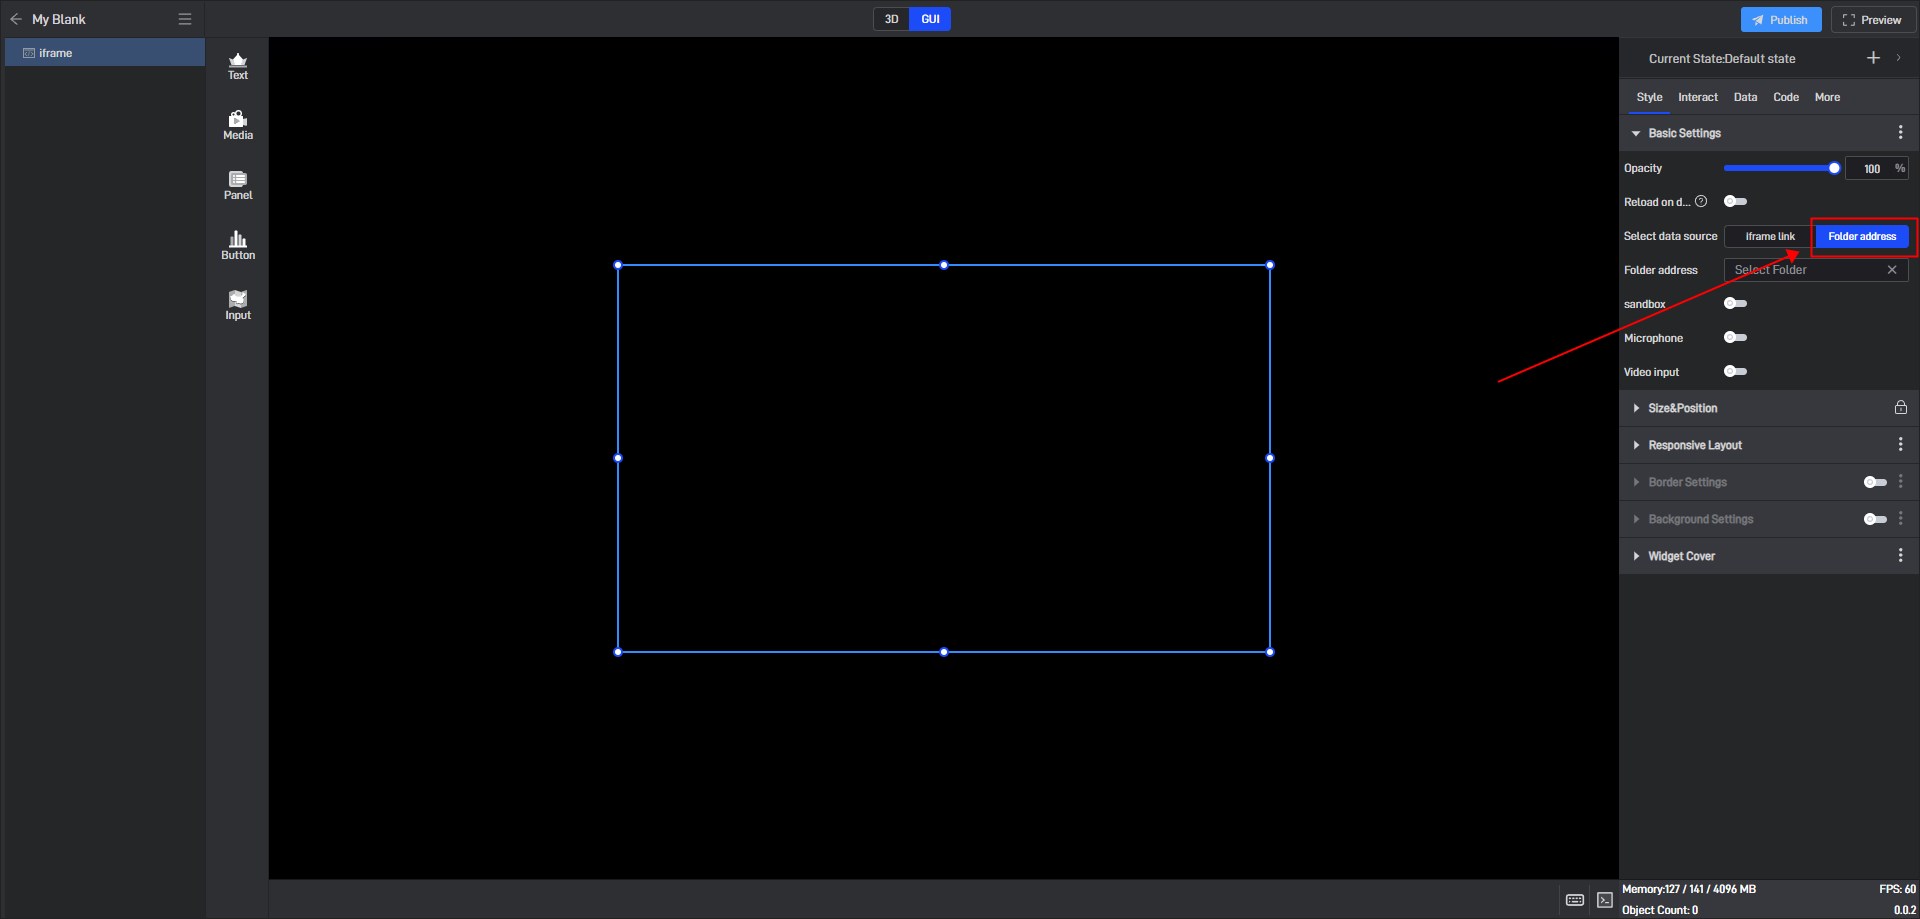
After inserting the iframe, set the data source selection in the iframe attributes to the folder address:
Then create a new folder locally, create a new index.html in the folder, and write the following code:

1
2
3
4
5
6
7
8
9
10
11
12
13
14
15
16
17
18
19
20
21
22
23
24
25
26
27
28
29
30
31
32
33
34
35
36
37
38
39
40
41
42
43
44
45
46
47
48
49
50
51
52
53
54
55
56
57
58
59
60
61
62
<!doctype html>
<html>
<head>
<meta charset="utf-8">
<meta http-equiv="X-UA-Compatible" content="IE=edge">
<meta name="viewport" content="initial-scale=1.0, user-scalable=no, width=device-width">
<title>iframe Secondary Development Example</title>
<style>
body {
overflow: hidden;
}
* {
font-size: 20px;
}
.container {
padding: 50px;
}
.container .box1 {
display: flex;
}
#msg-input {
height: 40px;
line-height: 40px;
width: 100%;
}
#send-btn {
margin-left: 10px;
width: 100px;
}
.container textarea {
width: 100%;
height: 680px;
margin-top: 50px;
}
</style>
</head>
<body>
<div class="container">
<div class="box1">
<input id="msg-input" type="text" name="msg" value="Enter a message">
<input id="send-btn" type="button" value="Send" onclick="sendMessage()">
</div>
<textarea id="content" readonly></textarea>
</div>
<script type="text/javascript">
window.addEventListener("message", (ev)=>{
const msg = ev.data.msg;
if (msg) {
const textarea = document.getElementById("content");
const value = textarea.value;
textarea.value = value ? value + "\n" + msg : msg;
}
});
function sendMessage() {
const msg = document.getElementById("msg-input").value;
window.parent.postMessage({
msg: msg,
}, "*");
}
</script>
</body>
</html>

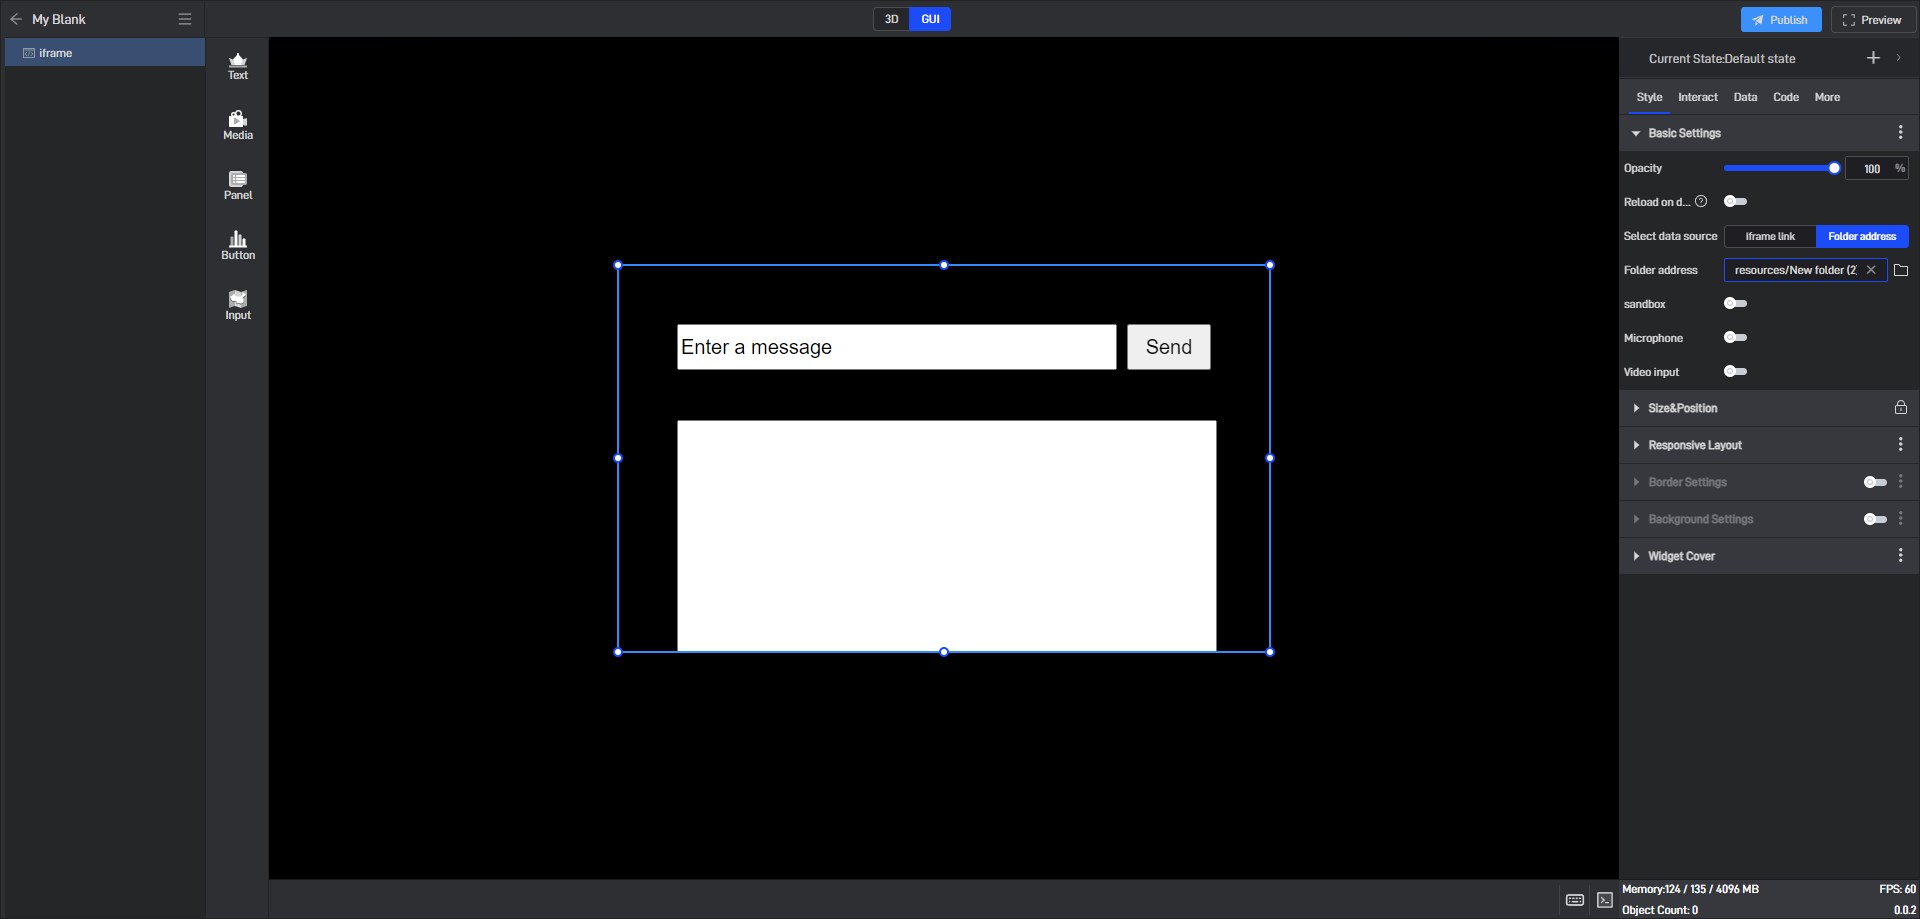
Go back to Wings Engine, select the iFrame component, select the folder you just created in the folder address in the property panel mentioned above, click OK, and you can see that the elements in the web page have been displayed normally. Let’s simply adjust the position of the iFrame component:
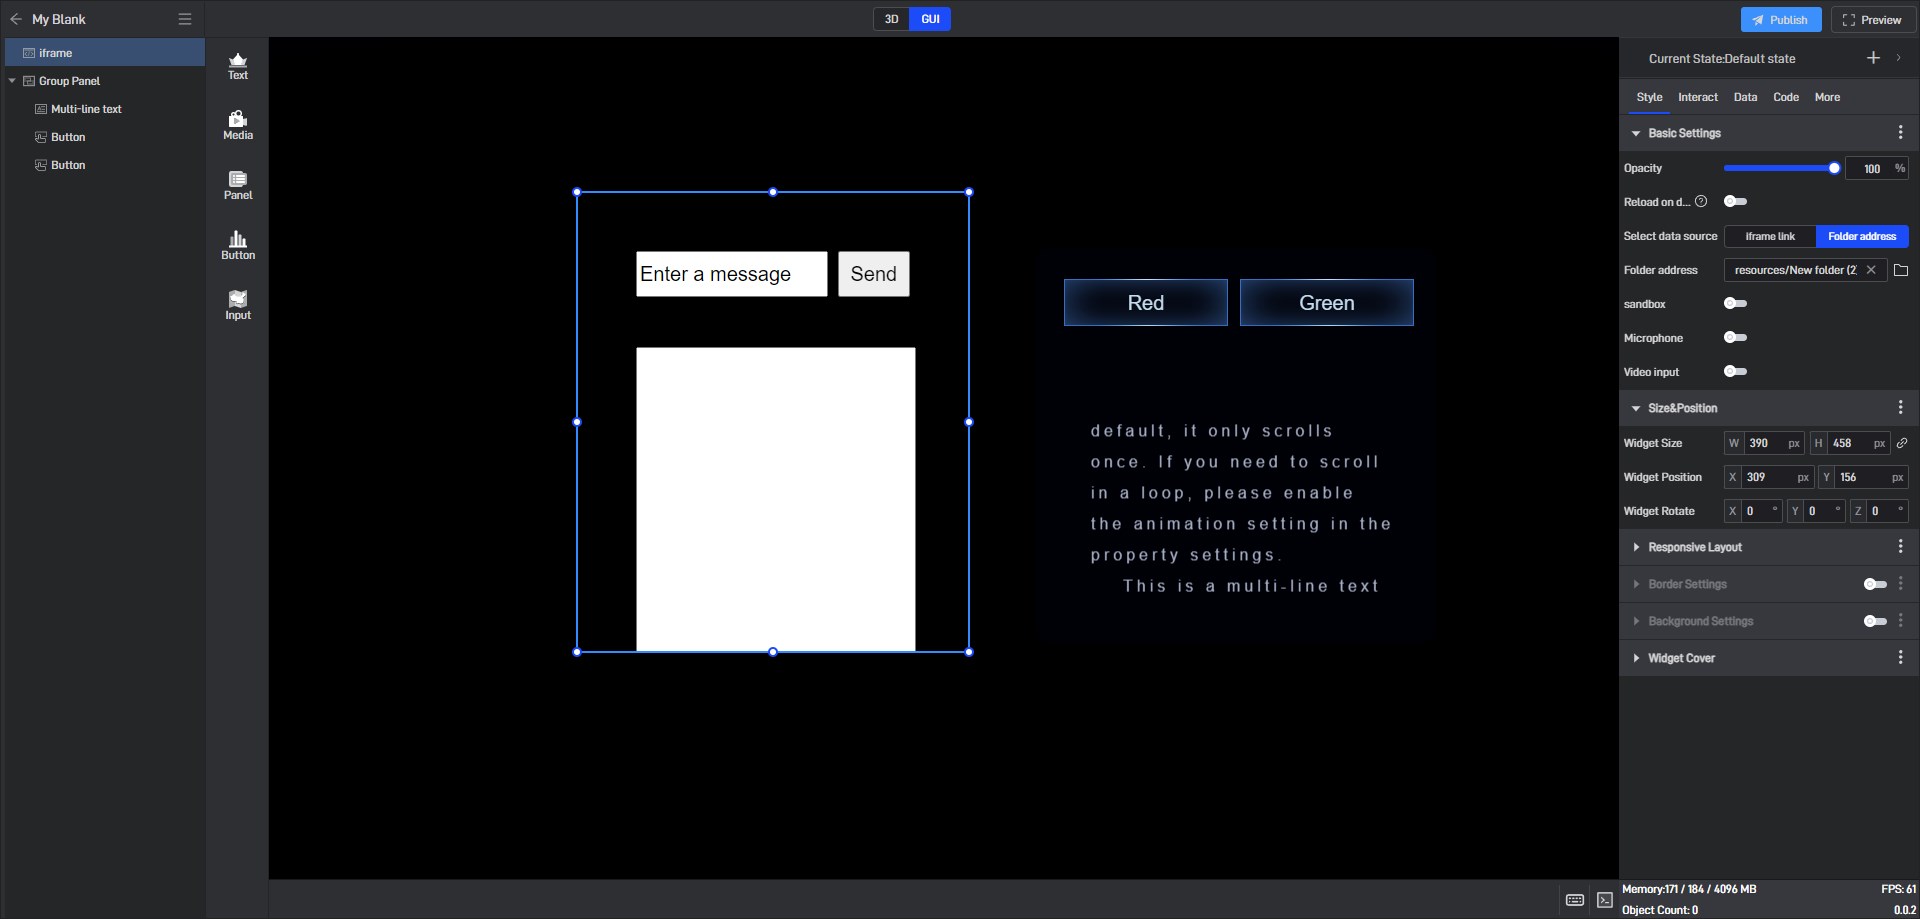
At this point, the basic functions of the iFrame are ready for use. Next, let’s handle the communication between the iFrame and the widgets in Wings Engine. First, add the button and multi-line text widgets to Wings Engine, as shown in the figure:
Then reselect iFrame, click the Code tab on the right, click the New button to create a secondary development code file, click Edit File, paste the following code into the secondary development code file and save it:

1
2
3
4
5
6
7
8
9
10
11
12
13
14
15
16
17
18
19
20
21
22
23
24
25
26
27
28
29
30
31
32
33
34
// Secondary Development API Reference: https://www.shanhaibi.com/docs/v1/tx9rigt2ff6e0m1h/

export class SampleExtension {
redButton = Element.empty();
greenButton = Element.empty();
infoBox = Element.empty();

async init() {
this.iframe.onMessage((ev) => {
const msg = ev.data.msg;
if (msg) {
const line = "Received message from iframe: " + msg;
const text = this.infoBox.getOption("text");
this.infoBox.setOption("text", text ? text + "\n" + line : line);
}
});
this.redButton.addEventListener("click", (ev) => {
this.iframe.postMessage(
{
msg: "Red button clicked",
},
"*"
);
});
this.greenButton.addEventListener("click", (ev) => {
this.iframe.postMessage(
{
msg: "Green button clicked",
},
"*"
);
});
}
}

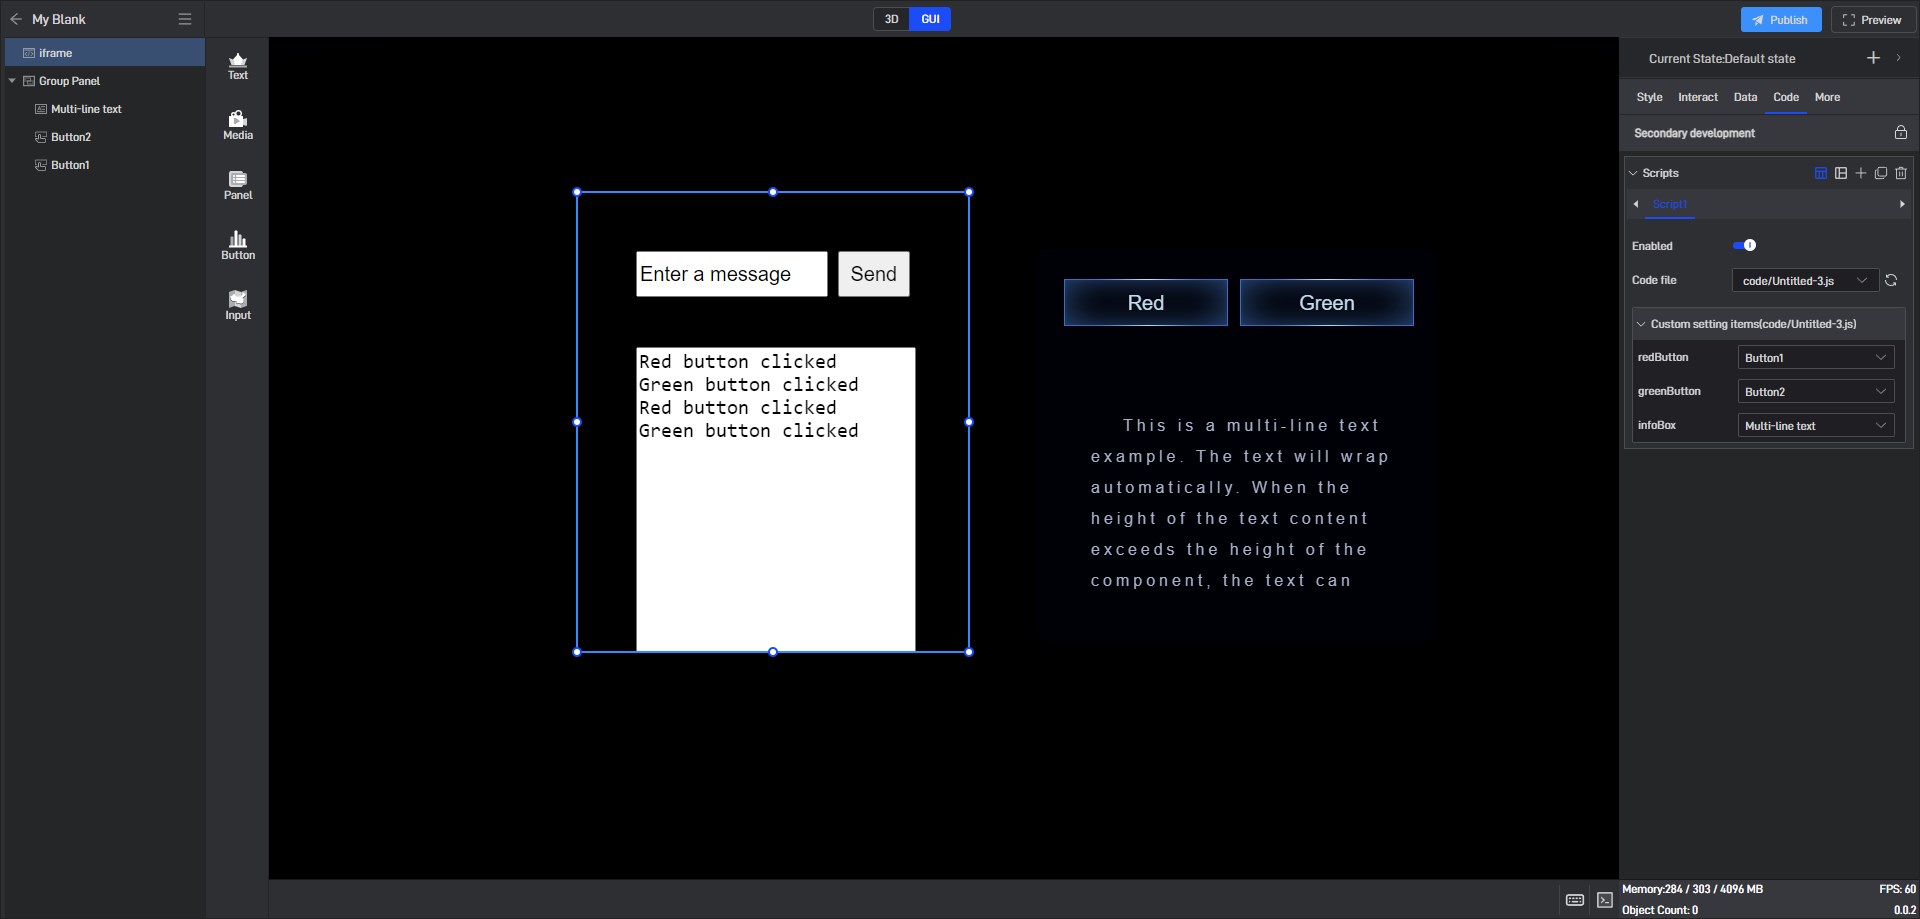
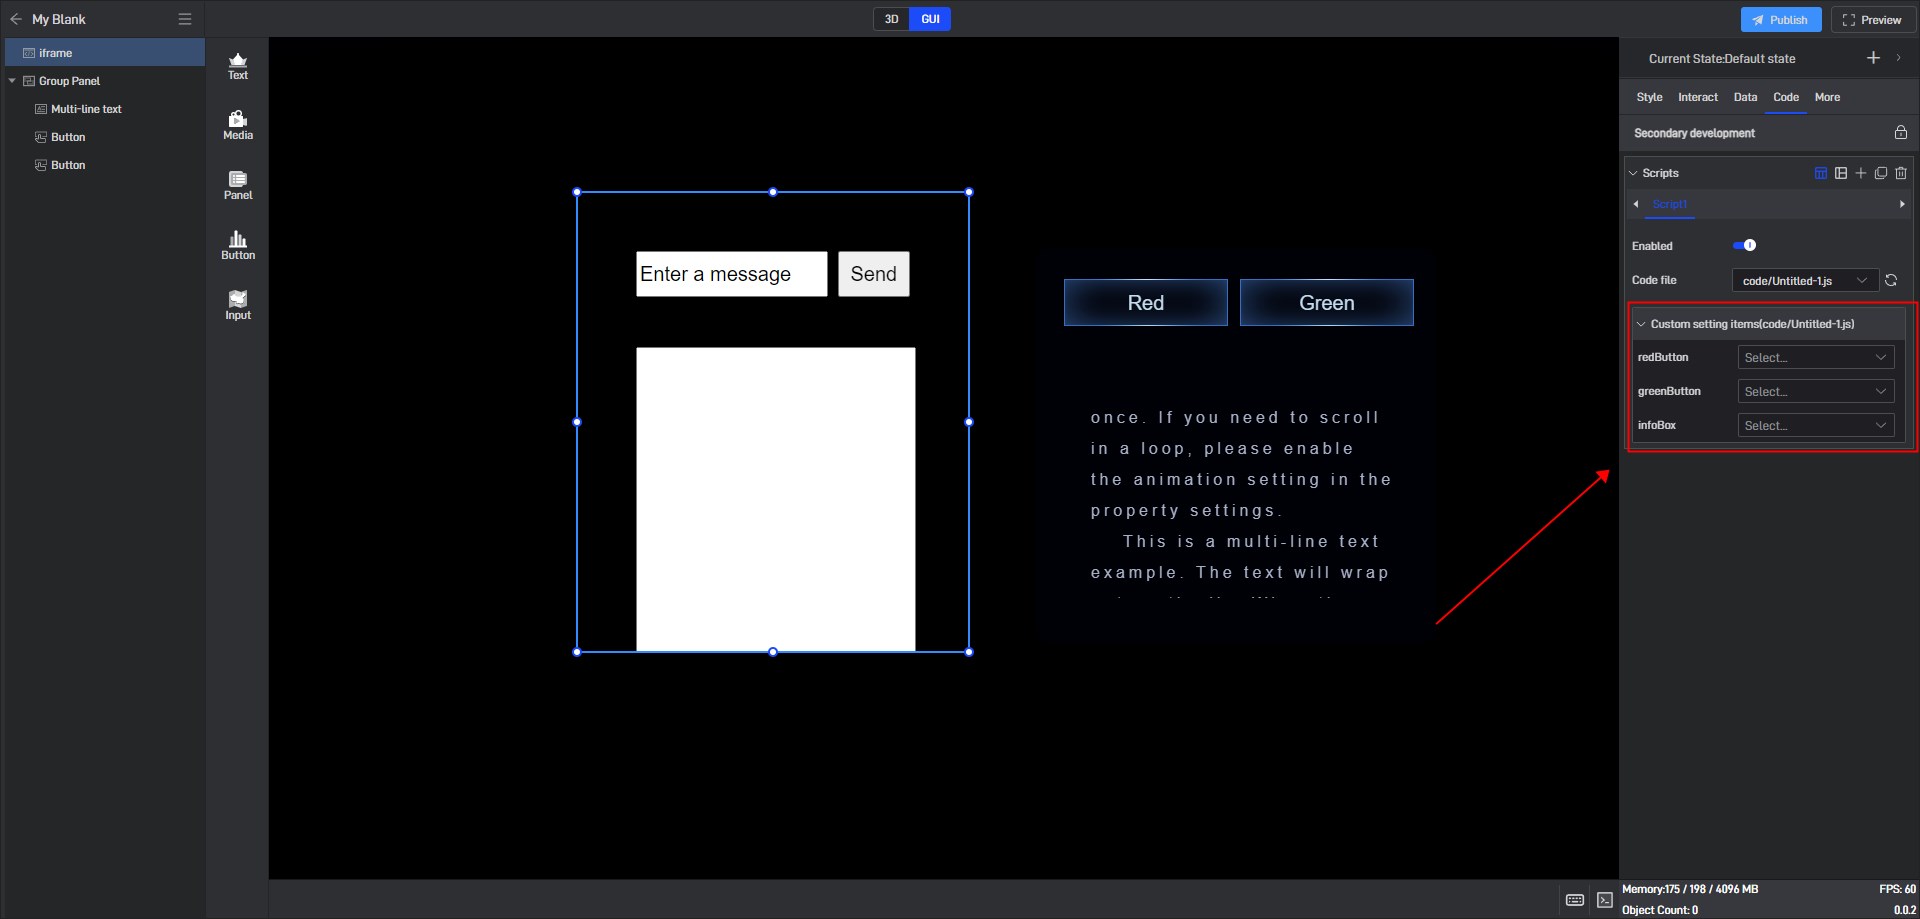
After saving, click the refresh button on the right side of the file selection box, and you can see three component selection boxes appear below the second code. We select two button components and a multi-line text component in Shanhaijing respectively:
After selecting, you can see that the content in the iFrame and the content in the Wings Engine widget can communicate normally: