PBR Material
PBR material is one of the components inside Wings Engine. It will be added automatically without manual addition and cannot be deleted.
Basic Settings
| Configuration items | Description |
|---|---|
| Backface culling | When turned on, the internal material of the model will not be displayed, which can save performance. |
| Disable Lighting | When turned on, the material is not affected by light. |
| Unlit | When turned on, the model material will not darken in darker scenes. |
| IOR | Adjusts the refraction intensity of the sun shining on the object. The refractive index of air is 1, so the effect changes according to the absolute value of the refractive index IOR minus 1. |
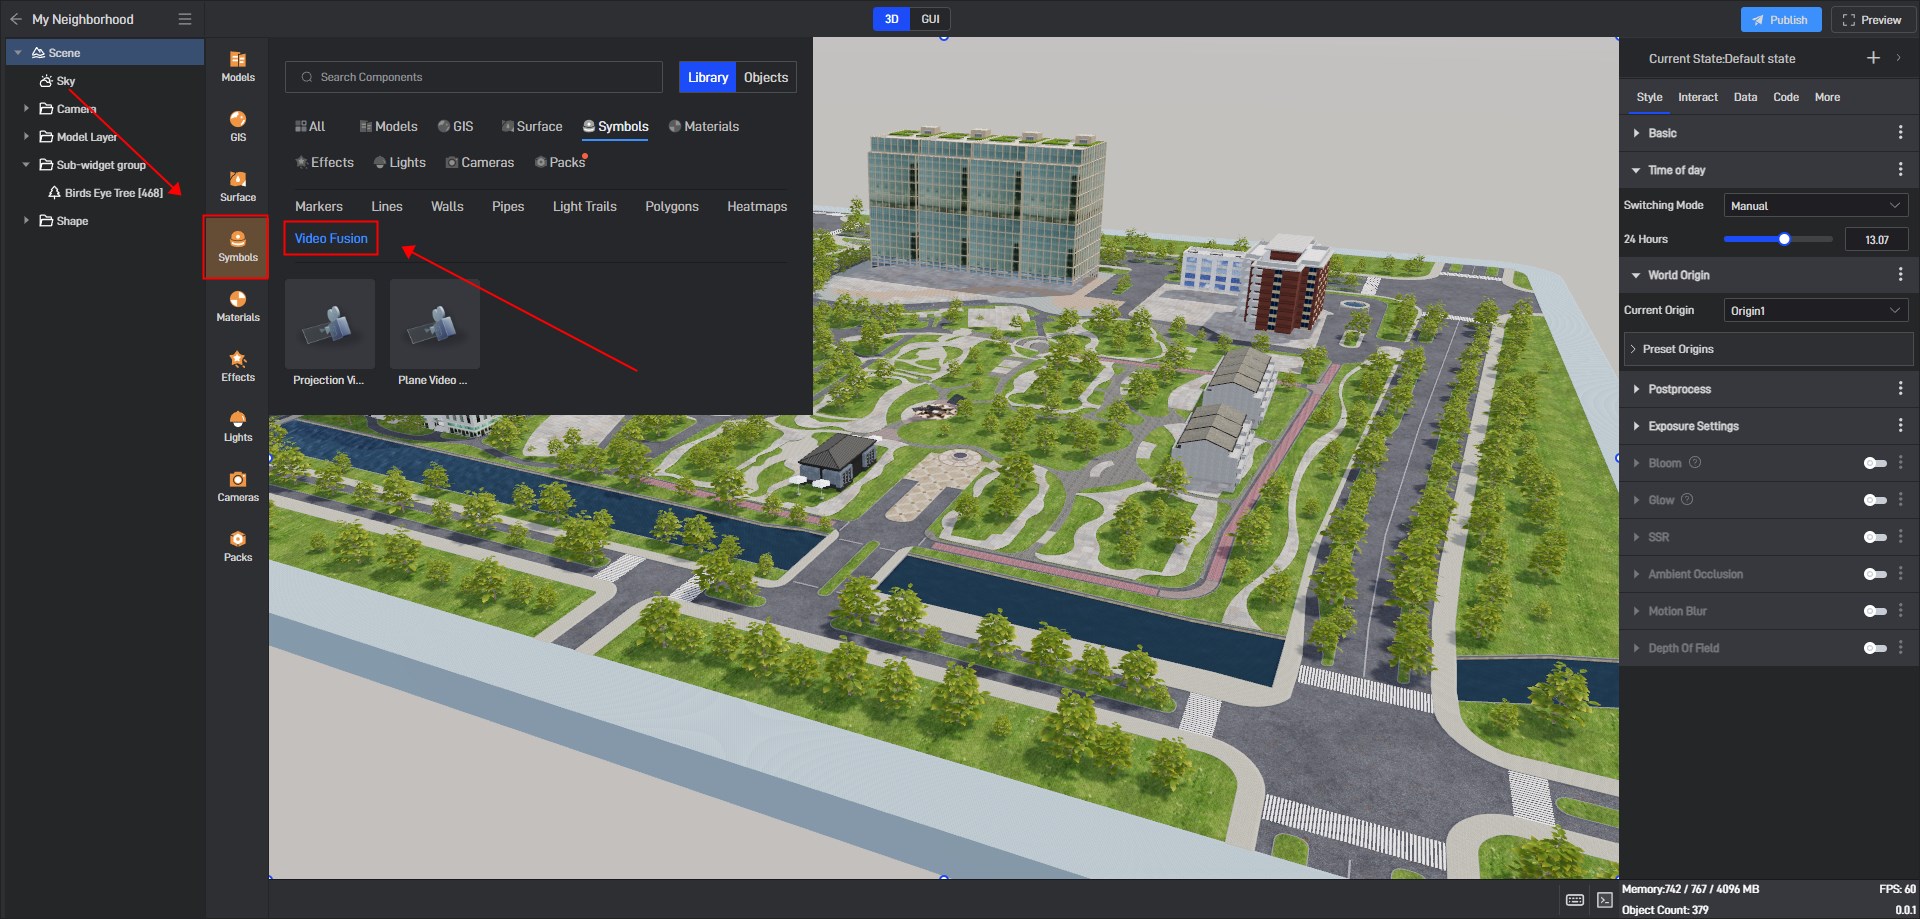
| Video Fusion | After turning it on, you can receive the video fusion, which can make the picture more realistic. |
| Auto Ponding | After turning it on, water will automatically accumulate on the ground when it rains. |
**Tips: **When exporting from Blender, make sure to set the visible face as the front face. For models on the ground, as long as the faces of the model are normal, it is recommended to turn off backface culling.
Video fusion location:
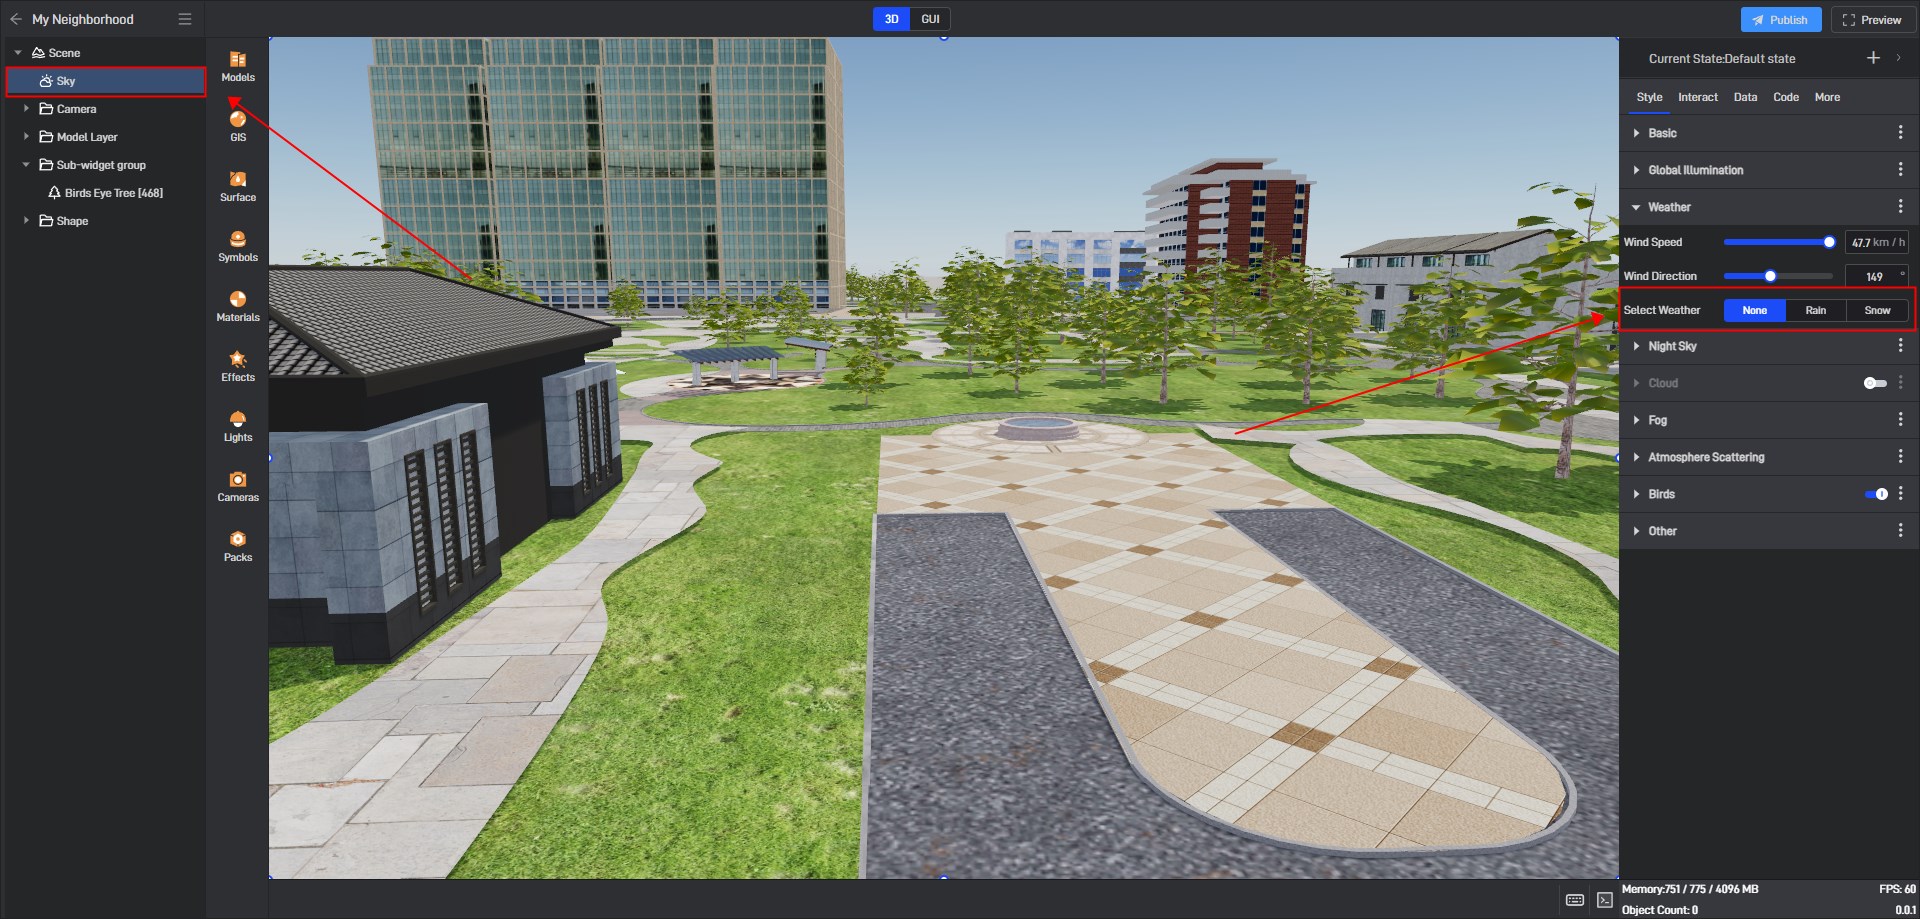
Snow/Rain Weather Location:
2. Albedo
| Configuration items | Description |
|---|---|
| Color | Select the color base that the material will appear in. |
| Texture | Local texture files can be added here. |
| UV Scale | Scale down or scale up the existing UV coordinates. |
| UV Offset | Move existing UV coordinates. |
| UV Set | When there are multiple UV textures in the material, it is used to quickly switch UV textures. |
| Level | Adjusts the intensity of the texture. The higher the intensity, the brighter the texture. |
| Has Alpha | When turned on, the alpha channel of PNG and other types of images will be activated on the texture, presenting a semi-transparent effect. |
| Albedo Strength | Adjust the intensity of the base color. The higher the base color intensity, the brighter the base color. |
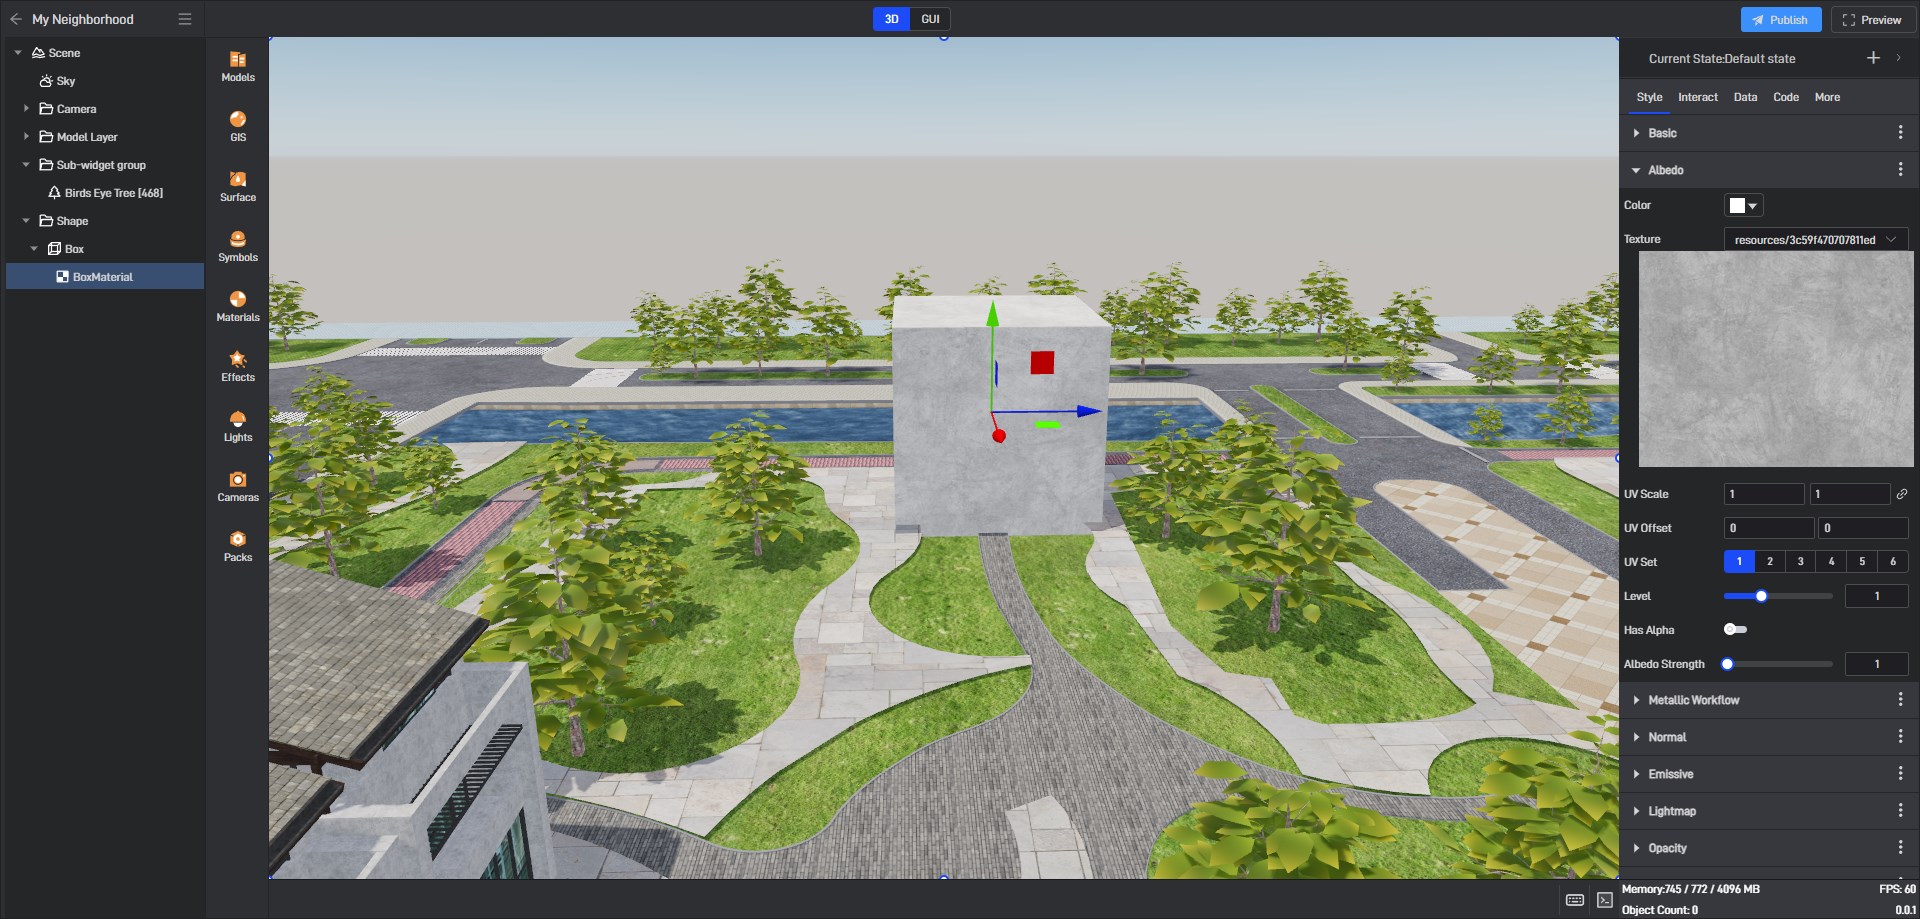
The effect when the material color is white is as shown below:
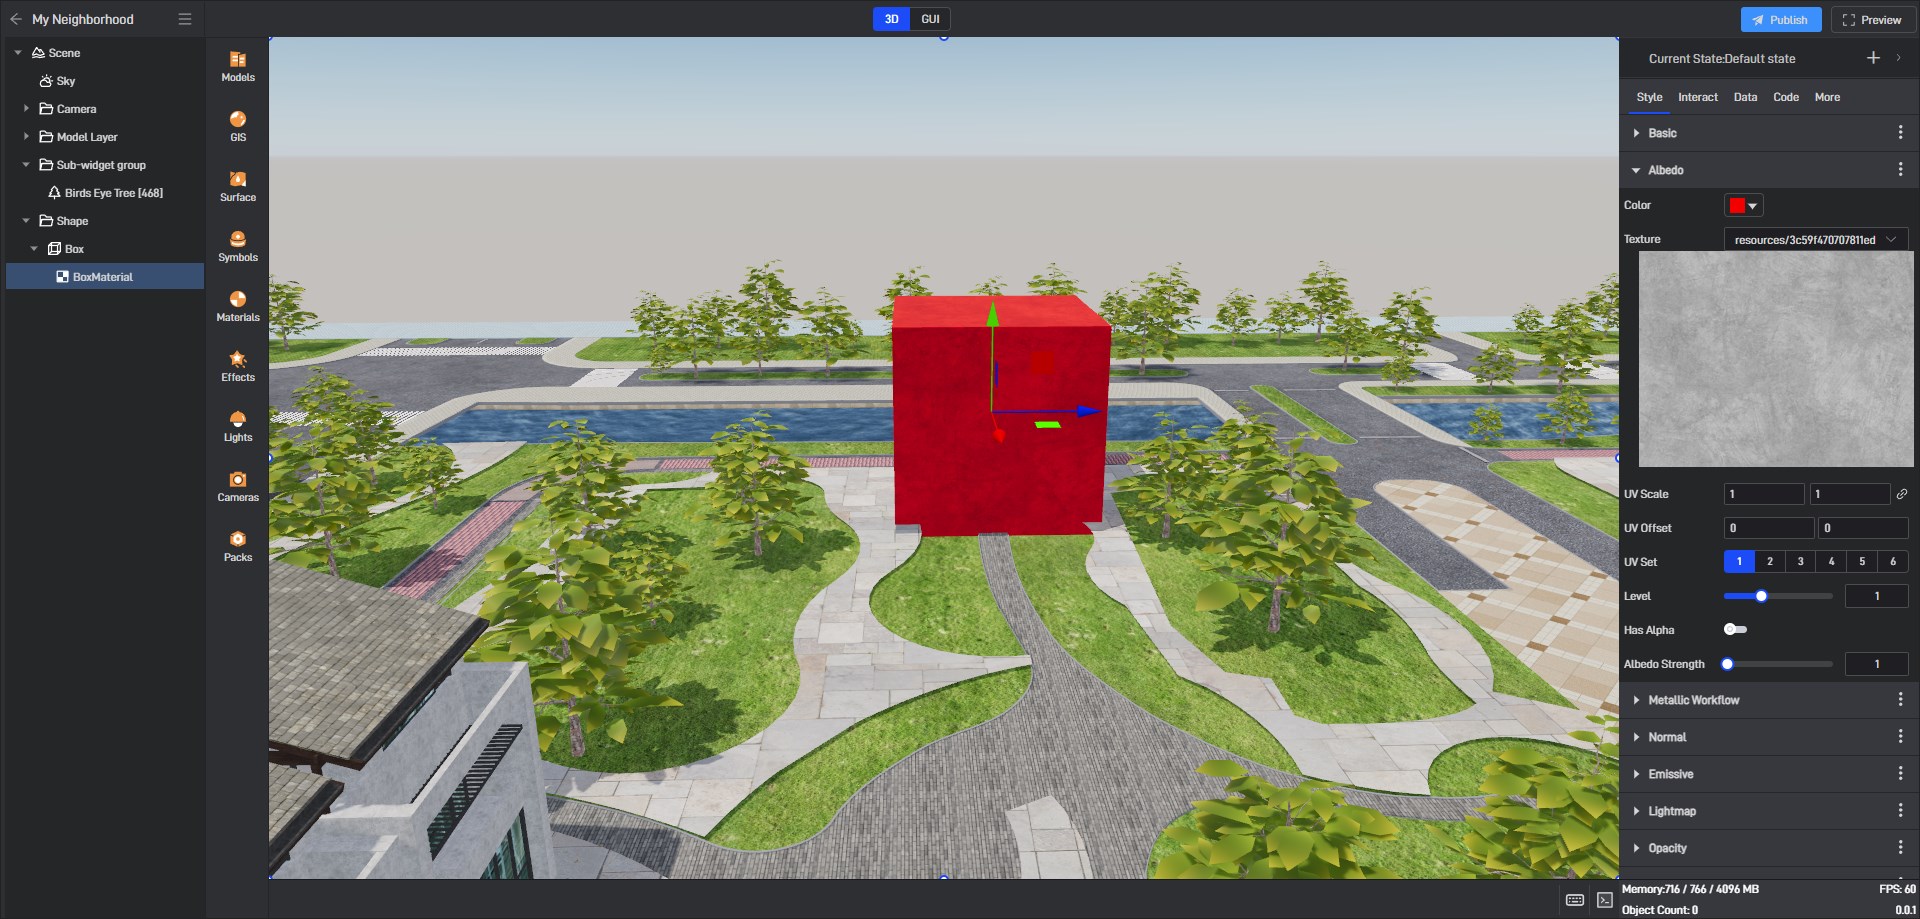
The effect when the material color is red is as shown below:
3. Metallic Workflow
| Configuration items | Description |
|---|---|
| Roughness | Adjust the surface roughness of the material. |
| Metalness | Adjust the metallic glossiness of the material surface. |
| Texture | You can add a local texture file here to adjust the material roughness/metalness. |
| UV Scale | Scale down or scale up the existing UV coordinates. |
| UV Offset | Move existing UV coordinates. |
| UV Set | When there are multiple UV textures in the material, it is used to quickly switch UV textures. |
| Level | Typically set to 1 to have no noticeable effect on the material. |
4. Normal
| Configuration items | Description |
|---|---|
| Texture | You can add a local texture file here to adjust the material texture. |
| UV Scale | Scale down or scale up the existing UV coordinates. |
| UV Offset | Move existing UV coordinates. |
| UV Set | When there are multiple UV textures in the material, it is used to quickly switch UV textures. |
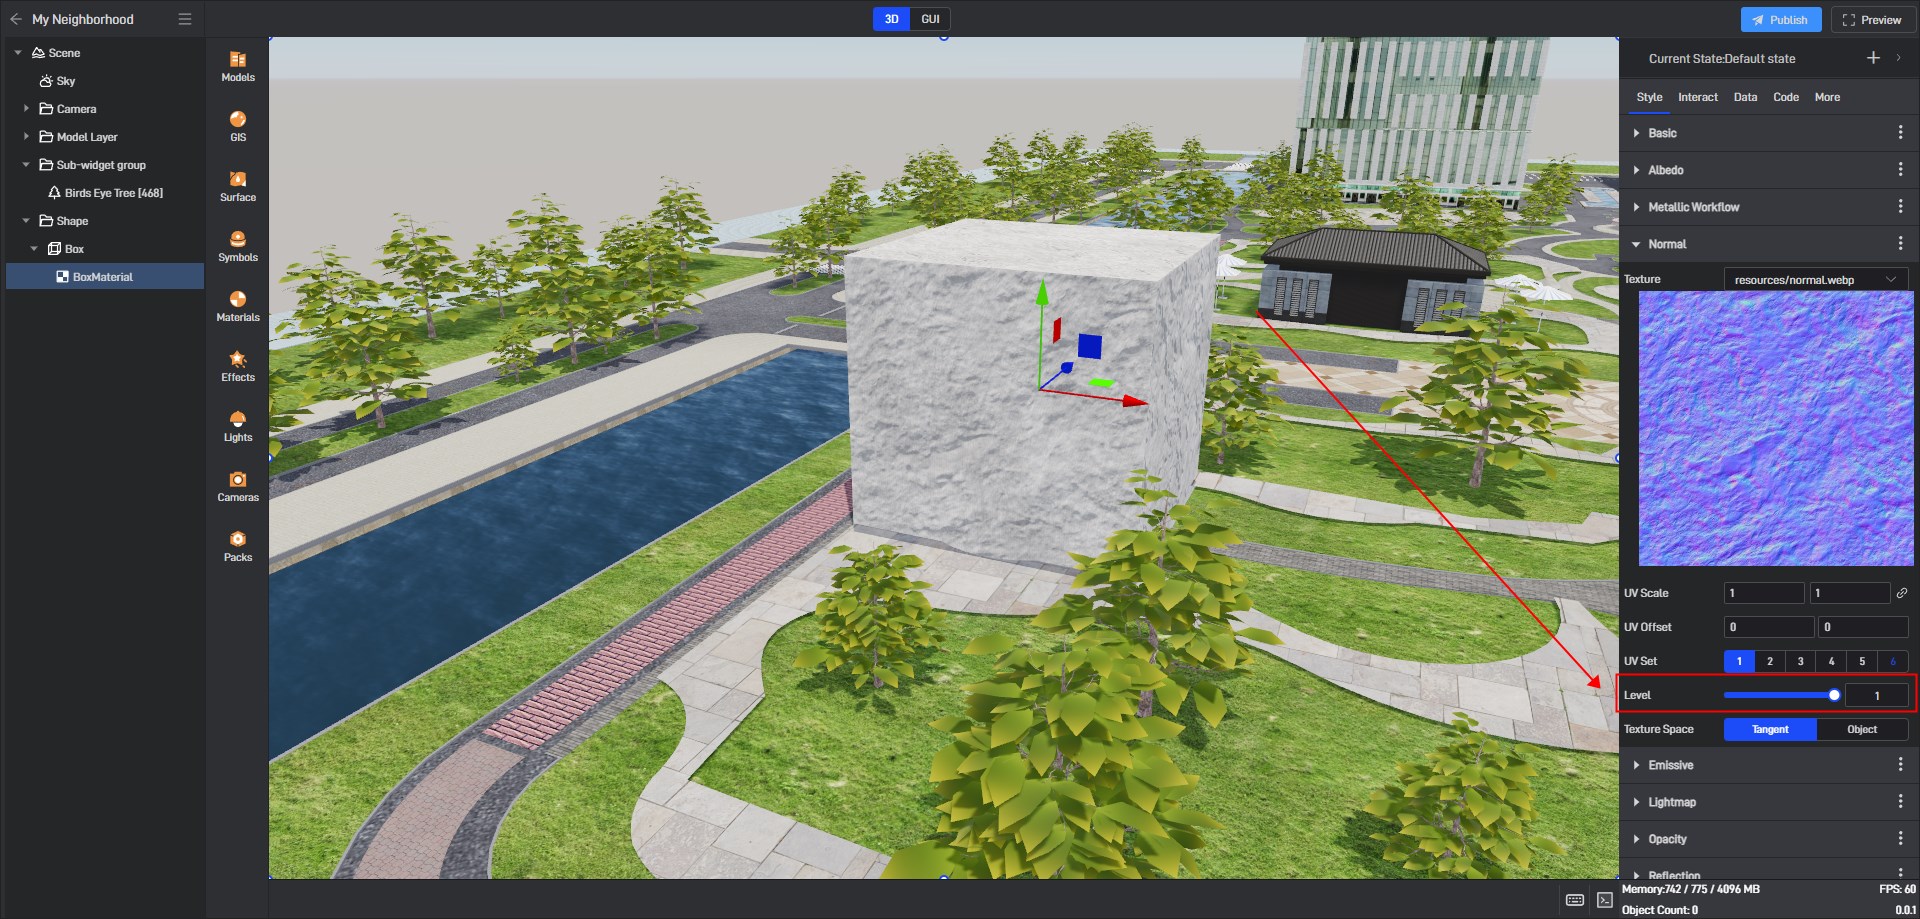
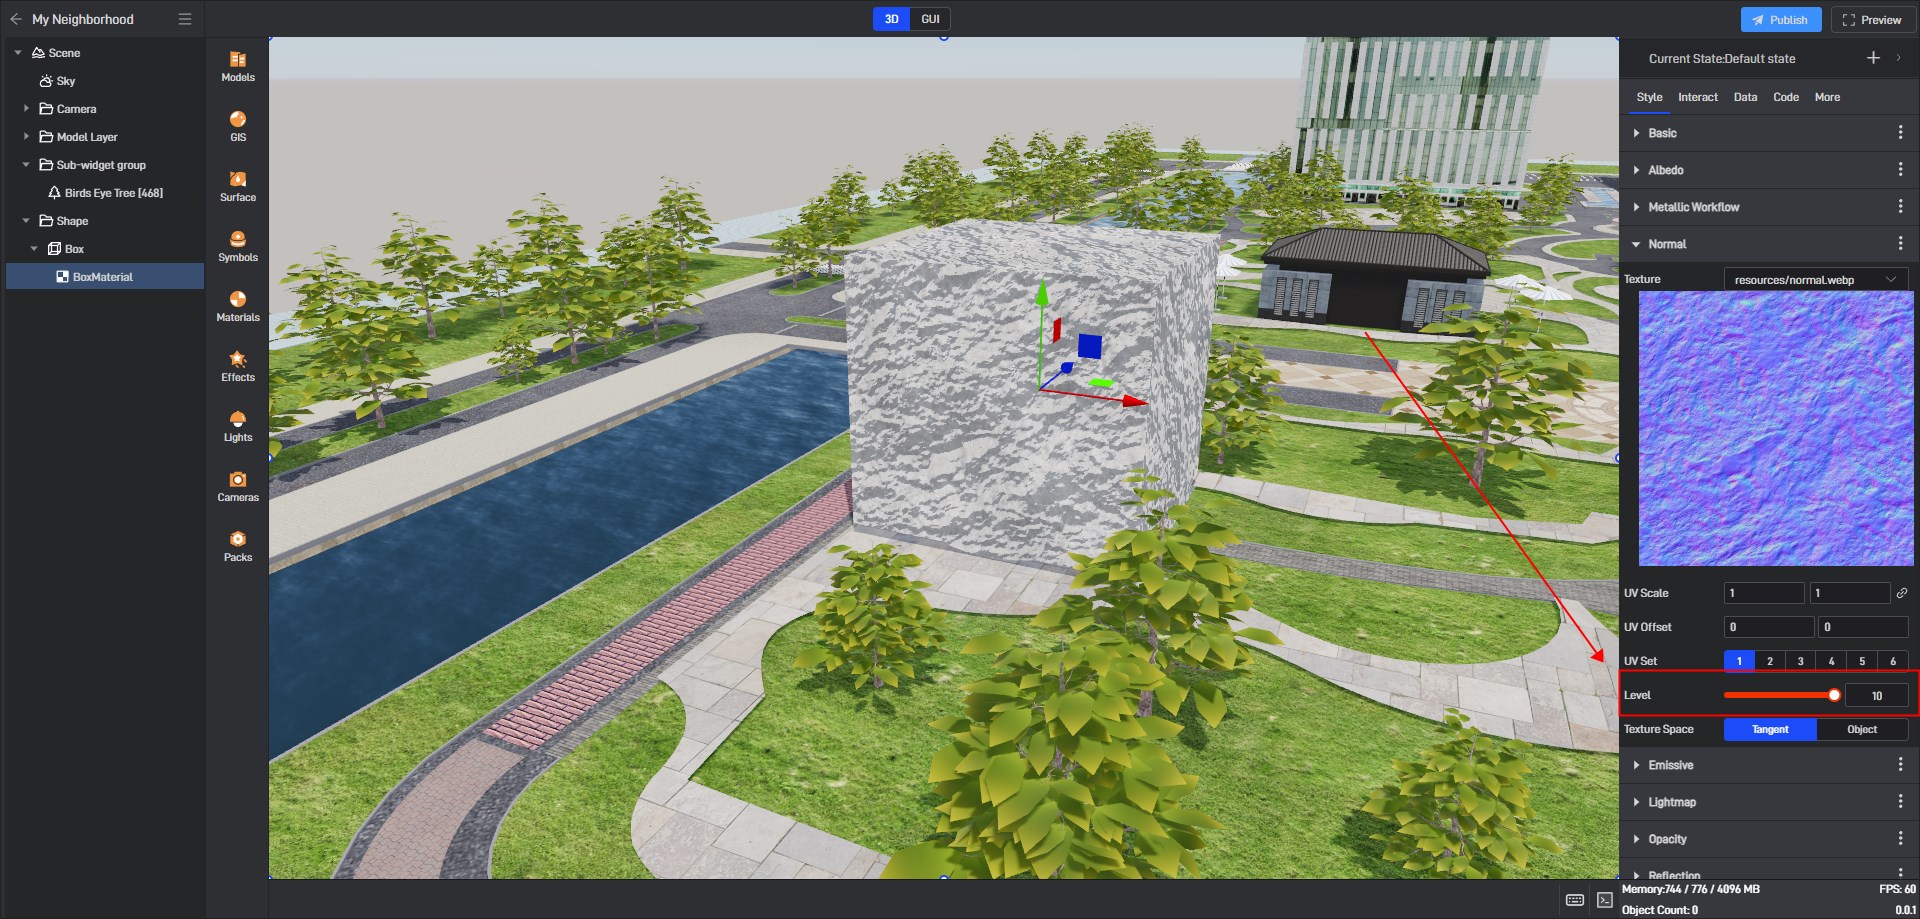
| Level | Increasing the strength of the normals can make the surface normals more prominent and the details more obvious, thus enhancing the visual effect of the material. |
| Space | Select Normal Space or Object Space to determine which coordinate system the normal information is based on. Normal Space is a local coordinate system relative to the surface normal of the model, while Object Space is a coordinate system relative to the entire model object. |
Material effect when normal level is 1:
Material effect when normal level is 10:
5. Emissive
| Configuration items | Description |
|---|---|
| Color | Adjust the glow color as needed for the effect. |
| Emissive at Night | Once turned on, the glow effect only takes effect at night. |
| Texture | You can add a local texture file here to adjust the glow effect. |
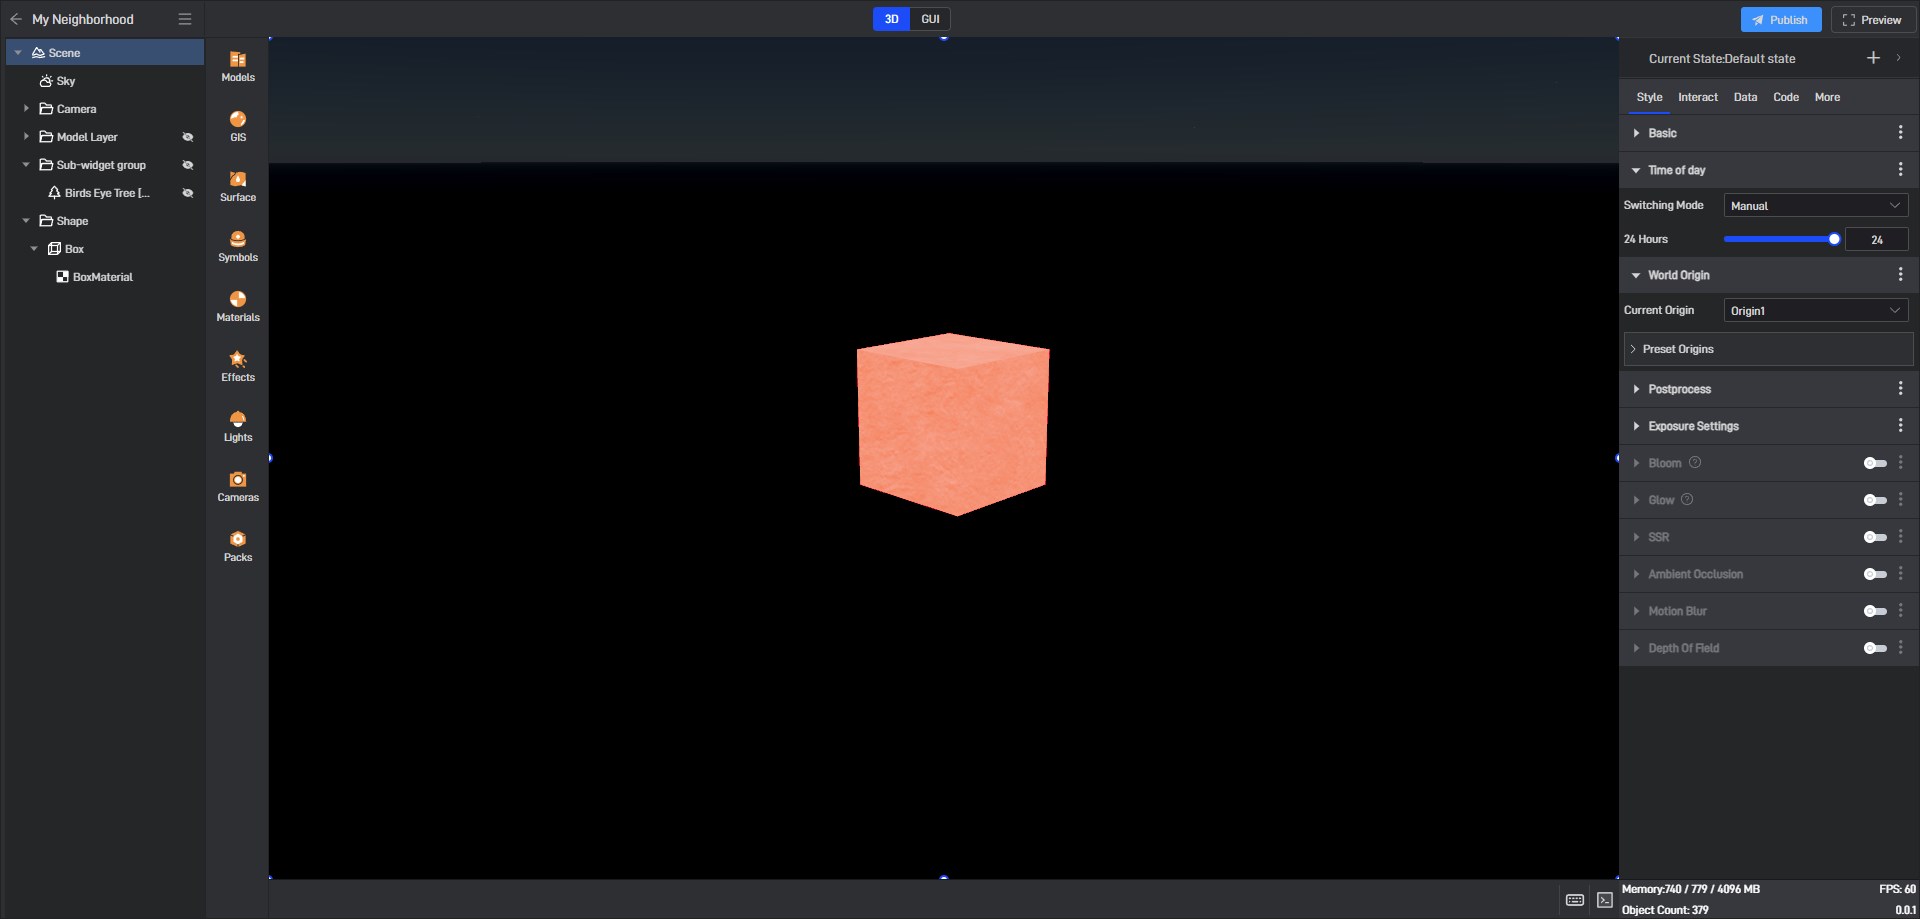
| Glow Intensity | Adjust the light intensity. The higher the intensity, the brighter the light. |
Material glow effect:
6. Light
| Configuration items | Description |
|---|---|
| Texture | You can add a local texture file here to adjust the light effect. |
| Light at Night | When turned on, the lighting effect only takes effect at night. |
7. Opacity
| Configuration items | Description |
|---|---|
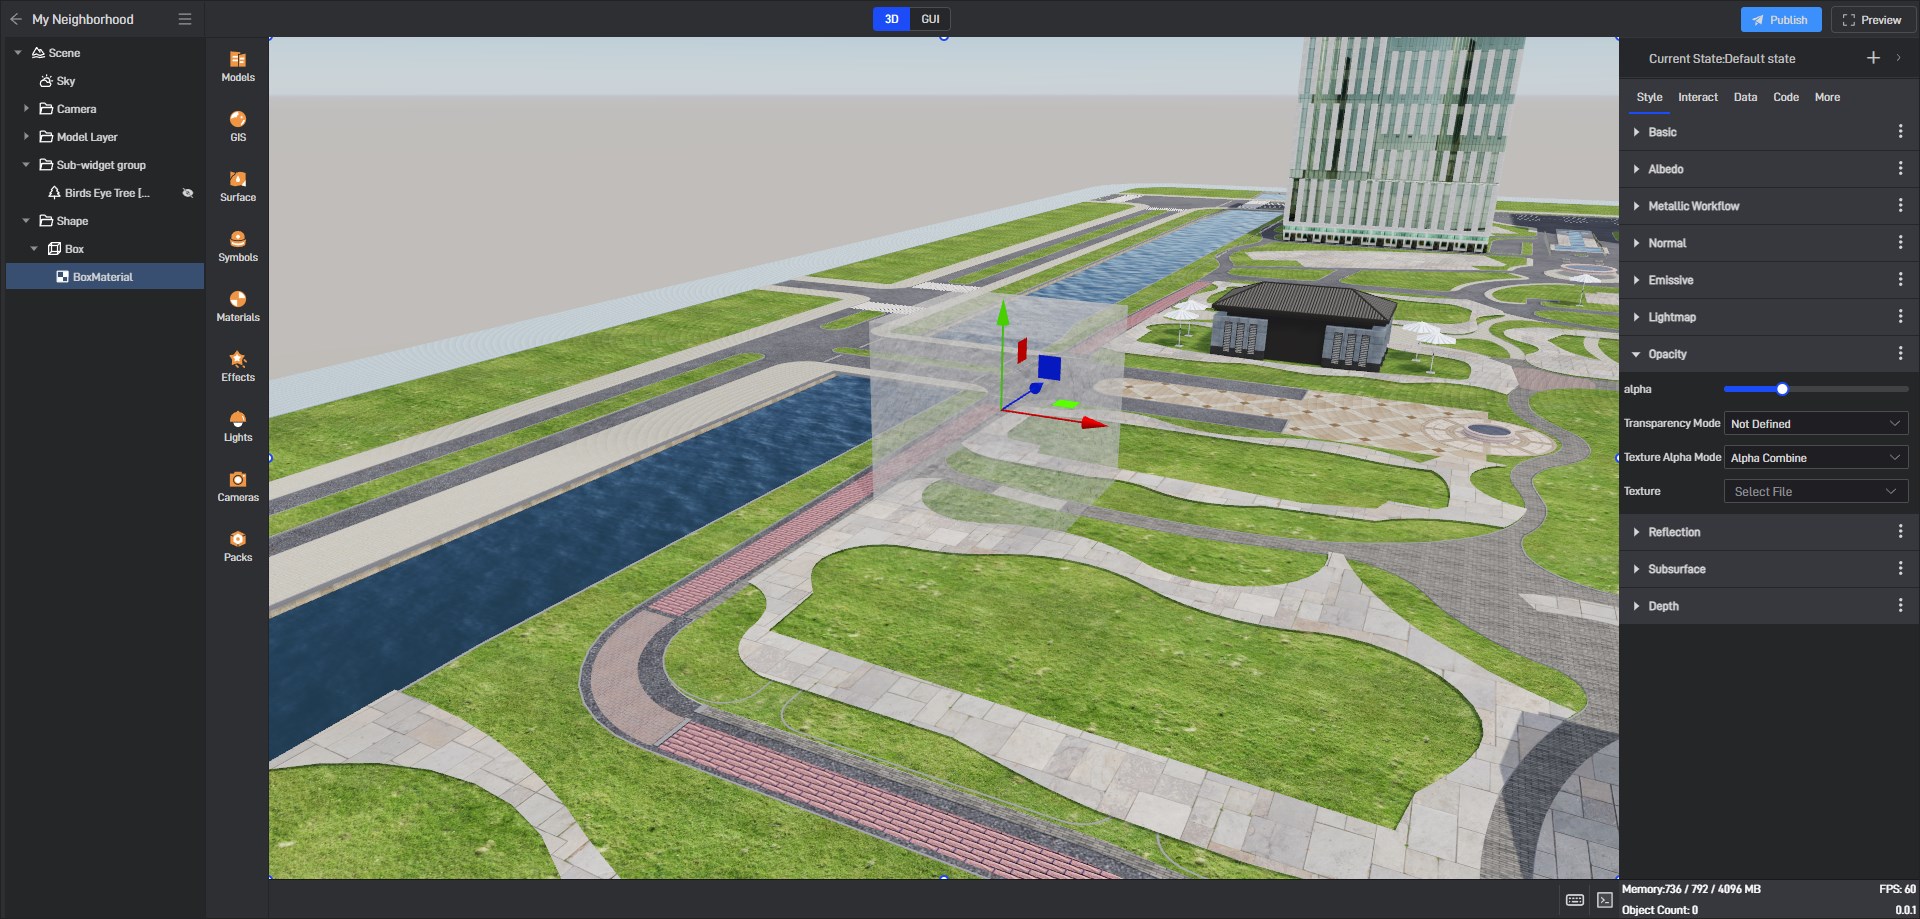
| alpha | Adjust the transparency of the material. |
| Transparent Mode | Adjust the material transparency mode, which is divided into “Opaque”, “Alpha Test”, “Alpha Bland”, and “Alpha Test and Blend”. |
| Texture Alpha Mode | Adjust the material alpha mode, which is divided into “Add”, “Combine”, “Subtract”, “Multiply”, “Maximized”, “One One”, “Premultiplied”, “Premultiplied-Porterduff”, “Interpolate”, and “Screen Mode”. |
| Texture | You can add a local texture file here to adjust transparency effect. |
Material Transparency Effect:
8. Reflection
| Configuration items | Description |
|---|---|
| SSR | Usually used on water, metal or glass materials, the material can reflect the surrounding environment and other objects, enhancing the realism of the rendering. Note that you must first turn on screen space reflections on the scene for it to take effect. |
| Color | Adjusts the color of reflected light. |
| Texture | You can add a local texture file here to adjust reflection effect. |
| Align Normals | When turned on, the reflected light is more consistent with the details described by the normal texture, making the reflection more closely fit the microstructure of the surface and presenting a more realistic effect. |
| F0 Factor | Adjusts the reflectivity of the material at normal incidence angles. |
| F0 Color | Adjusts the reflection color of the material at normal incidence angles. |
| F0 Texture | You can add a local texture file here to adjust F0 factor. |
9. Subsurface
| Configuration items | Description |
|---|---|
| Color | Adjusts the color of subsurface scattering in the material. |
10. Depth
| Configuration items | Description |
|---|---|
| Z Offset Factor | When two or more surfaces are very close and the depth buffer is not accurate enough, depth conflicts will occur, causing the rendering results to appear jittery or flickering. Adjusting the depth offset can avoid this phenomenon. |
| Z Offset Unit | Adjusts the size of the units used to fine-tune the depth value in the depth offset, which represents the increment or step size used when fine-tuning the depth value in the depth buffer. |
| Depth Function | Selects the function used to control the behavior of depth testing in graphics rendering. |
| Depth Write | Select “Default”, “Disable” and “Force”.If depth writing is turned off, the depth value of the fragment will not affect the depth value of the corresponding pixel position in the depth buffer; if depth writing is forced, the depth value of the fragment will be written to the depth buffer. |