Scene
The settings interface of Wings Engine’s scene editor is divided into four main categories: Basic Settings, Time of Day, Latitude and Longitude Origin, and Post-processing. The Post-processing category has several subcategories, which will be introduced one by one below:
1. Basic Settings
| ** Configuration item ** | Describe |
|---|---|
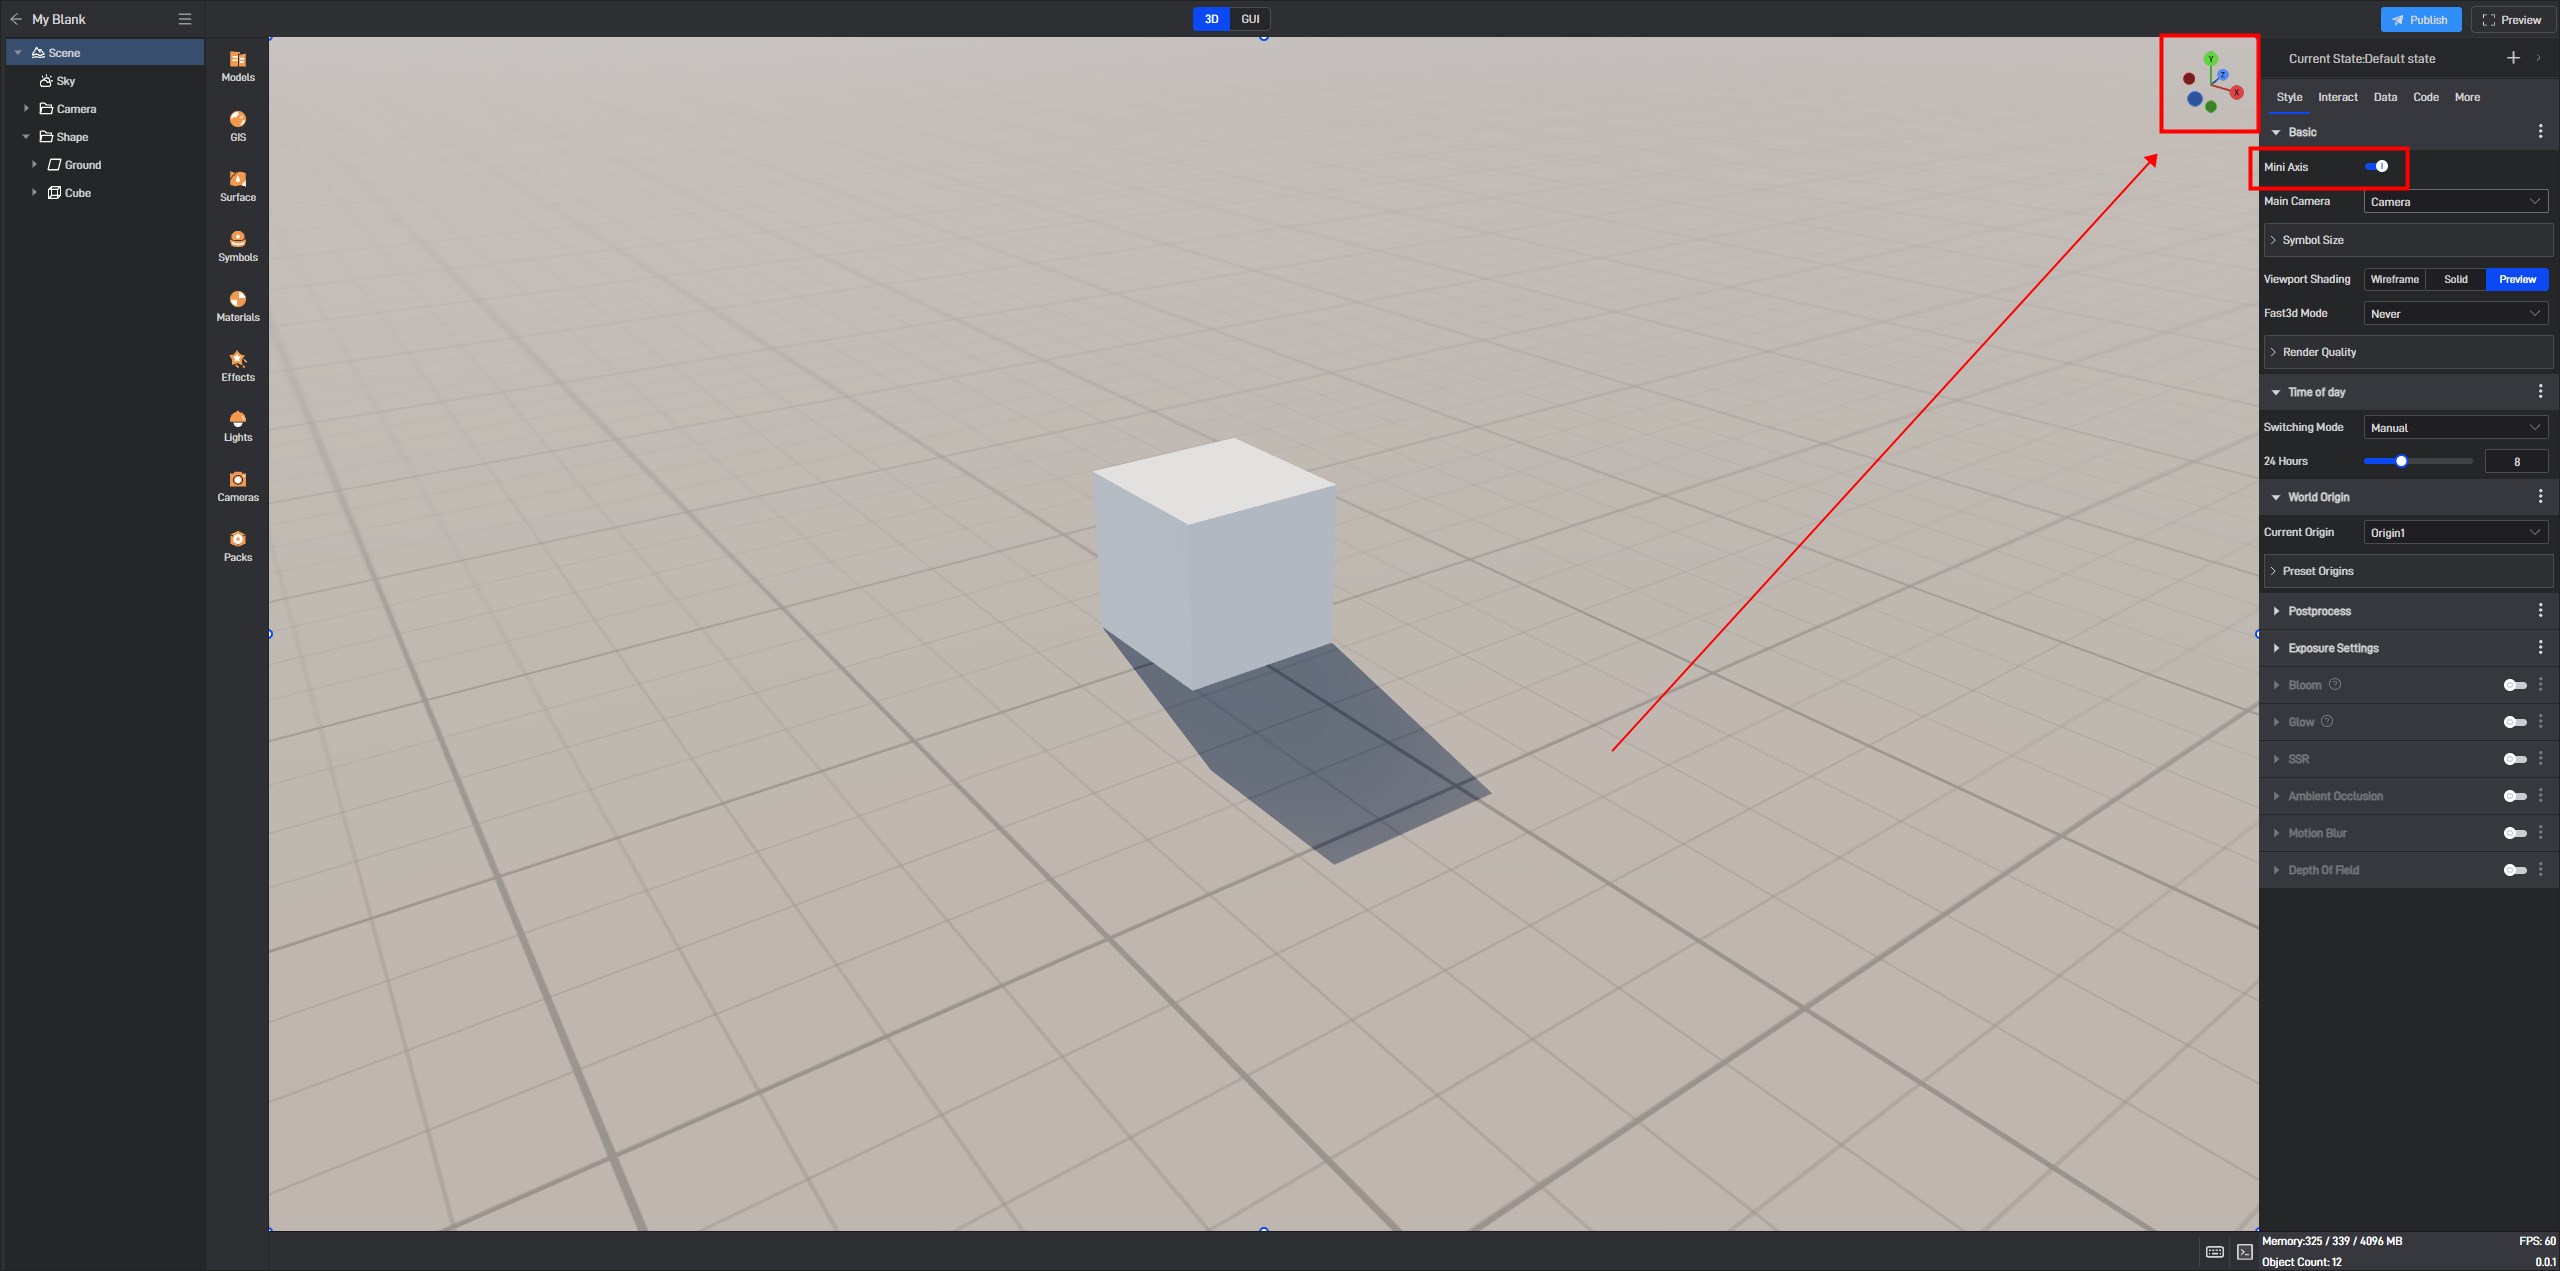
| Display Small Coordinates | Toggle whether to display the small XYZ coordinate axis in the top right corner of the scene. |
| Main Camera | The camera currently in use, determining which camera is rendering the scene. |
| Anti-Aliasing | The current anti-aliasing algorithm in use; MSAA is recommended. |
| Sample Count (MSAA) | Determines the quality of MSAA anti-aliasing, with 8 being the highest. If performance is an issue, consider reducing it to 4. |
| Output Resolution | The proportion of the output resolution to the full screen resolution. The default is 1, with lower values resulting in a blurrier image. |
Location of the small coordinates:
2. Time of Day
The Time of Day feature supports three modes: Manual Setting, Time Elapse, and System Time. The mode will synchronize with the sun’s height, affecting the sun’s angle in the sky and the various properties of the dynamic sky color, among other aspects.
| ** Configuration item ** | Describe | ||
|---|---|---|---|
| Time of Day Mode | ** Manual Setting**: Set a fixed time of day. | ** Time Elapse**: Time progresses from day to night and cycles continuously. You can set the speed of this elapse. | ** System Time**: The current time in Wings Engine is determined by the current computer or server time. |
| Time of Day (24H) | In Manual Setting mode, specify the current time in Wings Engine in a 24-hour format, such as 18.5 representing 6:30 PM. | ||
| Day Duration (Minutes) | In Time Elapse mode, set the real-world duration for a full day cycle in Wings Engine. | ||
| Time Zone | In System Time mode, the default is the time zone set on the current operating system, but it can be modified to other time zones. |
It’s important to note that the Time of Day settings also affect model and material options, such as those that only emit light at night.

3. Origin Latitude and Longitude
| ** Configuration item ** | Describe |
|---|---|
| Origin Position | The point in the Wings Engine with coordinates (0,0,0) corresponds to the latitude, longitude, and altitude coordinates. This option is mainly used for the correspondence between the GIS system and model positions, and it is also used for the correspondence of latitude and longitude positions in mapping. After setting the corresponding position, it is equivalent to aligning the coordinate system in the model with the local northeast sky coordinate system at the corresponding point in the latitude and longitude coordinate system. |
| Position Name | The preset name of the position, you can name it according to your preference. |
| Latitude, Longitude, and Altitude | The corresponding latitude, longitude, and altitude coordinates of the position. |
4. Postprocessing
Postprocessing is divided into two parts: a set of simple post effects and some advanced effects.
4.1. Simple Postprocessing
These postprocessing effects are all within the postprocessing options group:
| ** Configuration item ** | Describe |
|---|---|
| Contrast | The greater the contrast, the stronger the light and dark contrast. |
| Saturation | The greater the saturation, the more vivid the colors. |
| Hue | Adjust the colors of the current screen (note that this option only takes effect when the hue intensity is not 0). |
| Hue Intensity | Determines the extent to which the above hue option affects the screen, with 0 meaning no effect from the hue. |
| Brightness | The brightness of the current screen, it is not recommended to directly modify this option, prioritize modifying the exposure value. |
| Tone Mapping | The mapping algorithm from HDR to LDR, ACES is recommended. |
4.1.1 Vignetting
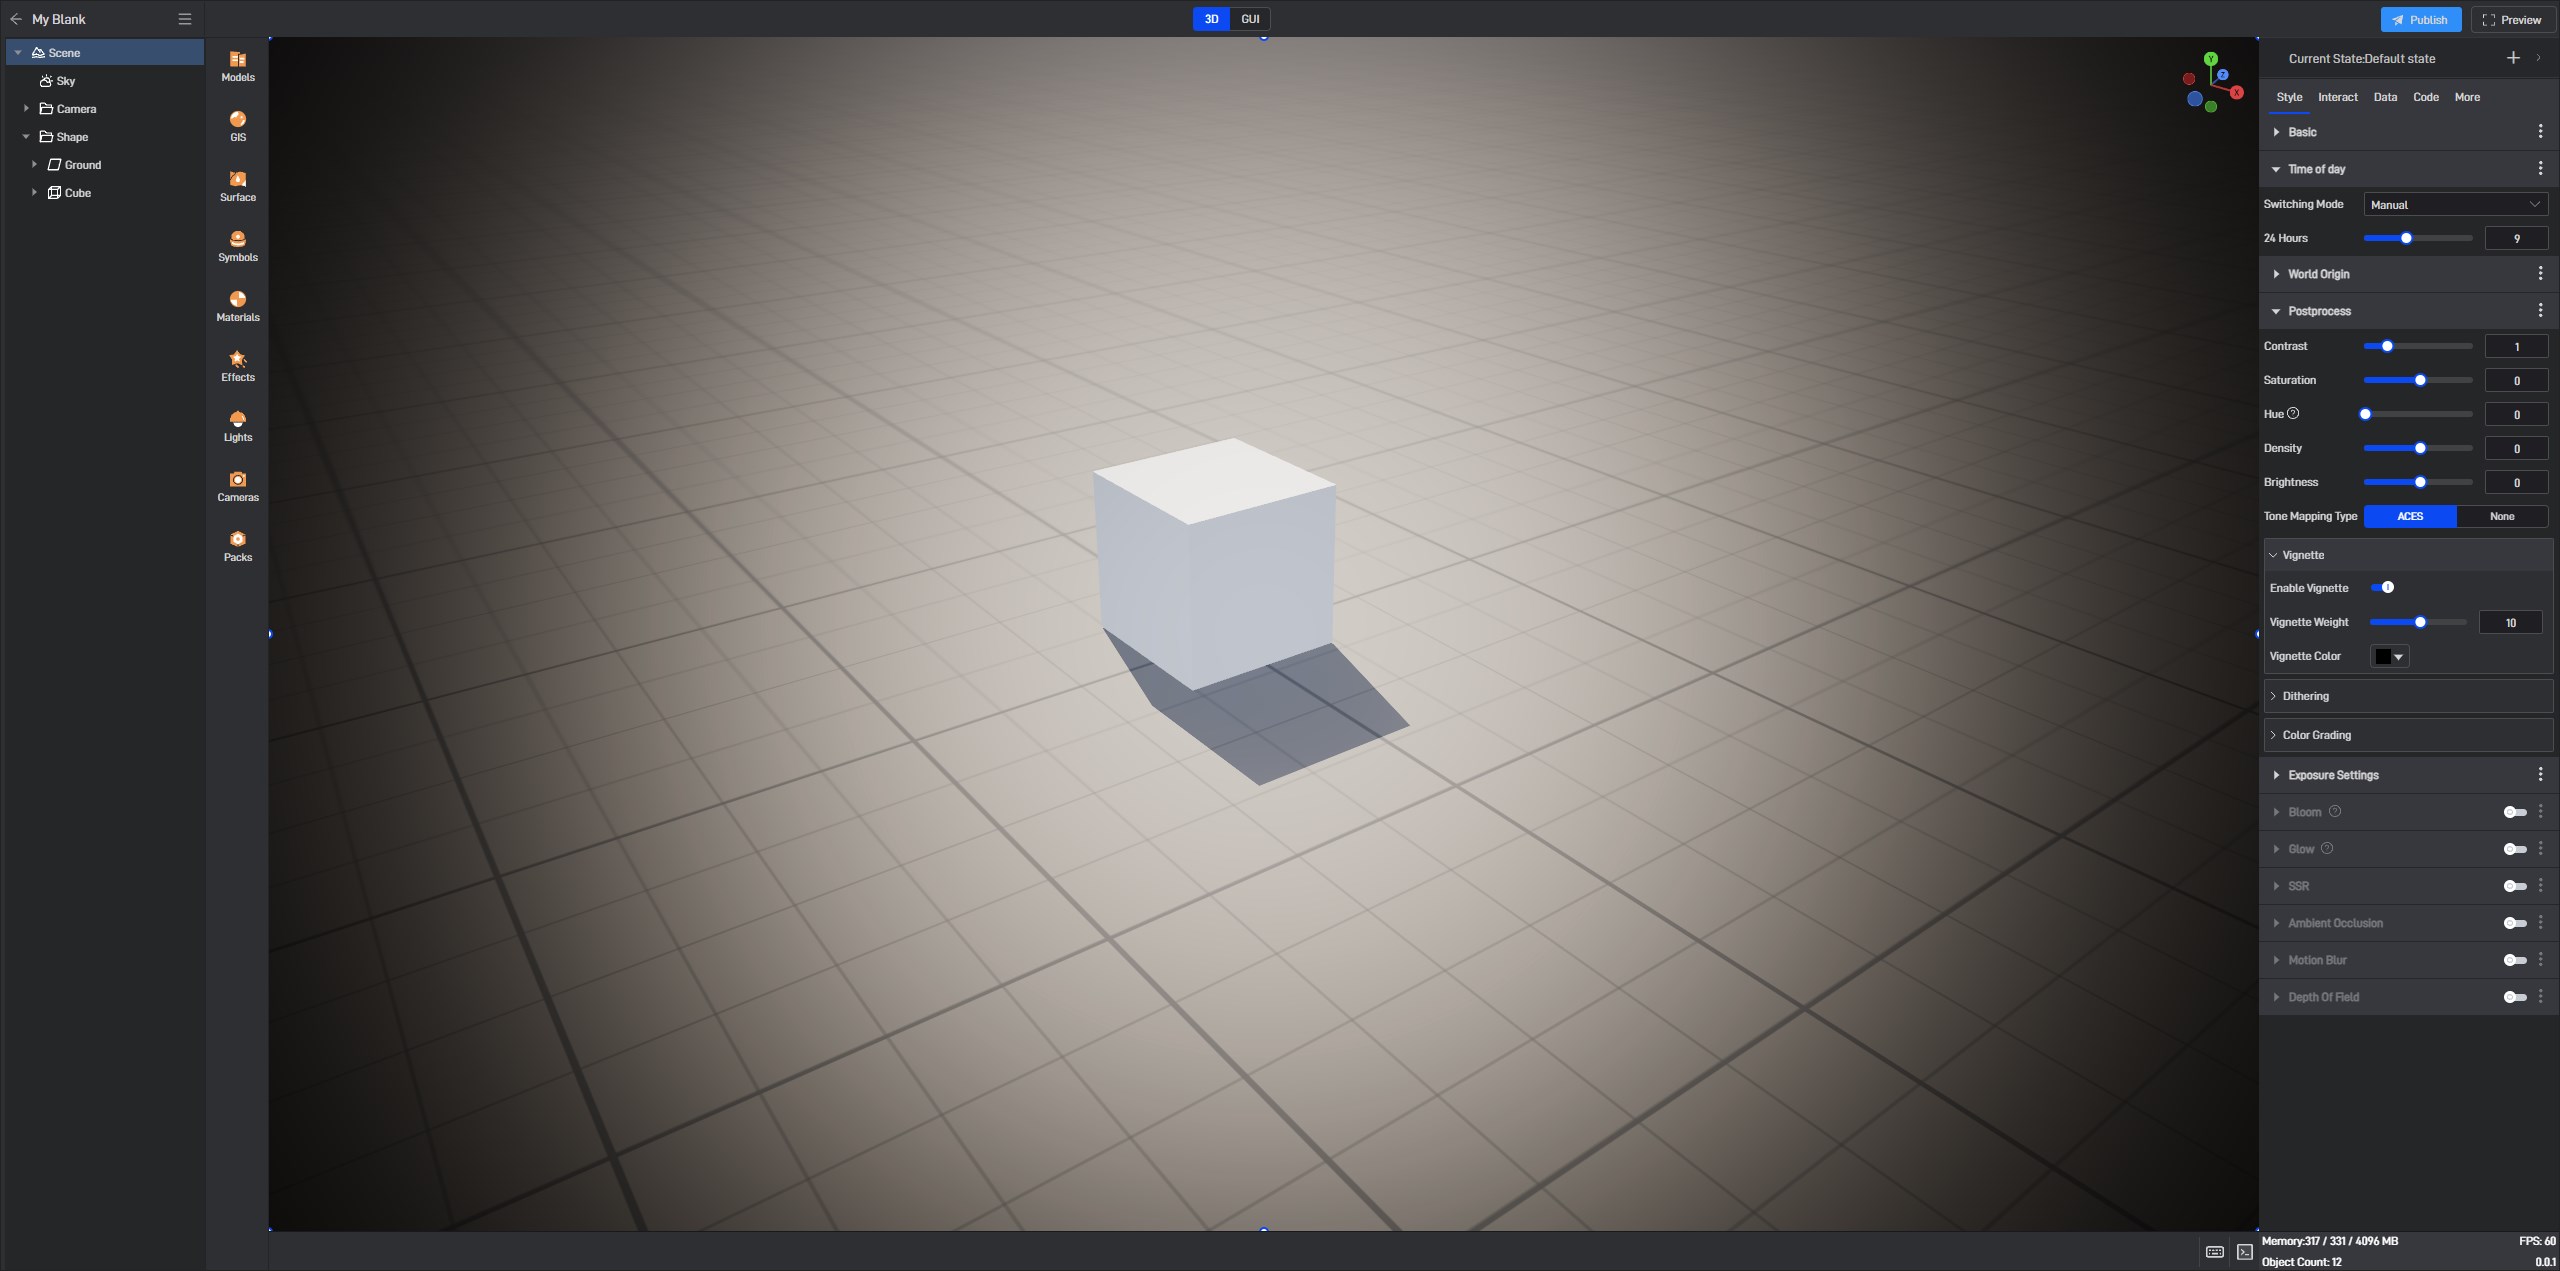
Often, we want the edges of the 3D scene screen to be darker than the middle part, which can enhance the screen effect and also make it easier to overlay chart elements on the sides of the screen.
Below is the effect after enabling vignetting:
4.1.2 Dithering
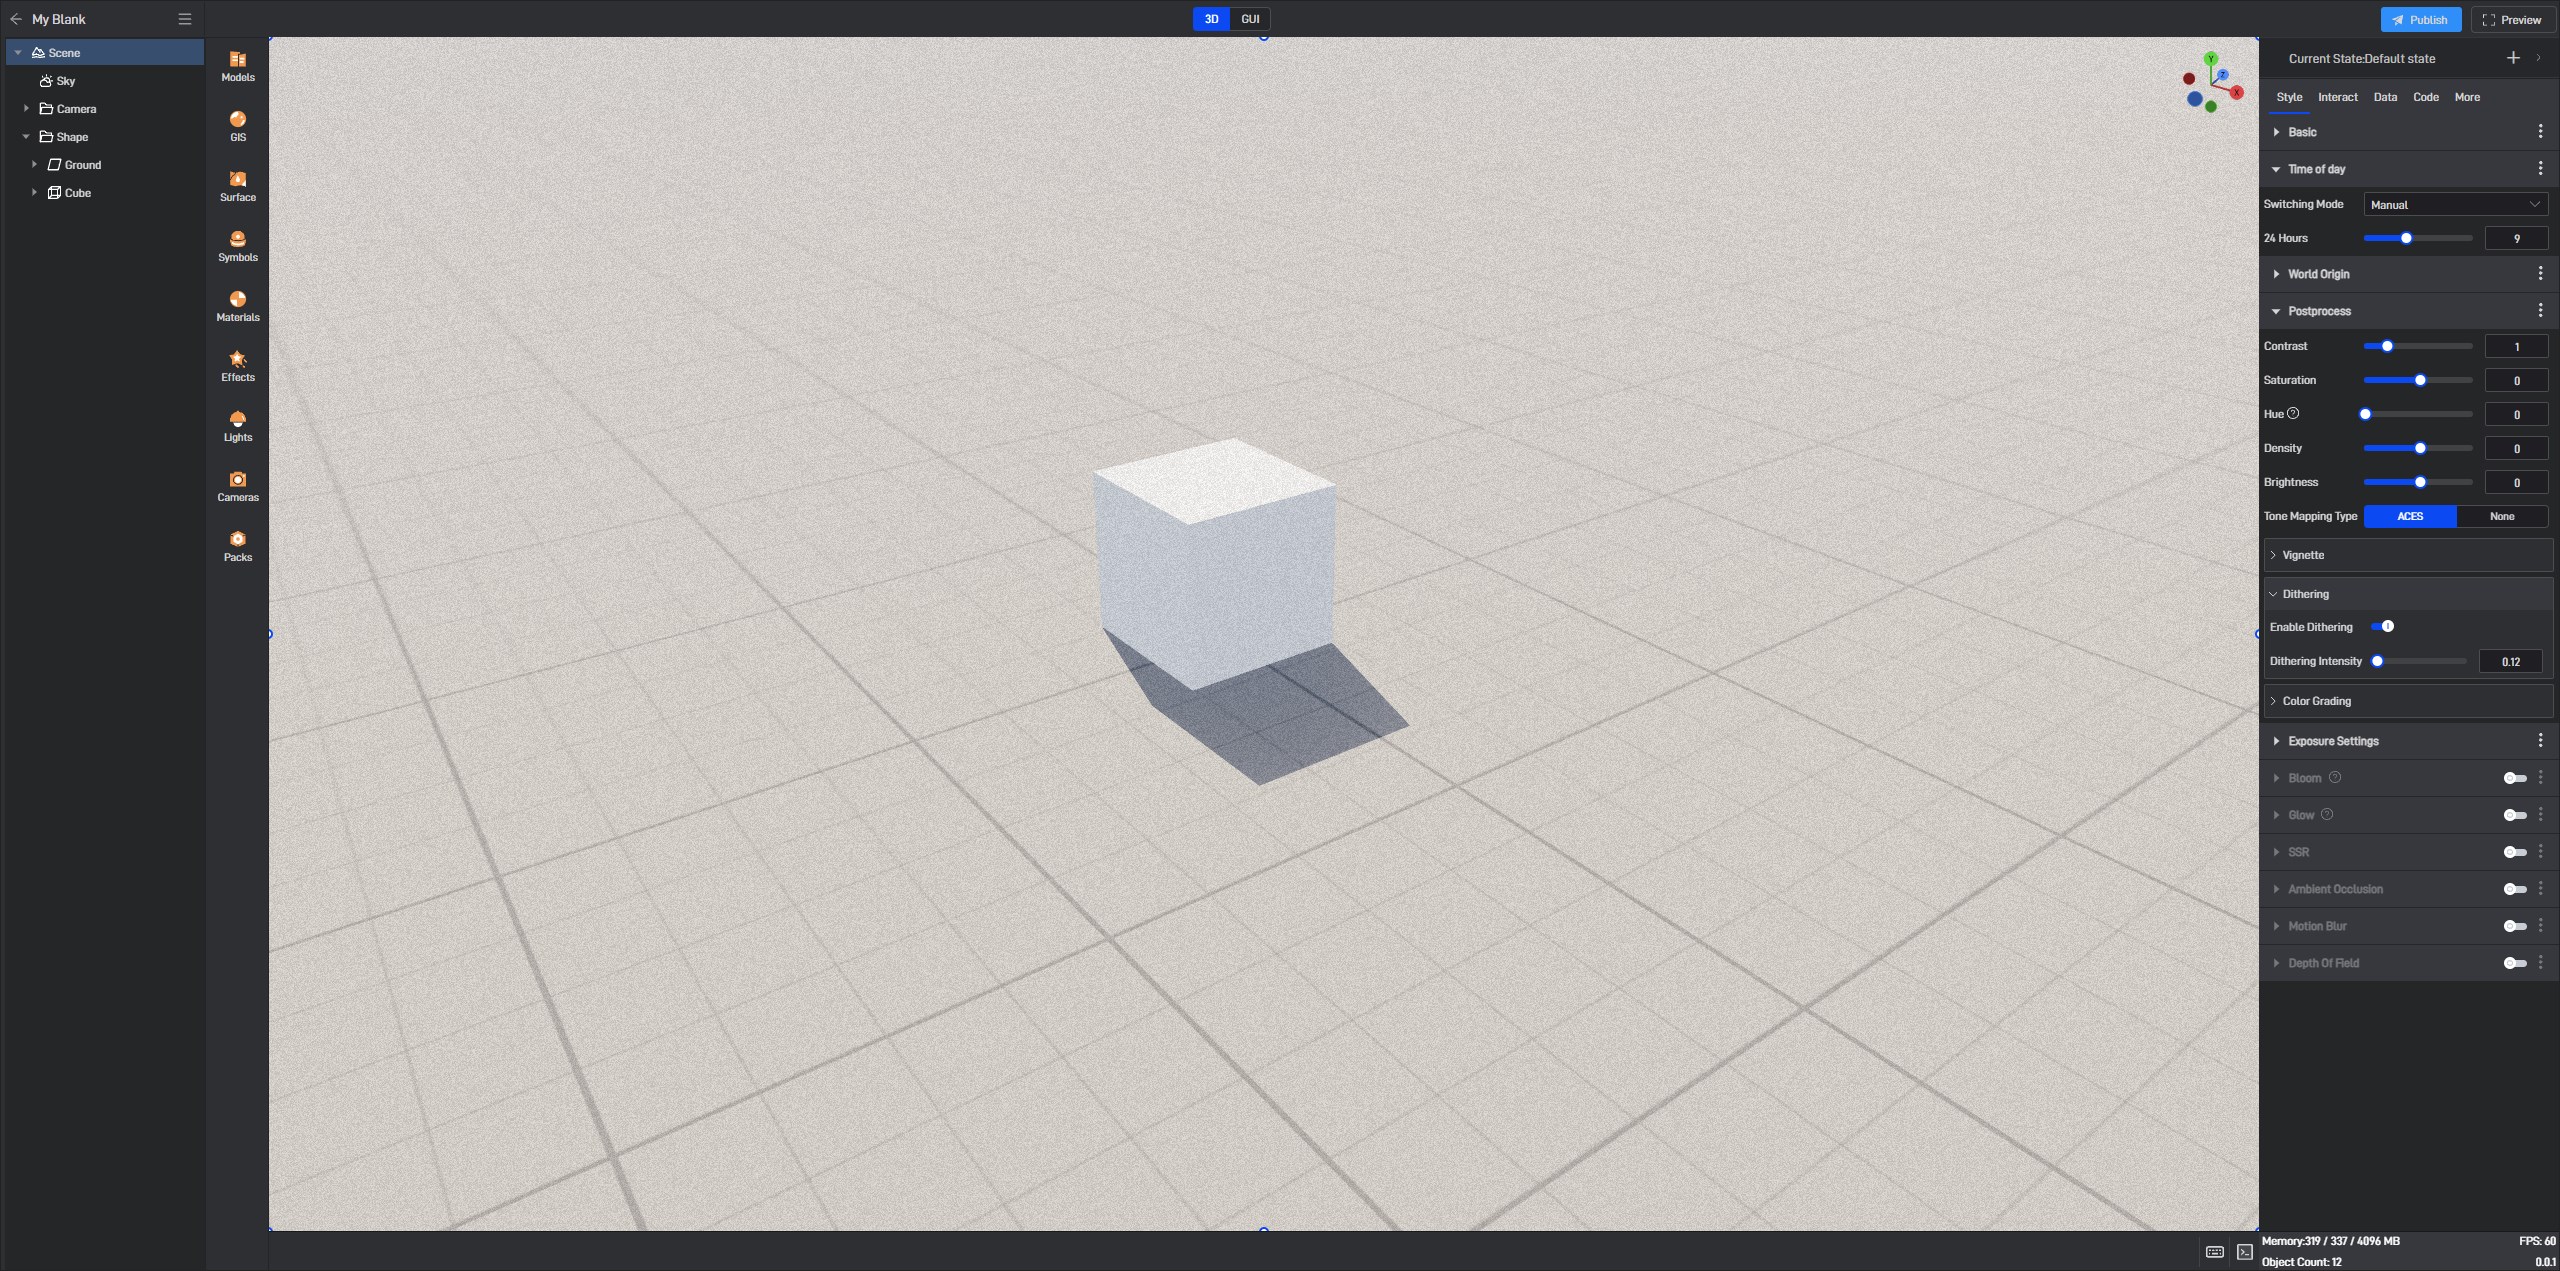
Dithering can add a certain amount of noise to the screen to increase the texture of the image.
Below is the effect after enabling dithering:
4.1.3 Color Grading
Color grading is an advanced color processing technique that allows one-to-one replacement and adjustment of colors in the image. Currently, the color grading supports LUT query formats in 3dl and cube files.
4.2 Advanced Post-Processing
4.2.1 Exposure
In addition to manual settings, exposure also supports Auto Exposure, which is also known as Eye Adaptation. This simulates the dynamic adjustment of the overall screen exposure as the eye adapts to changes in lighting conditions.
When adjusting to Auto Exposure, it is generally necessary to set the sun intensity to around 10,000 and to adjust the environment map to the sky.
| ** Configuration item ** | Describe | ||
|---|---|---|---|
| Exposure Mode | Manual Setting: Directly set the current exposure value of the screen. | Basic Auto Exposure: Simulate the auto exposure curve through numerical values. This is the recommended option as it offers the best balance between quality and performance. | Histogram Auto Exposure: Calculate the auto exposure curve using a histogram. This option more accurately simulates the actual eye adaptation process but is more performance-intensive. |
| Exposure Value | In manual setting mode, this is the current exposure value of the screen. | ||
| Exposure Compensation | In basic auto exposure and histogram auto exposure modes, this is the manual adjustment value applied to the currently auto-calculated exposure value. This value will be added to the result of the automatic exposure calculation. | ||
| Acceleration | The speed of change for the accelerating part of auto exposure. Increase this parameter if a faster change is desired. | ||
| Deceleration | The speed of change for the decelerating part of auto exposure. Increase this parameter if a faster change is desired. | ||
| High Percentage | Pixels with brightness exceeding this percentage will not be included in the auto exposure calculation. | ||
| Low Percentage | Pixels with brightness below this percentage will not be included in the auto exposure calculation. |
The effect of auto exposure is shown in the following diagram:

Note that enabling auto exposure generally requires adjusting three settings simultaneously:
- Sky Component -> Sun Light Intensity: Set to 10,000
- Sky Component -> Environment Map: Set to Sky
- Scene Component -> Exposure Mode: Set to Basic Auto Exposure or Histogram Auto Exposure
Additionally, ensure that Sky -> Sky Affected by Sunlight is enabled (this option is enabled by default).
4.2.2 Bloom
Bloom is an effect where light overflows, sometimes referred to as glow. Common scenarios where we use bloom include the glow of luminous objects and the reflection of sunlight. As shown in the figure below:

| ** Configuration item ** | Describe |
|---|---|
| Bloom Intensity | The current strength of the bloom effect. |
| Bloom Clarity | The smaller the value, the blurrier the bloom effect, resulting in better performance. This value can be reduced to improve FPS, especially when rendering large dimensions. |
| Bloom Layers | Directly adjusts each step of the bloom post-processing algorithm, allowing for fine-tuned adjustments of bloom quality and reflective color effects. It is generally recommended not to modify this option. |
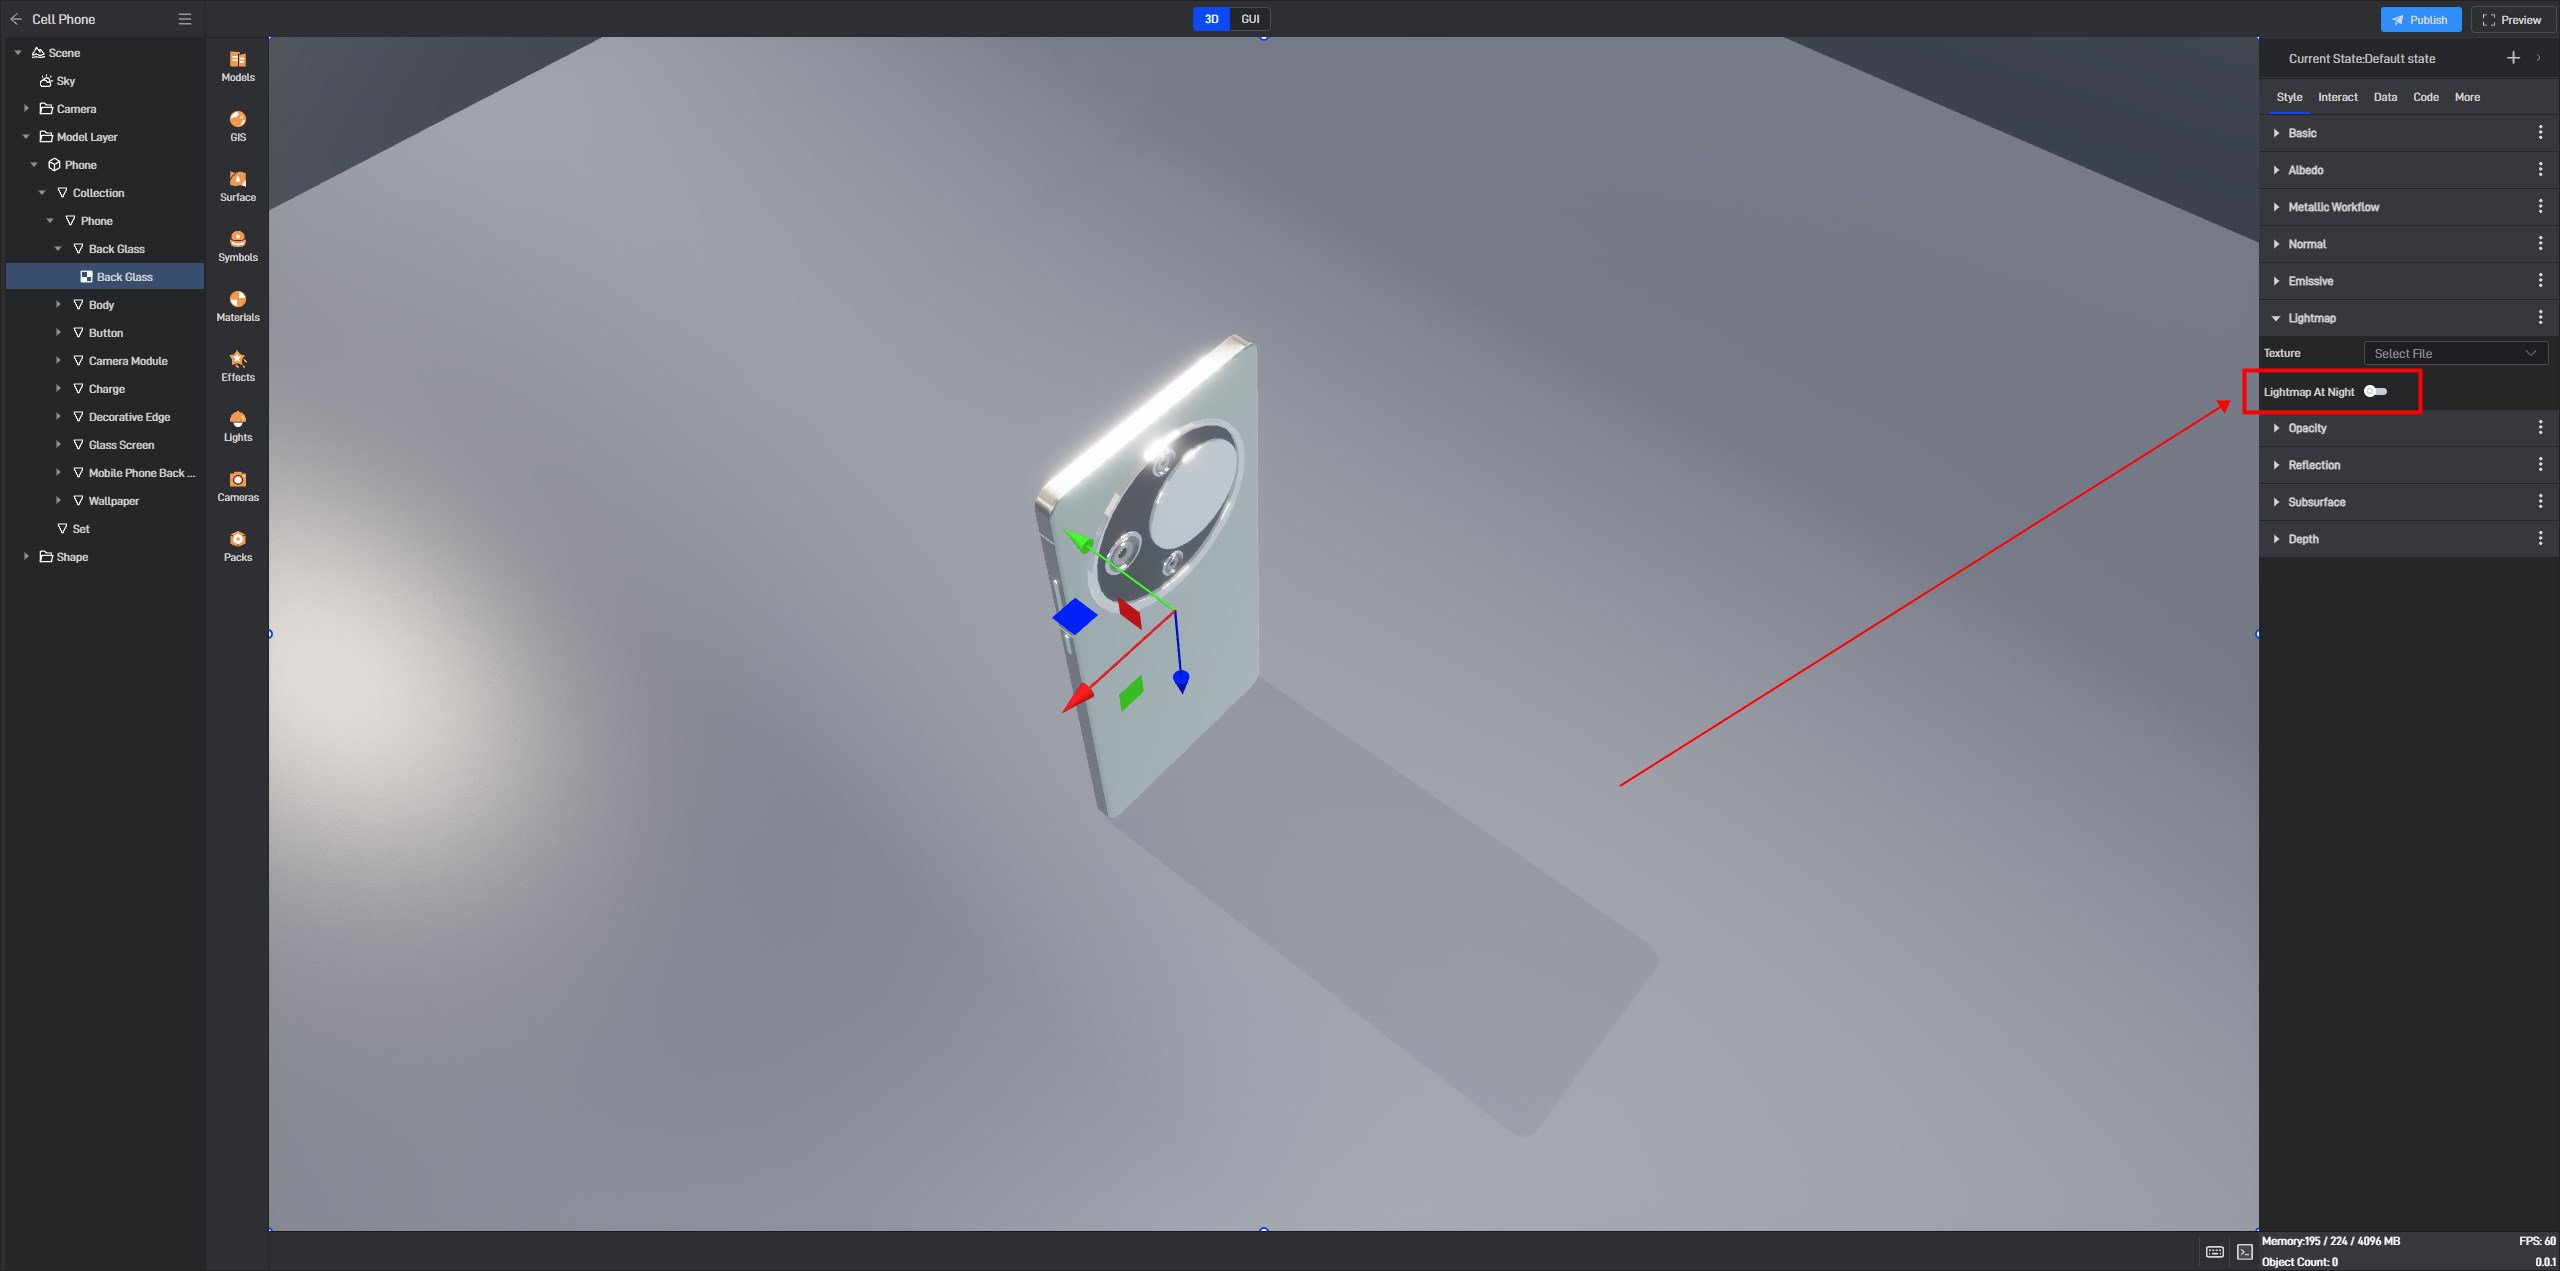
It is worth noting that after enabling bloom, the sunlight bloom effect is automatic, whereas the glow color and intensity of the material need to be manually adjusted. If automatic exposure is enabled, the glow intensity needs to be adjusted according to the sunlight intensity. Also, if you need a glowing effect during the day, you should uncheck the option for the material to only be effective at night. The specific settings are shown below:
4.2.3 Glow
| ** Configuration item ** | Describe |
|---|---|
| Glow Intensity | The current strength of the glow effect. |
| Glow Clarity | The smaller the value, the blurrier the glow effect, resulting in better performance. This value can be reduced to improve FPS, especially when rendering large dimensions. However, it should not be too low, as significant jitter may occur during camera rotation. |
Glow and bloom are essentially the same effect, but the glow here is implemented with a different algorithm. The glow algorithm is more performance-intensive but has an advantage: under the glow algorithm, the luminous core does not appear white, allowing more of the material’s original color to be retained. The effect is shown below:
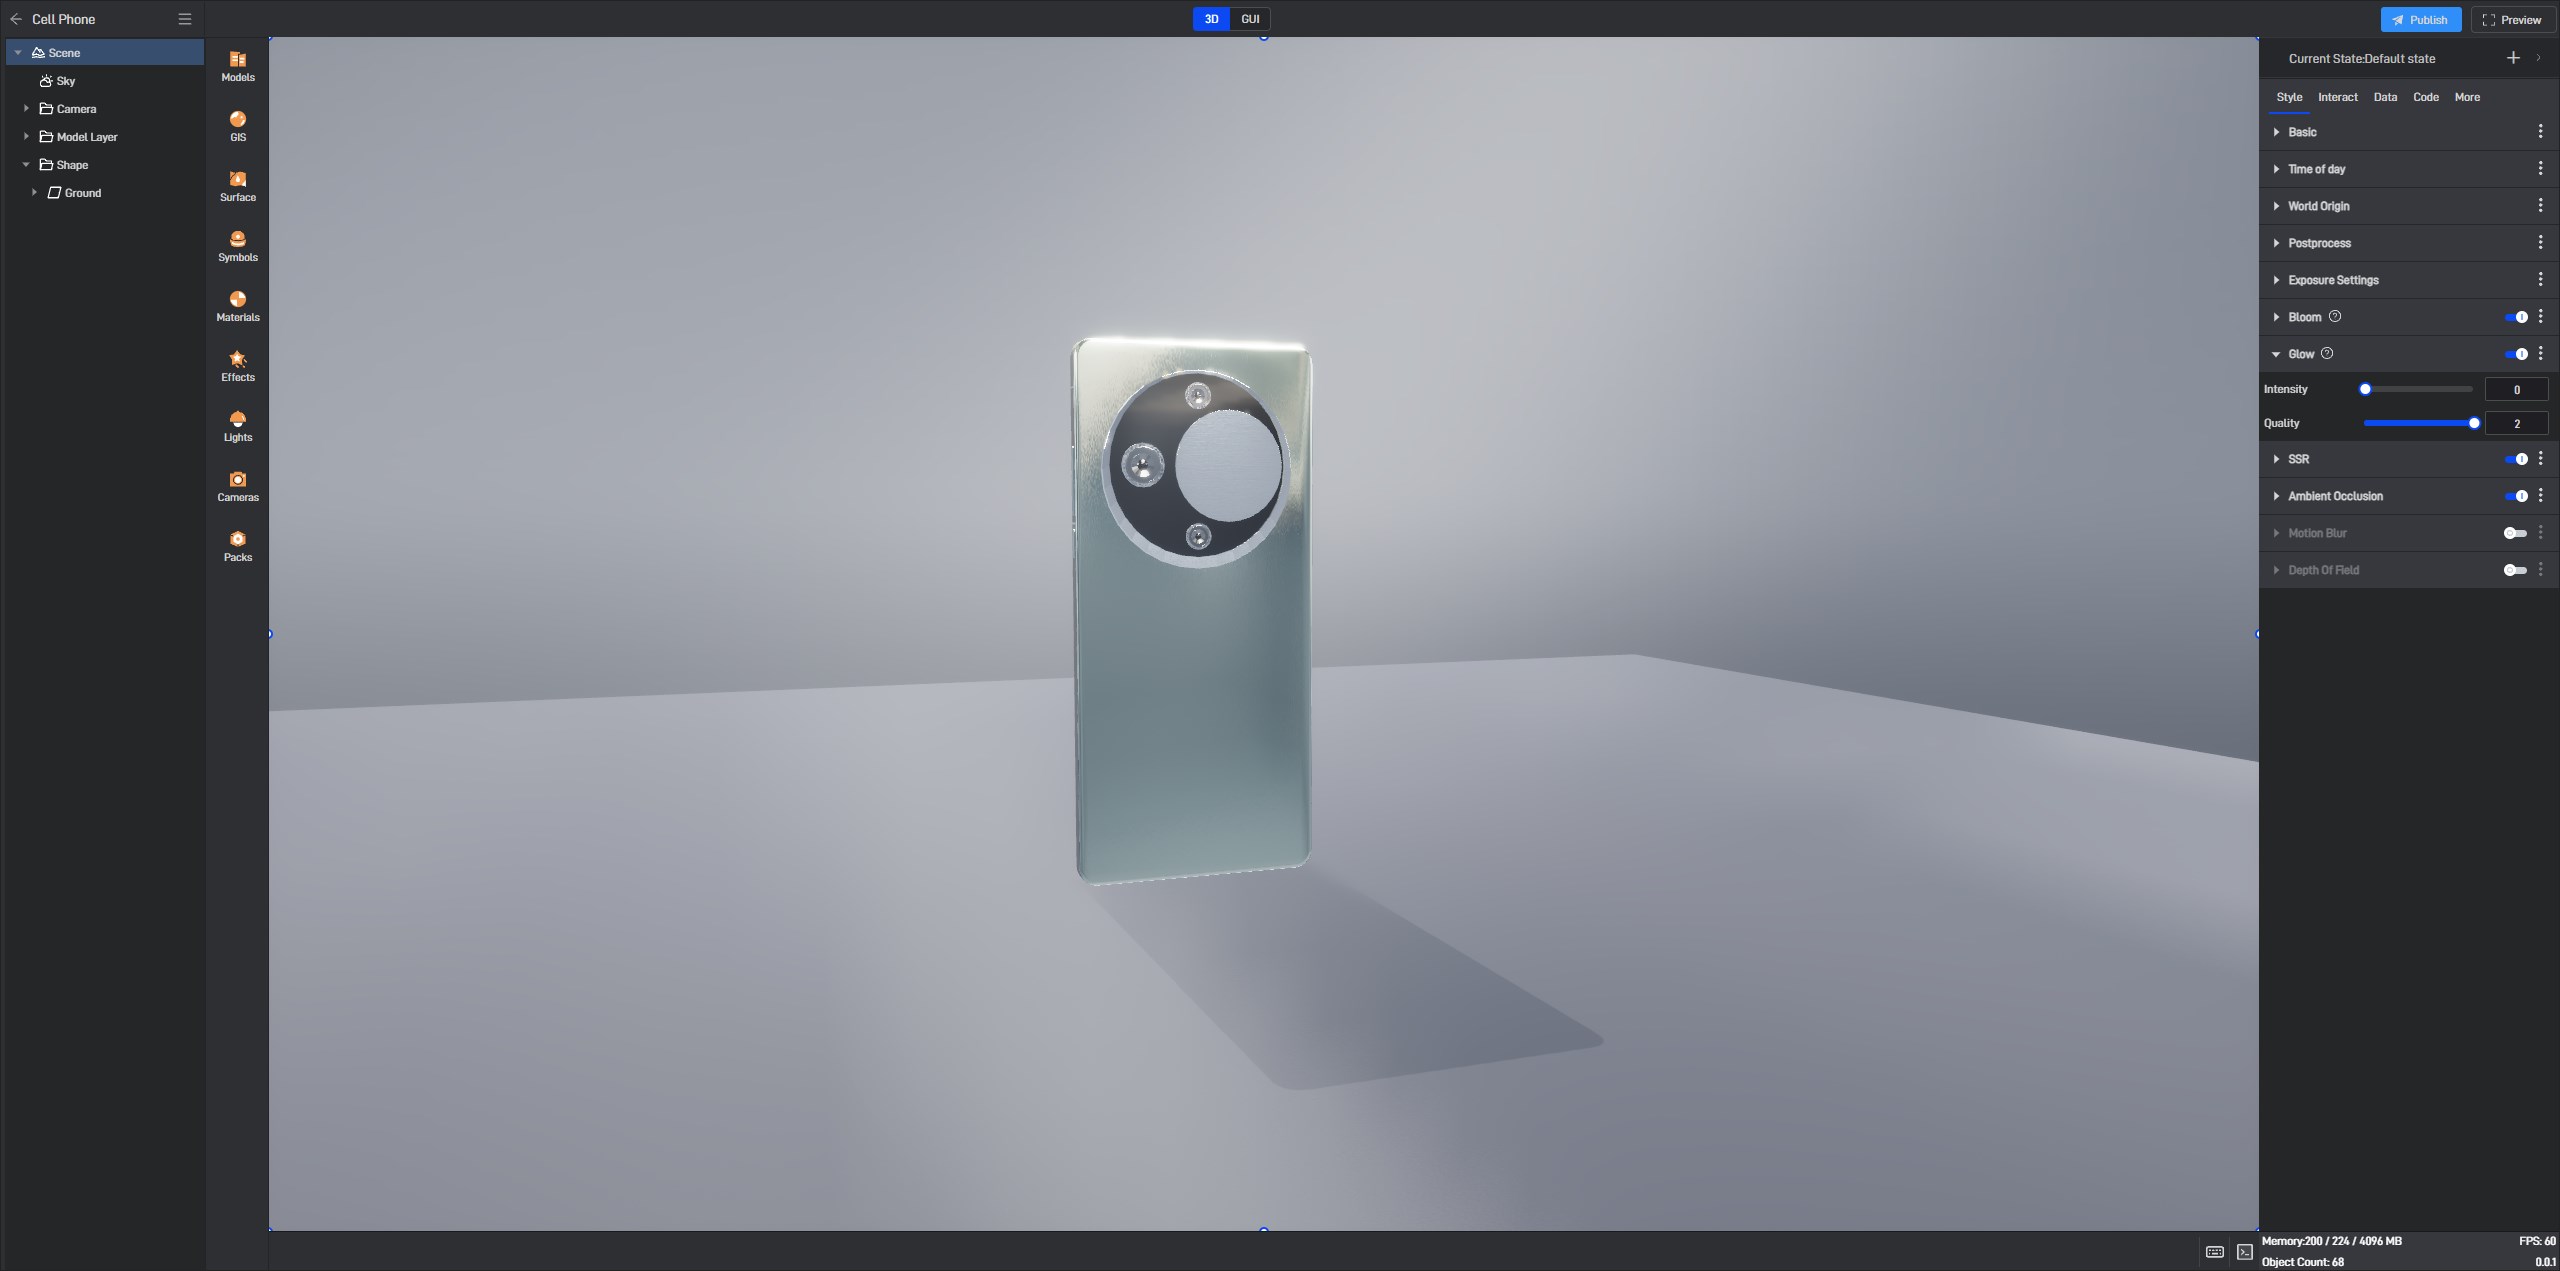
Therefore, the glow effect is more suitable for sci-fi scenes, as shown below:

4.2.4 Screen Space Reflection (SSR)
Screen space reflection can enhance the real-time reflection effect of the picture, greatly enhancing the realism of surfaces like water and glass. However, screen space reflection requires G-buffer to be enabled, which is quite performance-intensive and not recommended for low-end computers. The screen space reflection effect is shown below:
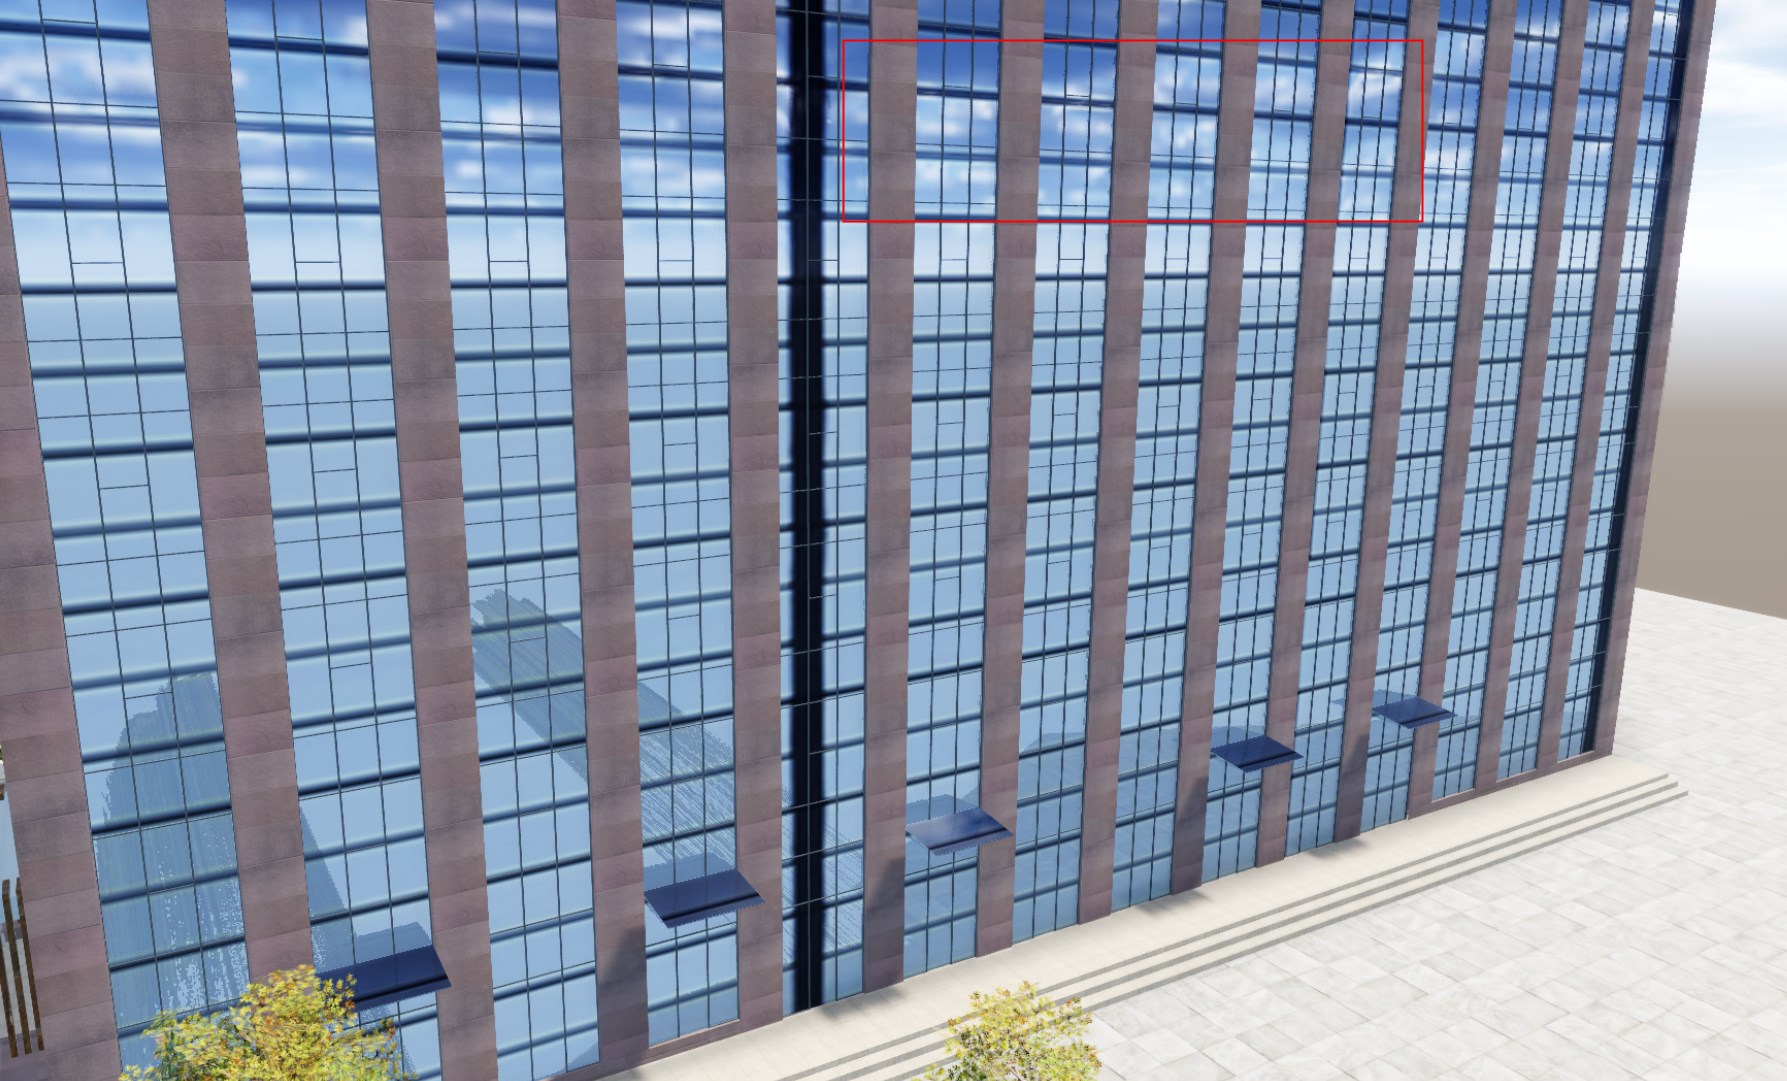
| ** Configuration item ** | Describe |
|---|---|
| Reflection Quality | The higher the quality, the clearer the reflection, but the higher the performance cost. |
| Maximum Step Count | The more steps, the more complete the reflection, but the higher the performance cost. |
| Reflection Intensity | The intensity of the reflected image. |
It is worth noting that after enabling screen space reflection, objects will not automatically start reflecting. The reflective material needs to be further adjusted to enable screen space reflection. Additionally, if the roughness is set to 1 or F0 is set to 0, the screen space reflection effect will not appear. The following material options all affect the screen space reflection effect:
4.2.5 Screen Space Ambient Occlusion (SSAO)
| ** Configuration item ** | Describe |
|---|---|
| Occlusion Mode | Currently provides two screen space ambient occlusion algorithms, including SSAO and GTAO. SSAO is a relatively simple AO algorithm. GTAO, short for Ground-Truth AO, calculates ambient occlusion and simulates GI effects by also considering some light bounces. |
| Intensity | Option under the SSAO algorithm; the higher the value, the darker the occluded parts. |
| Radius | Option under the SSAO algorithm; the higher the value, the larger the occluded area. |
| Sample Space Distance | Option under the GTAO algorithm; the higher the value, the farther objects in 3D space can cast shadows. |
| Sample Pixel Distance | Option under the GTAO algorithm; the higher the value, the farther objects in screen pixels can cast shadows. |
| Intensity | Option under the GTAO algorithm; the higher the value, the darker the occluded parts. |
| Step Count | Option under the GTAO algorithm; the higher the value, the higher the quality. |
4.2.6 Motion Blur
Currently, motion blur only supports camera-based motion blur. Motion blur can blur the image during rapid camera movements to simulate the effect of real shooting, essentially acting as temporal anti-aliasing. It is recommended to enable this when there are many camera animations, as shown below:
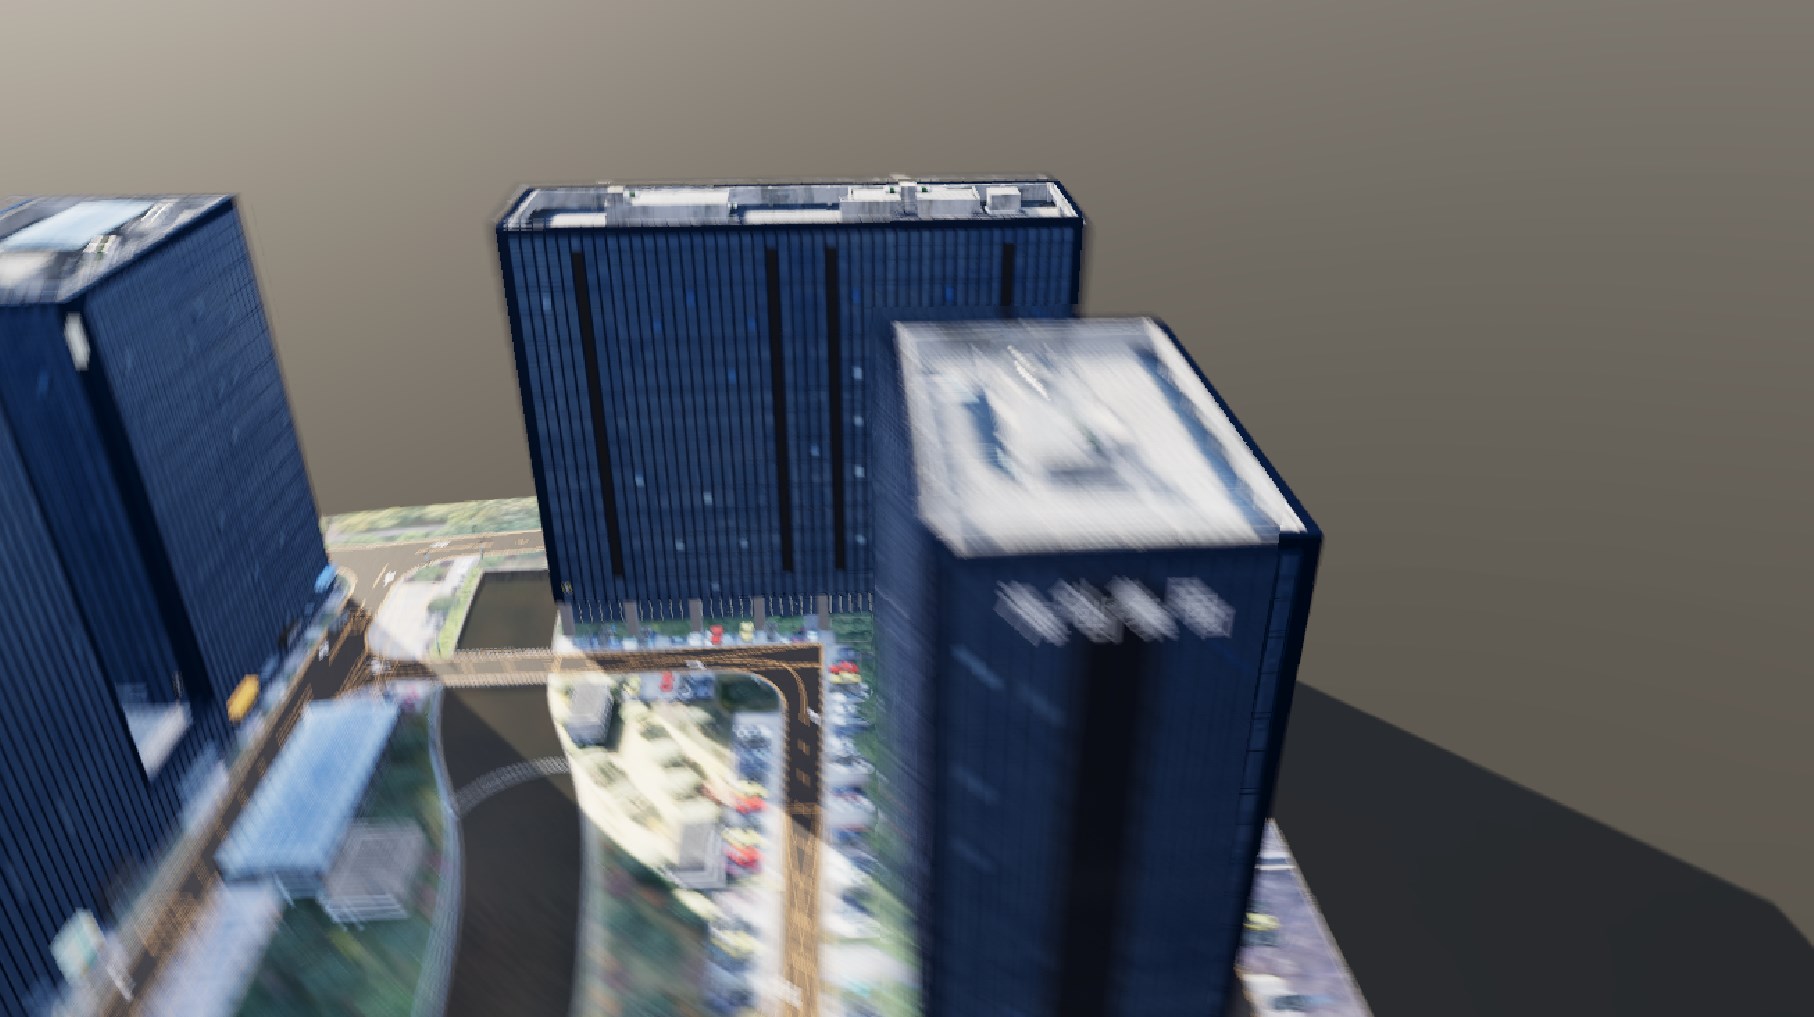
| ** Configuration item ** | Describe |
|---|---|
| Intensity | The higher the value, the greater the blur. |
| Sample Count | The higher the value, the better the quality of the blur effect, but the higher the performance cost. |