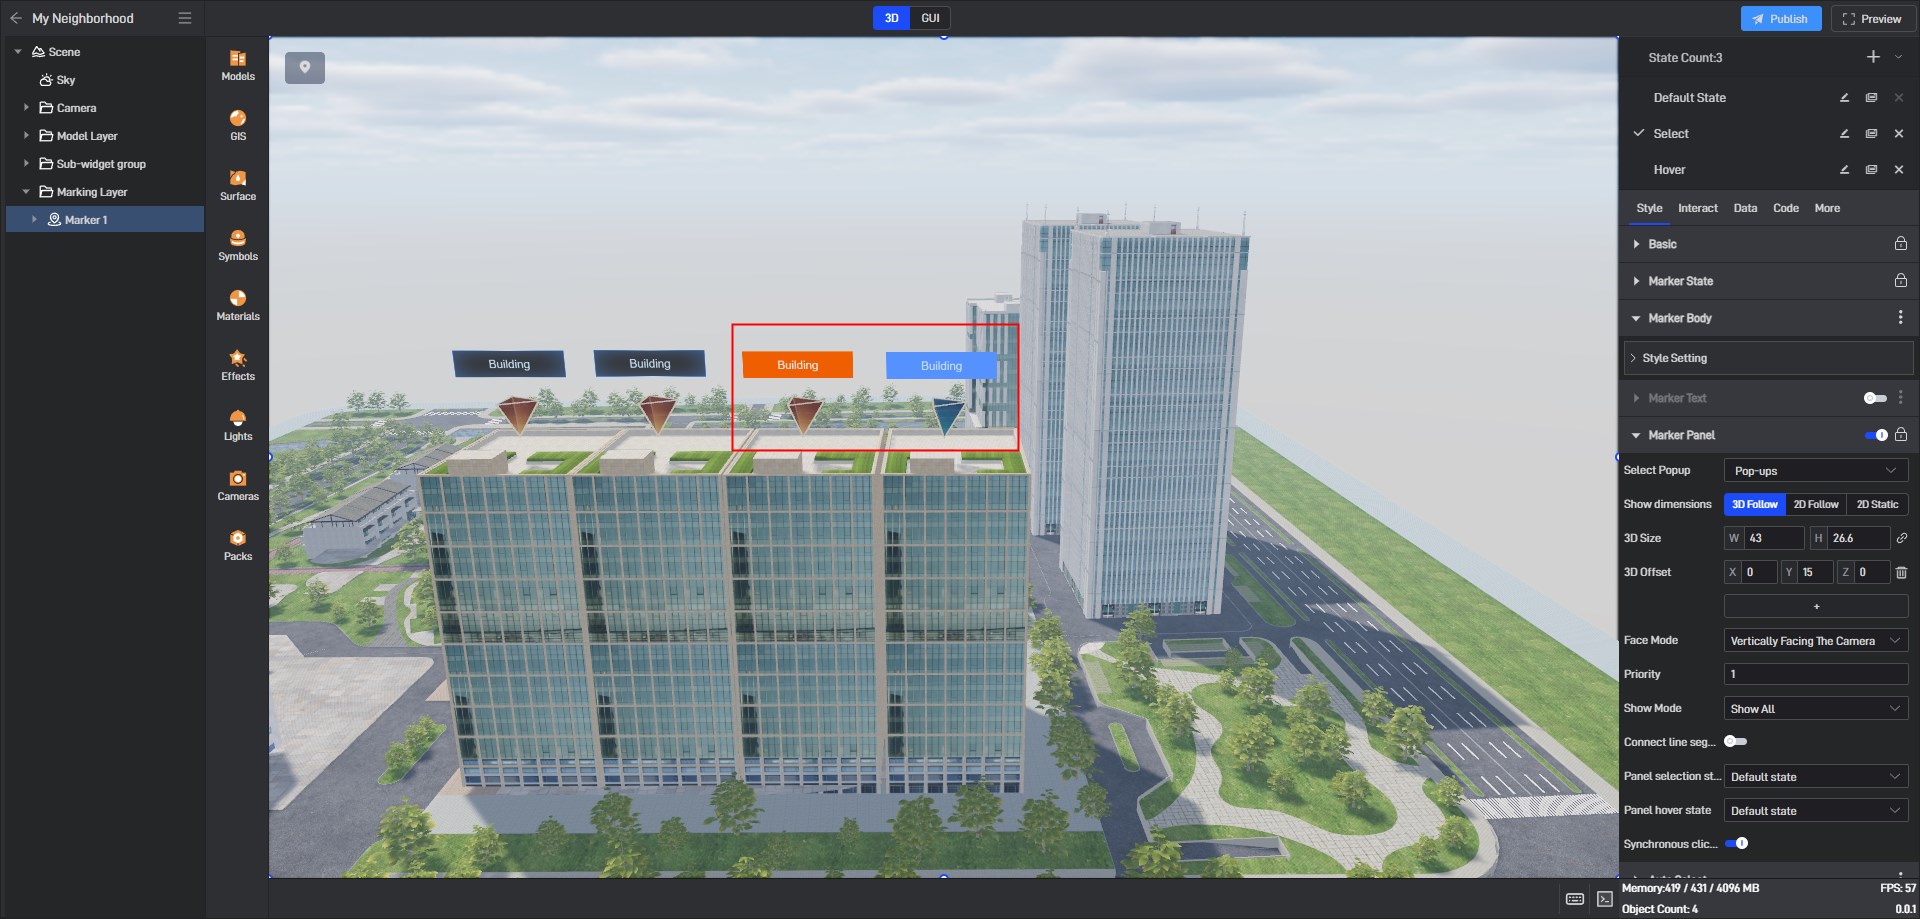
Marker Panel
Marker panel is an important supplement to the markers and is required in the following situations:
1. Need to display two-dimensional charts or digital data in 3D
2. Enhance the clarity and style of marker text
In the above aspects, we can add a marker panel setting. Of course, sometimes we can directly use the marker panel instead of the marker body.
1. The panel is used to display data
1.1 Generate data markers
First, open our sample project, delete the existing markers, and then place free markers where needed.
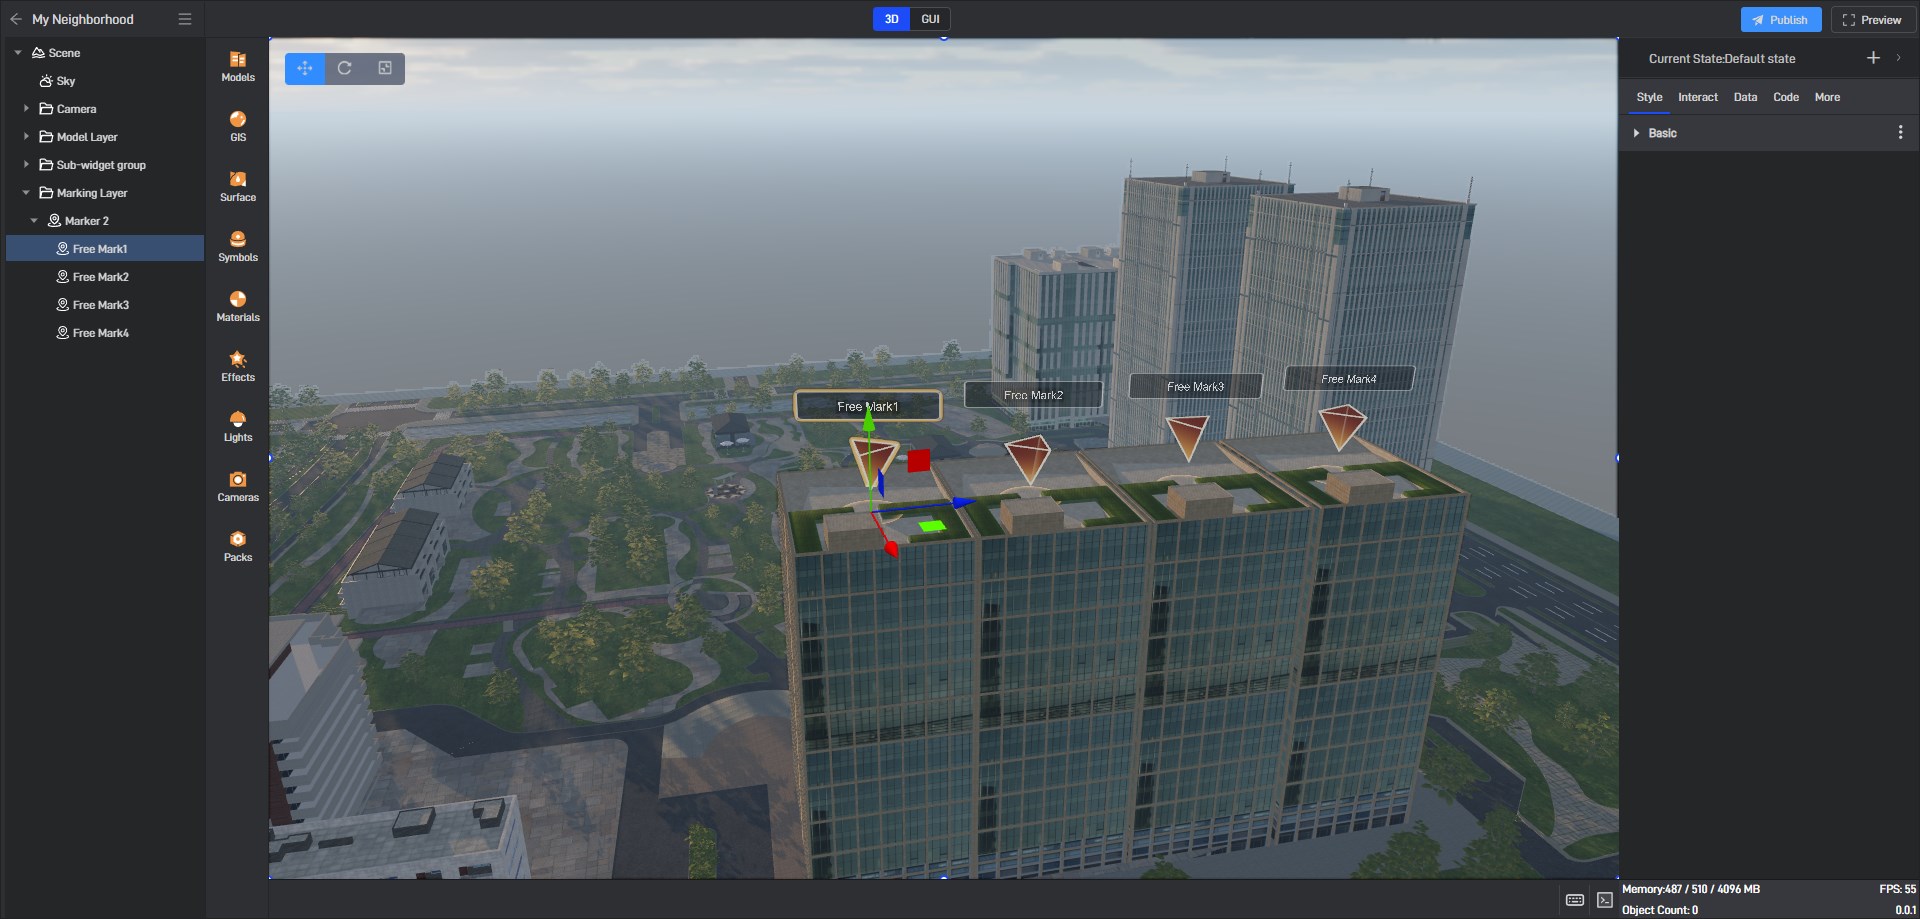
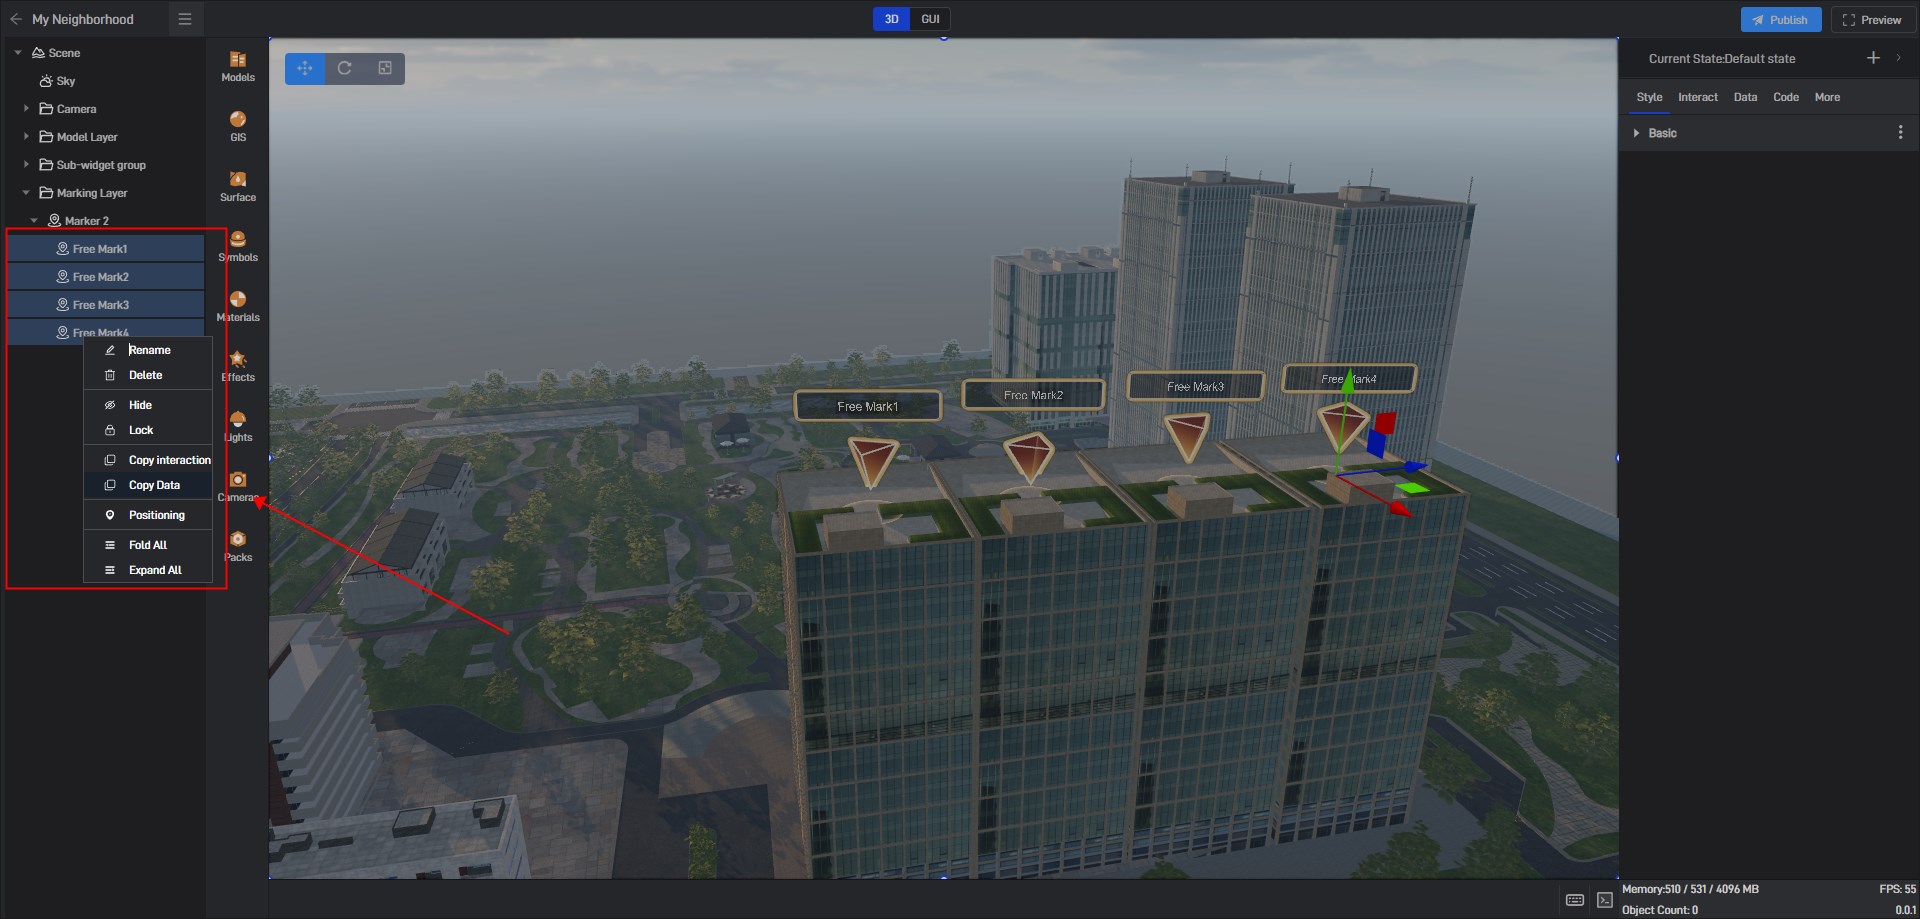
Select all these free markers, right-click and select “Copy Data”.
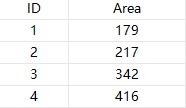
Create a new Excel file and press **”Ctrl+V” **to paste the data:

Delete unnecessary fields, adjust to the required marker name, it is best to give the marker a unique ID, and then add other fields.

Of course, this data can also be stored in a database or provided by an API, so that dynamic data can be realized. Of course, we can also split it into two data. Note that these two data need to be associated with the ID field (in fact, no matter which field is dragged into the tag Key, that field is used to associate different data tables):
Import this data into Wings Engine, click to select the Marker group, switch to “Data”, change the coordinate type to “Space Coordinates”, and drag “ID” into “Mark ID”, “Name” into “Mark Name”, and “Position” into “Position”. Delete the previous free mark point, and you can get the following effect:
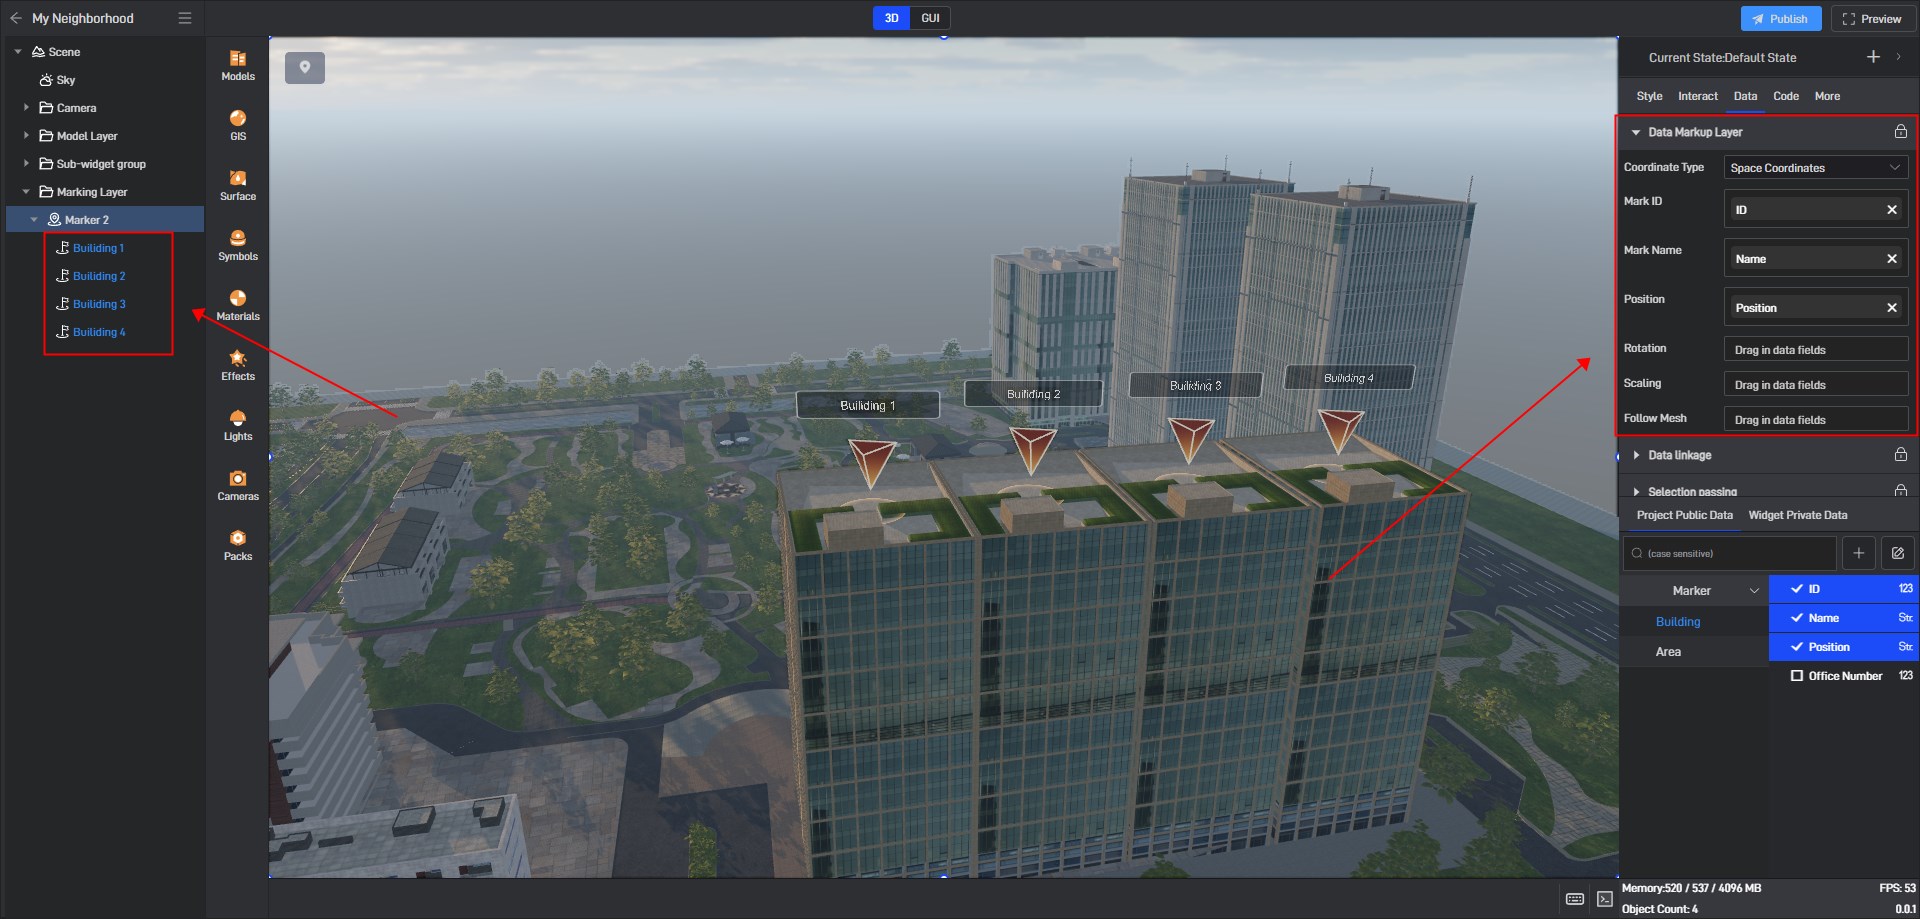
You can see that the data markers has successfully replaced the original free markers. On this basis, we can create data association effects.
Switch to the “GUI” scene and add a “Pop-ups”.
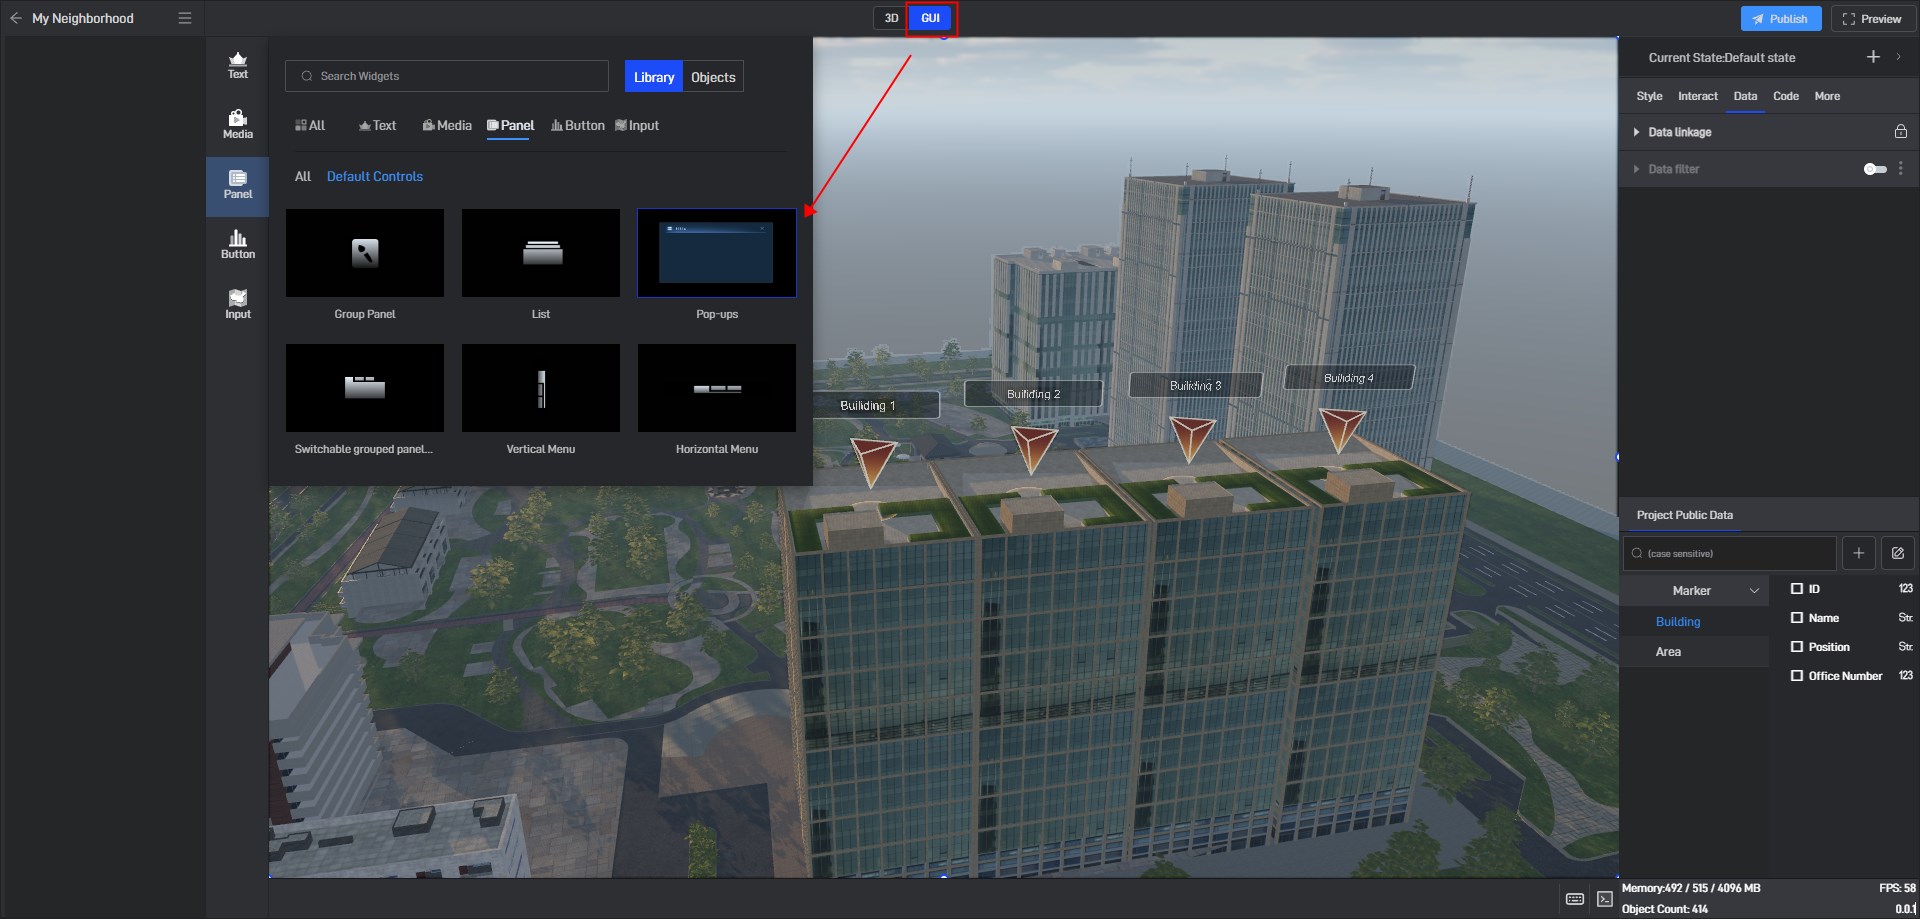
1.2 Pop-ups settings
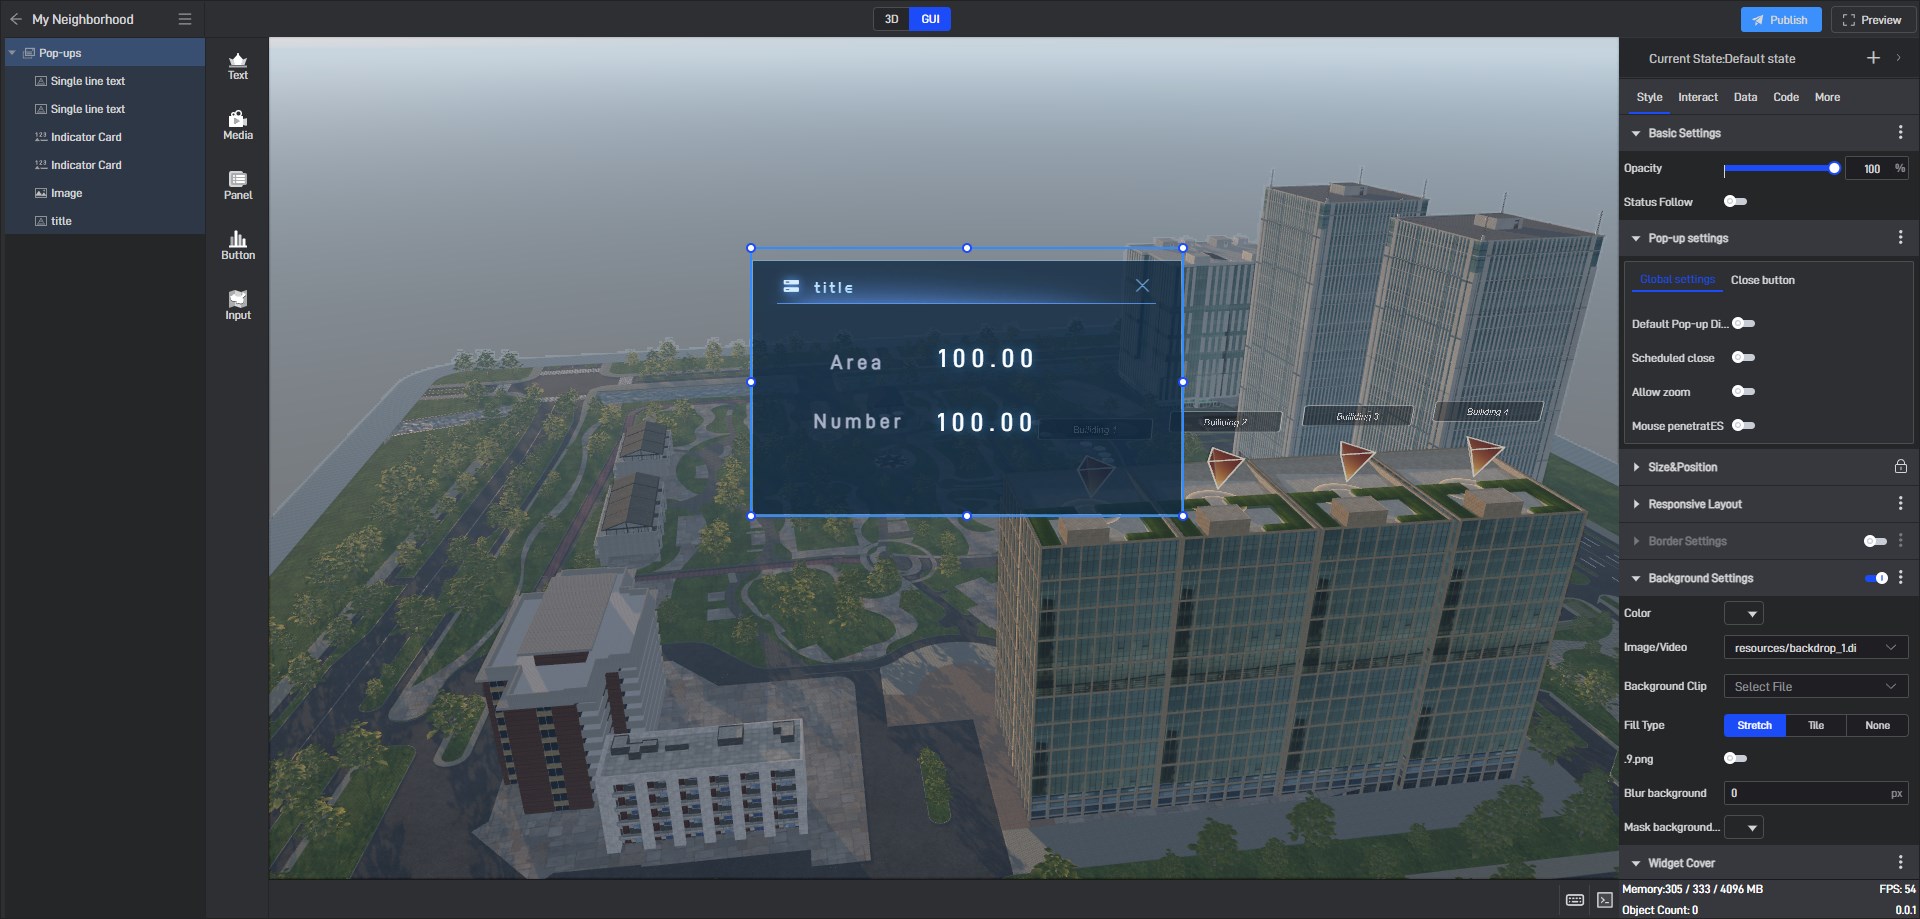
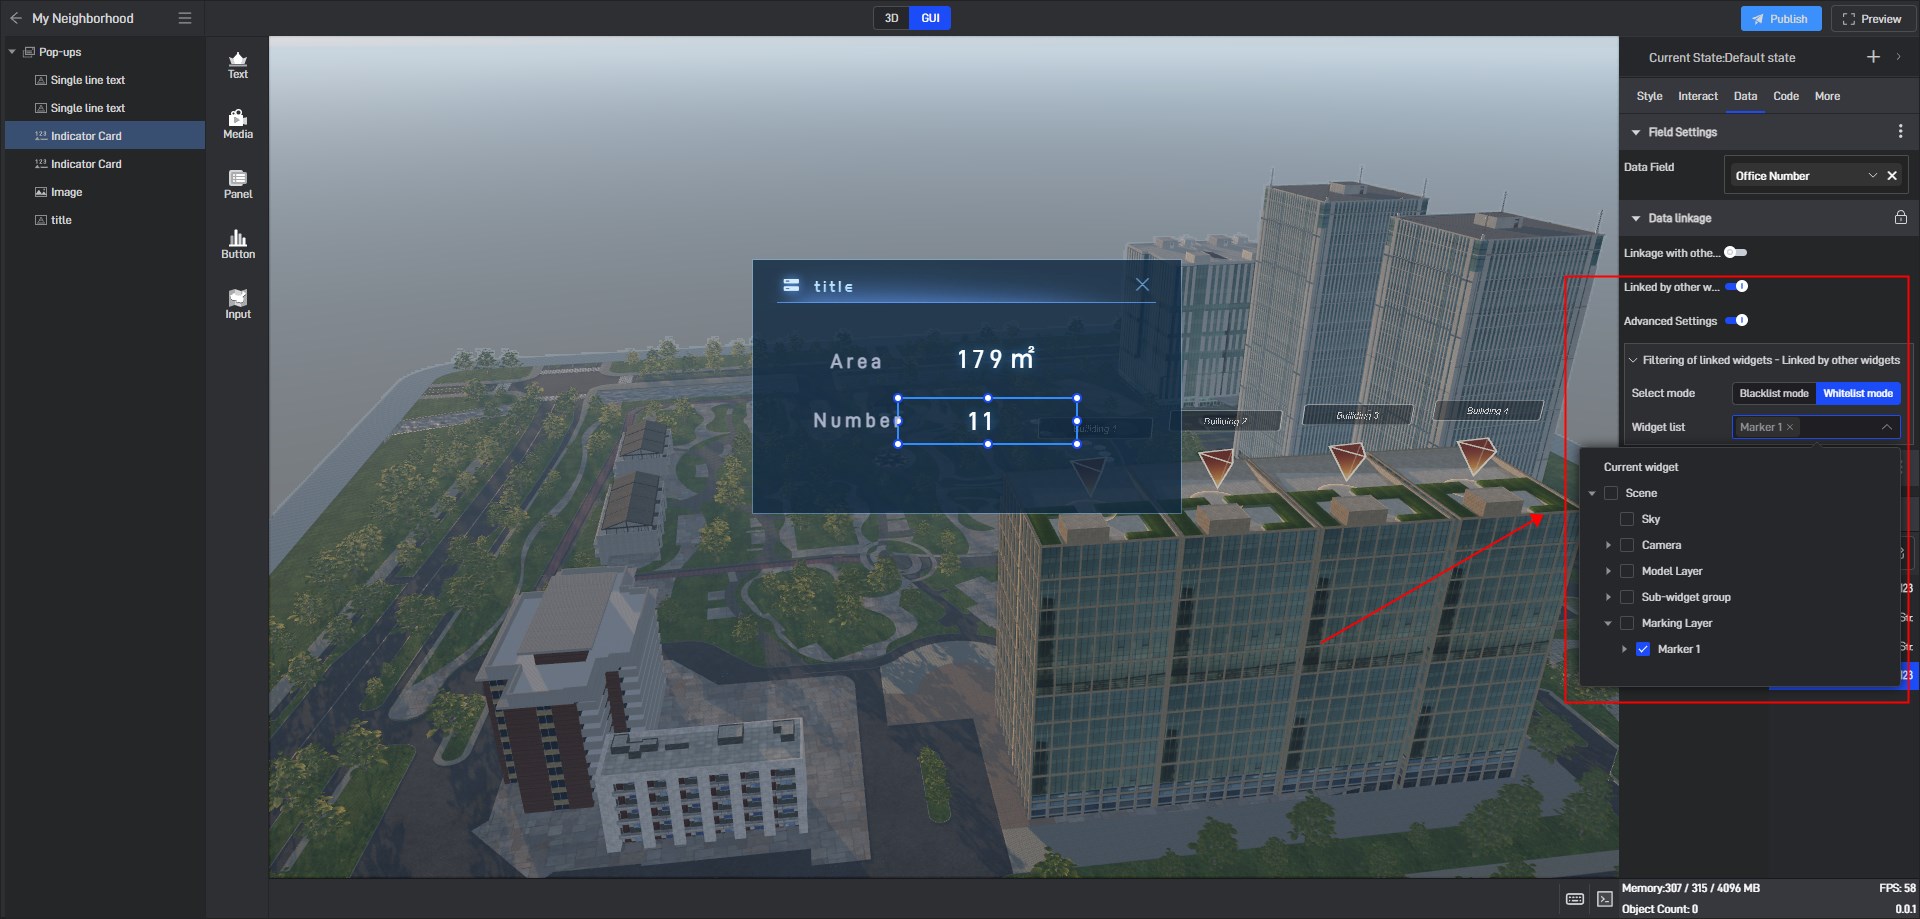
Add two “Indicator Cards” and two “Single Line Texts” in the pop-up window, and set the positions and contents respectively.
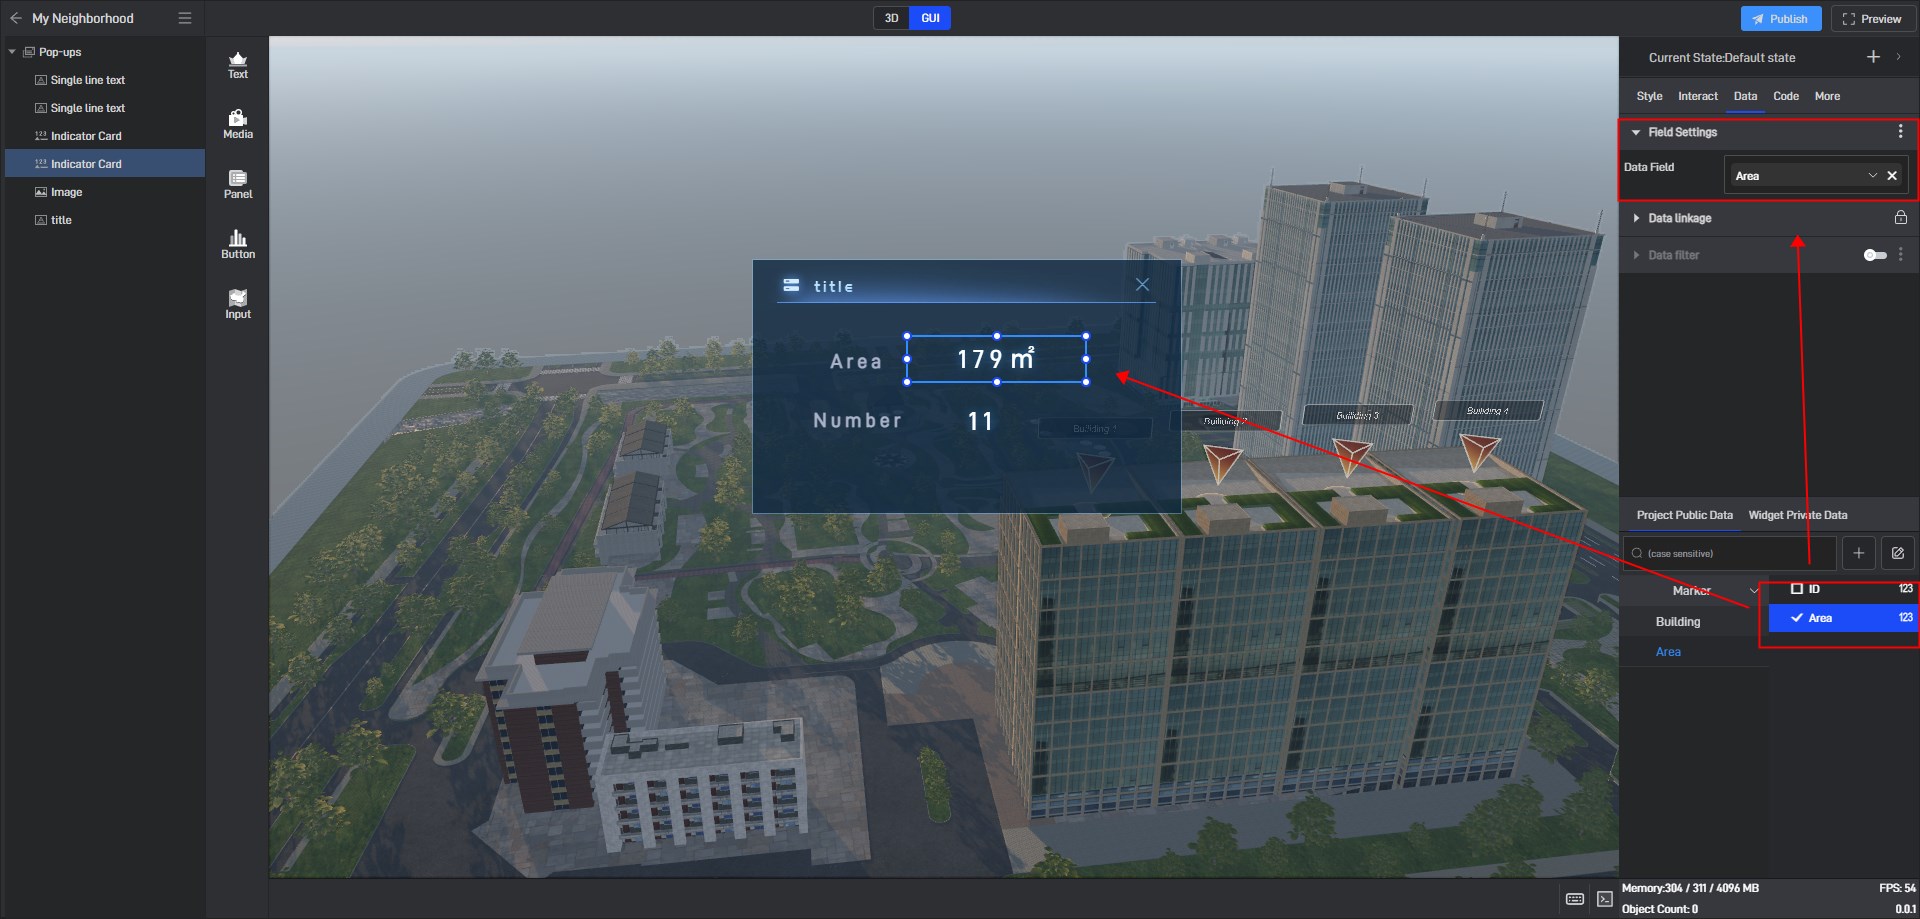
Add units to the two indicator cards and bind the previous data to the data on the indicator cards.
Set up data linkage for the two indicator cards, enable “Linked by other widgets”, and select whitelist as the “Marker 1” in “Advanced Settings”.
1.3 Marker panel linkage pop-up window
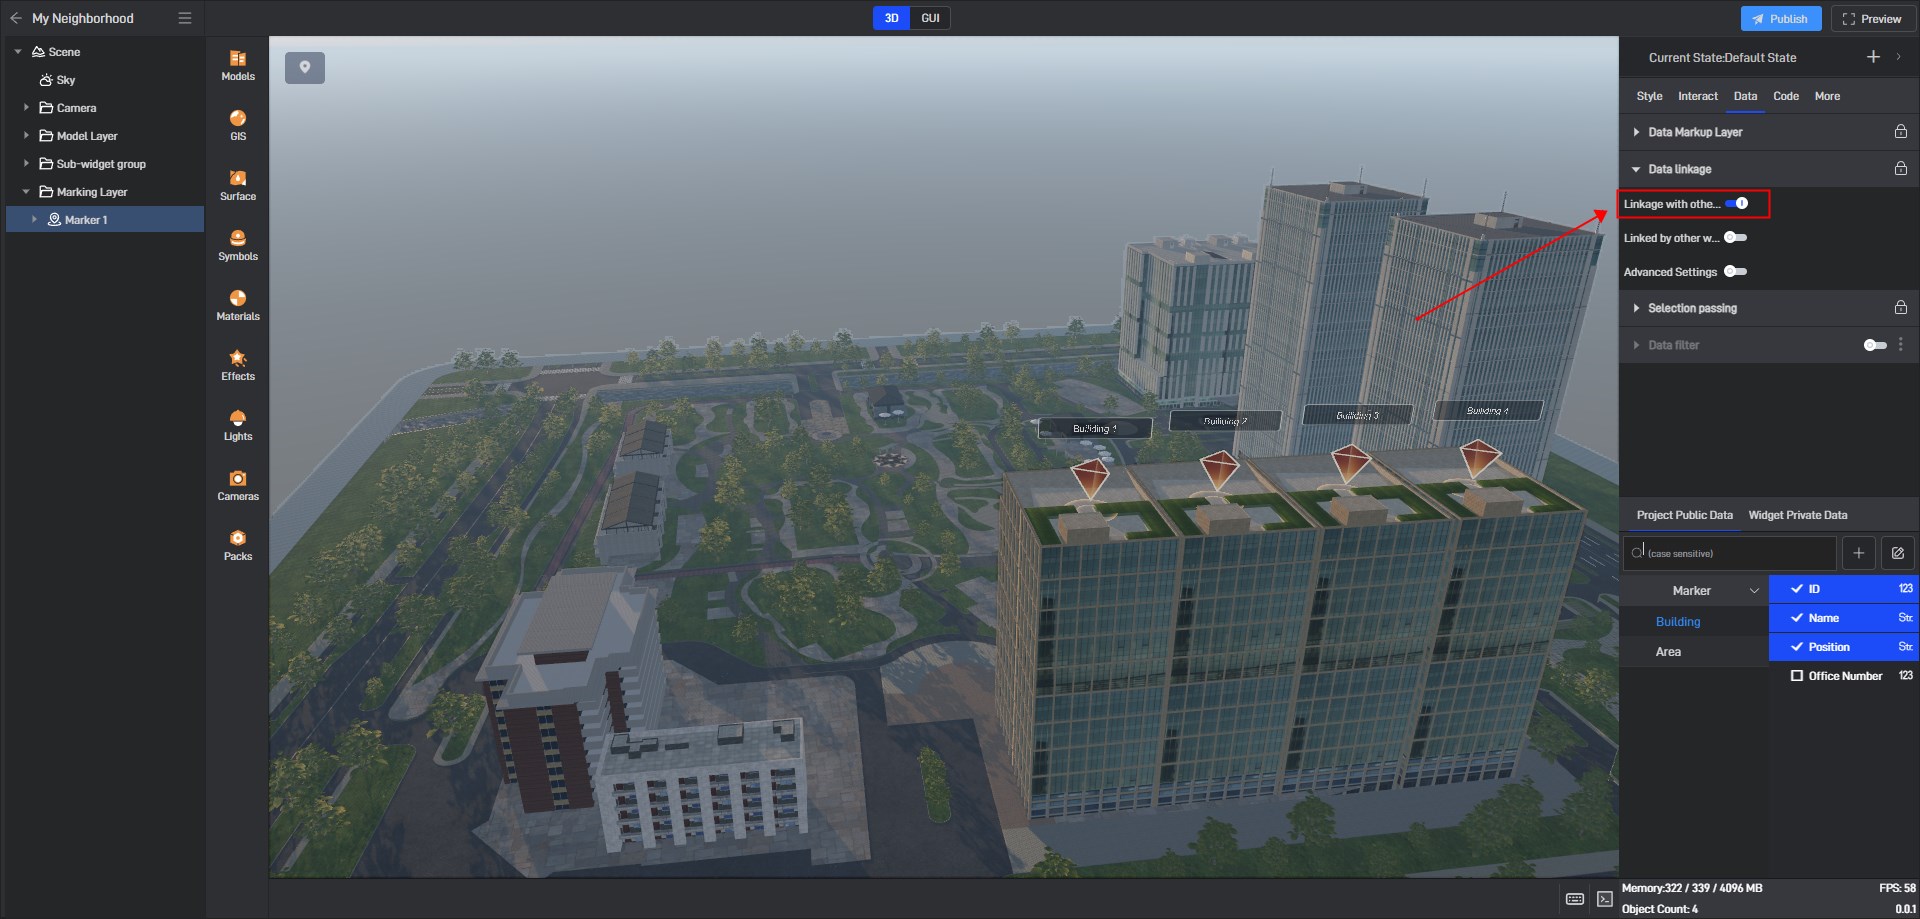
Switch to the “3D” scene, select the marker group, and enable “Link other widgets”.
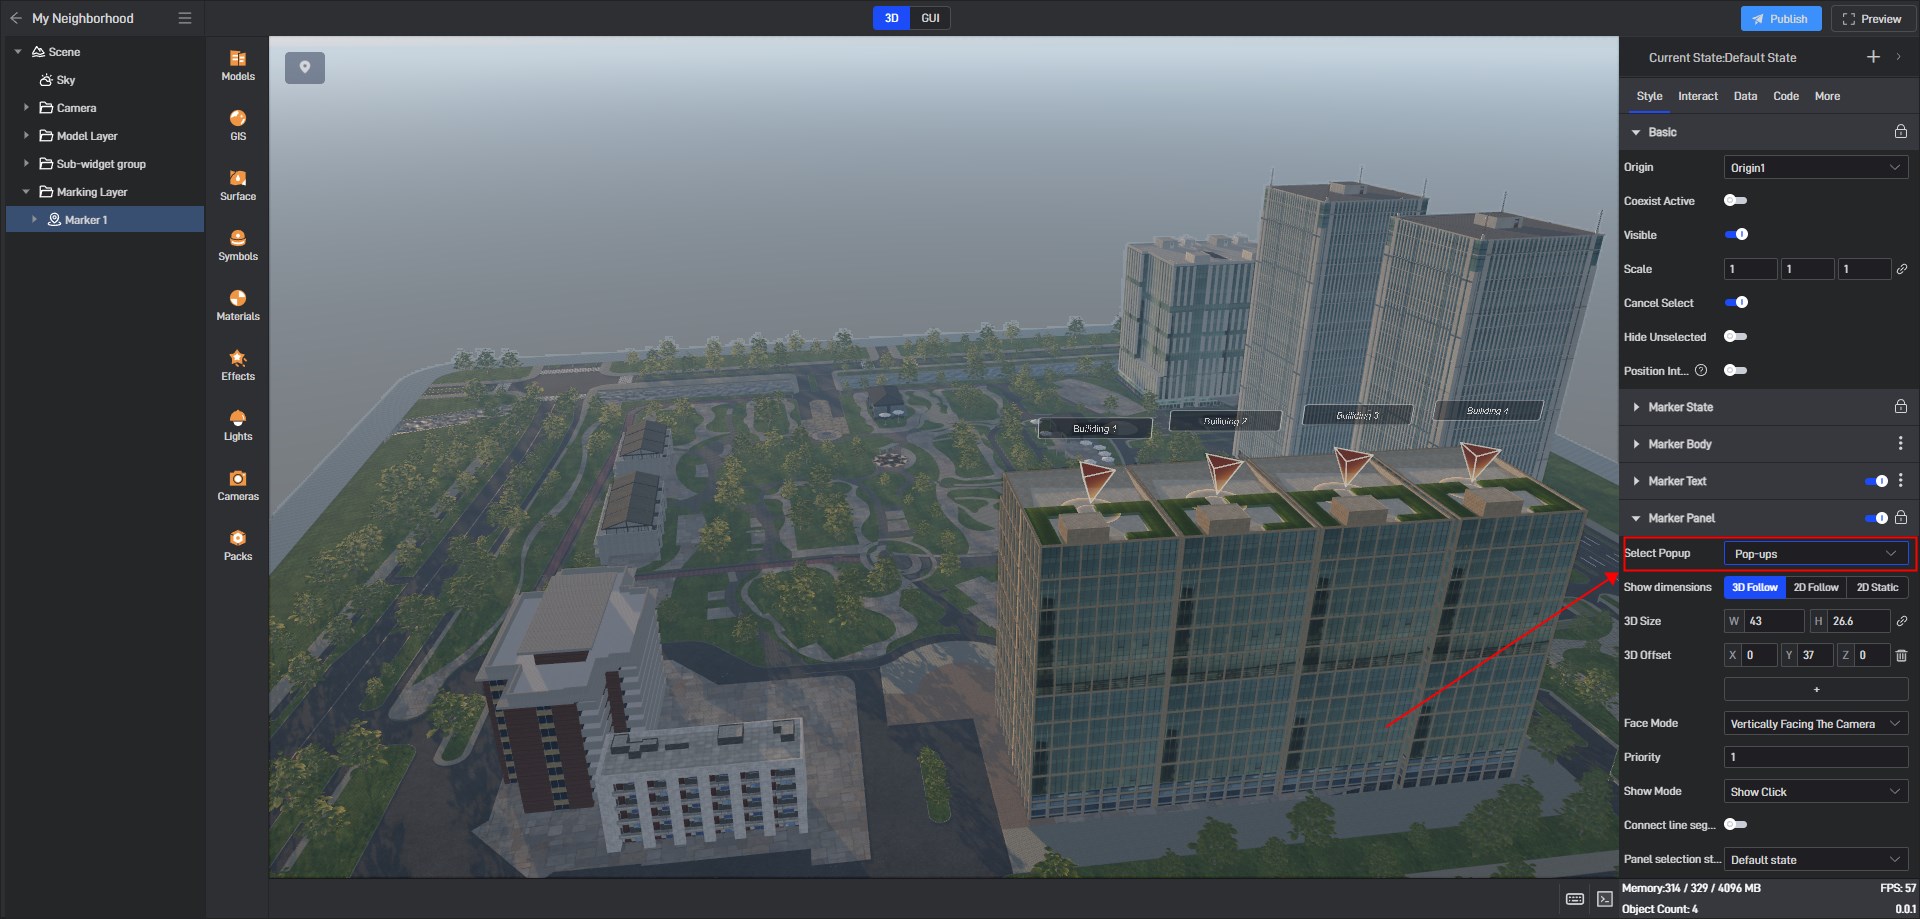
Enable the “Marker Panel” and select the popup just set up.
The default is to select when clicking the mark, we can also change it to show all.
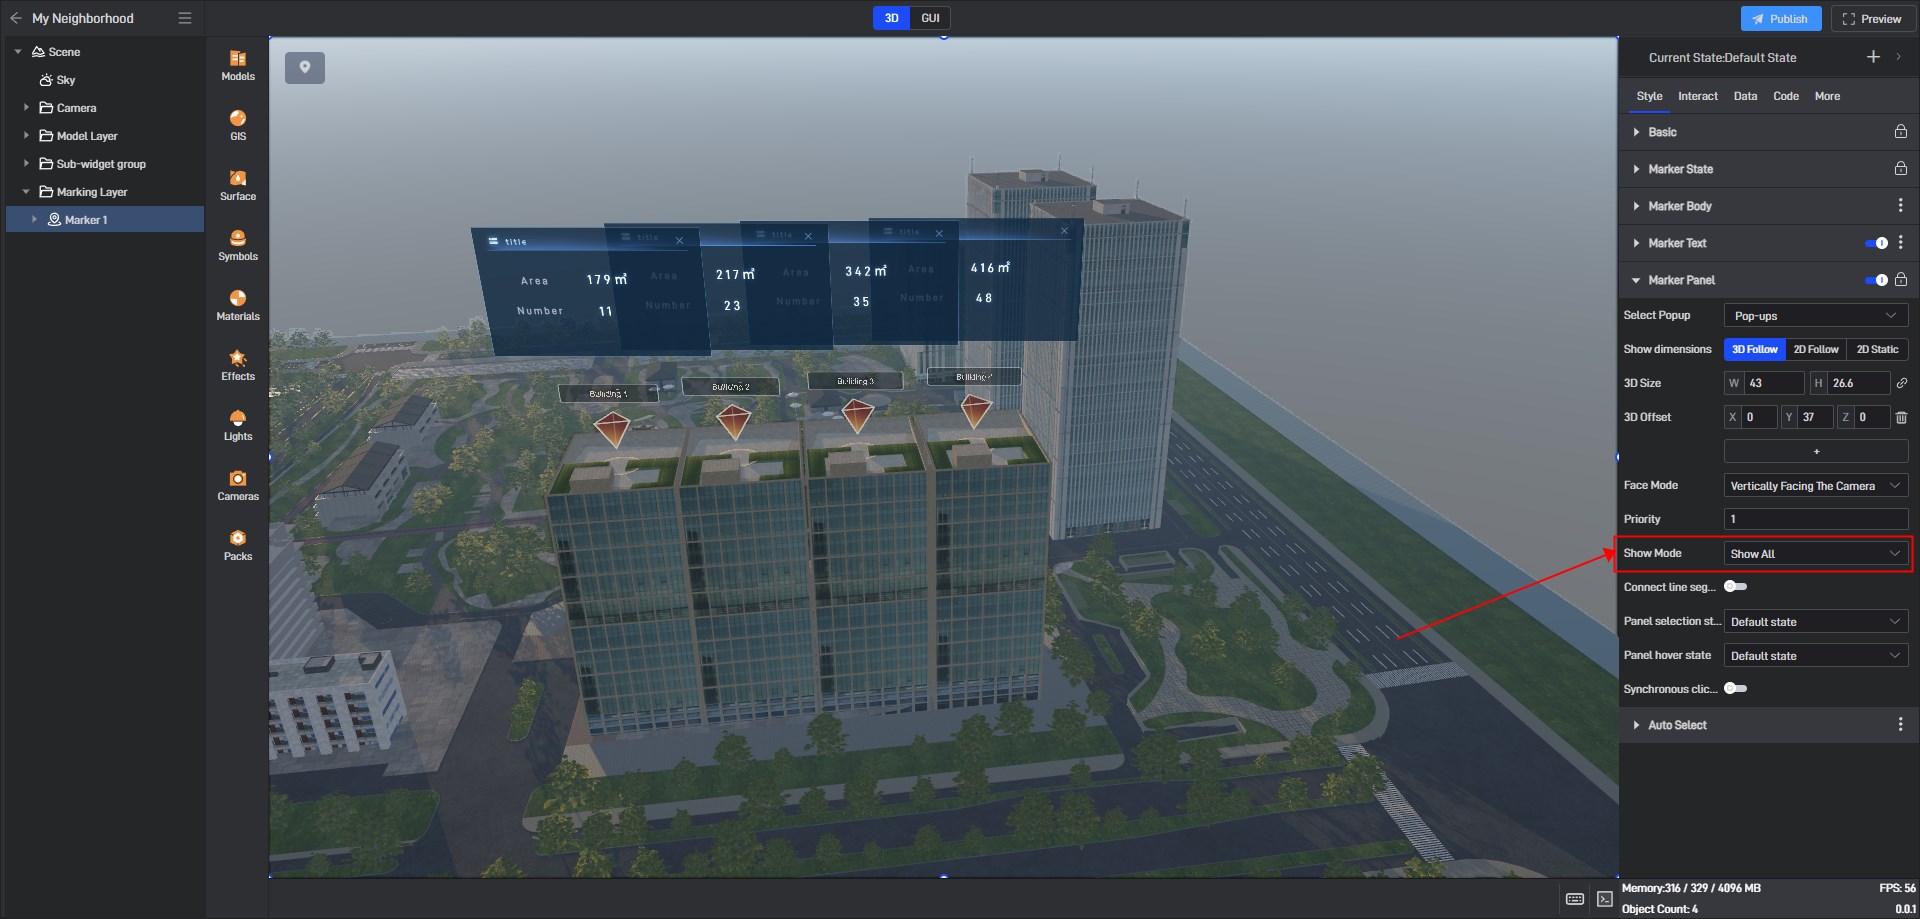
You can see that the data in the panel has been associated with the markers.
2. The panel is used to replace the marker text
Sometimes the text of the marker itself is not very clear, or it is difficult to implement some advanced interactions such as hover color change. In this case, we can directly process the panel as part of the marker to replace part of the marker effect.
2.1 Creating a text panel
Add a pop-up window, delete all background elements and background colors of the pop-up window, and insert a button.
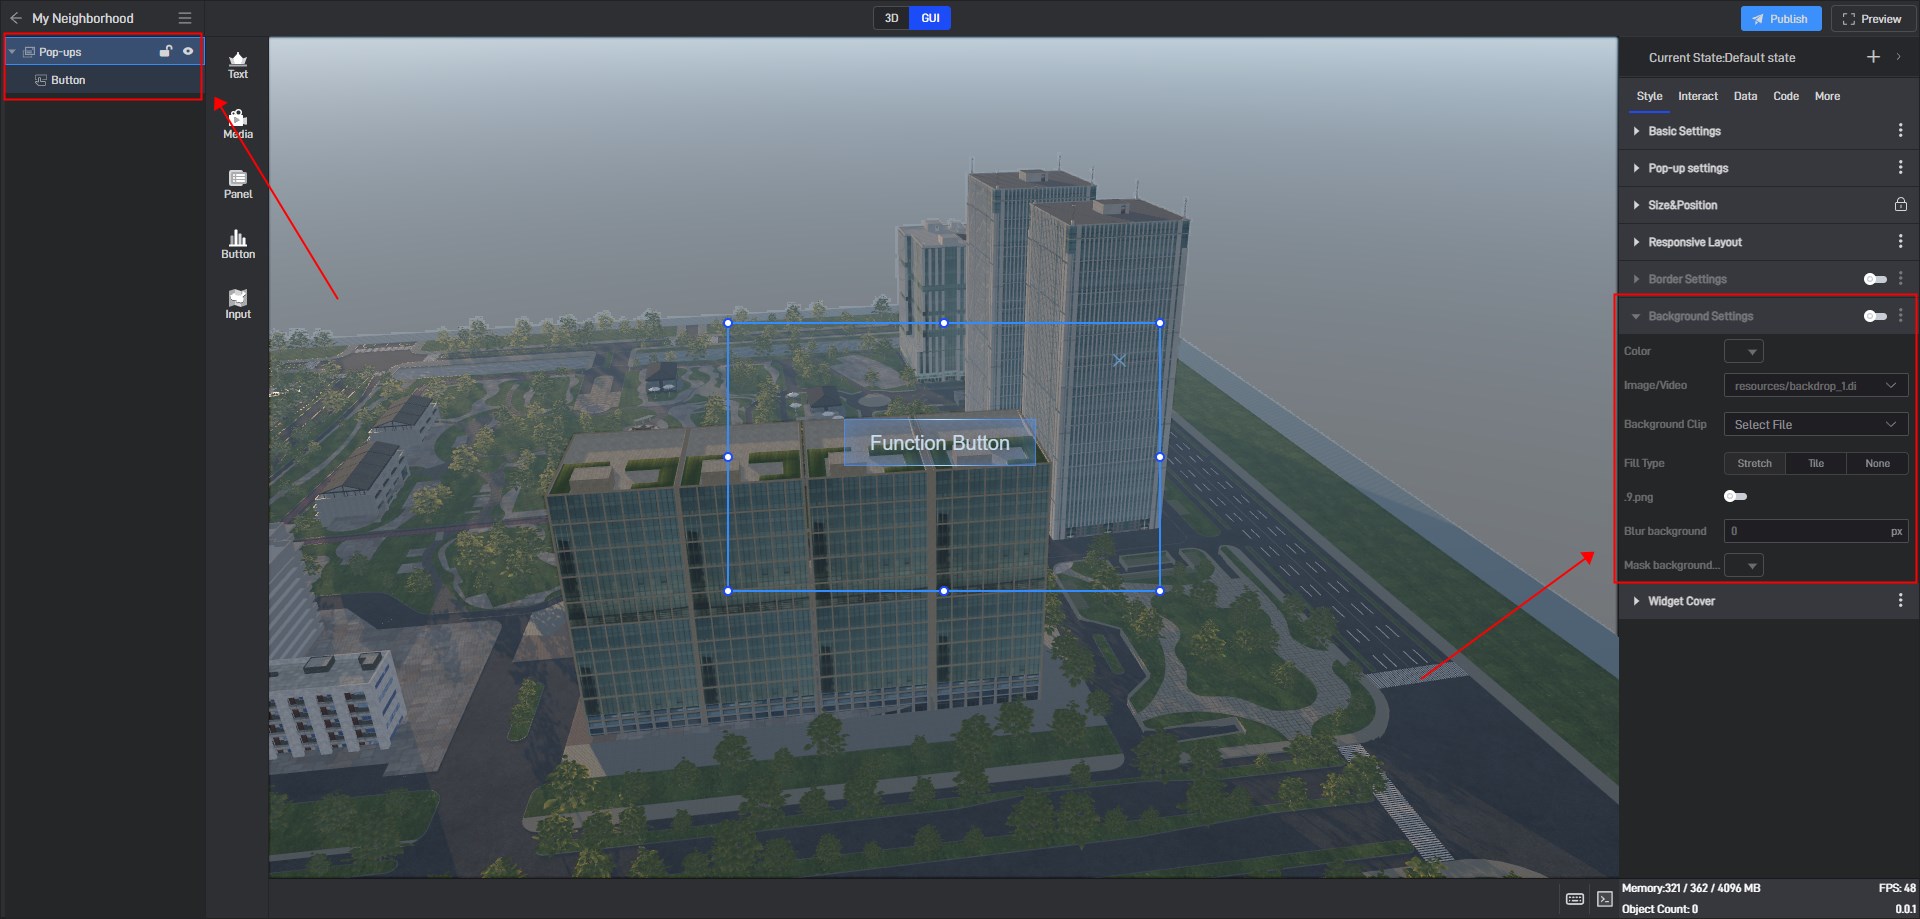
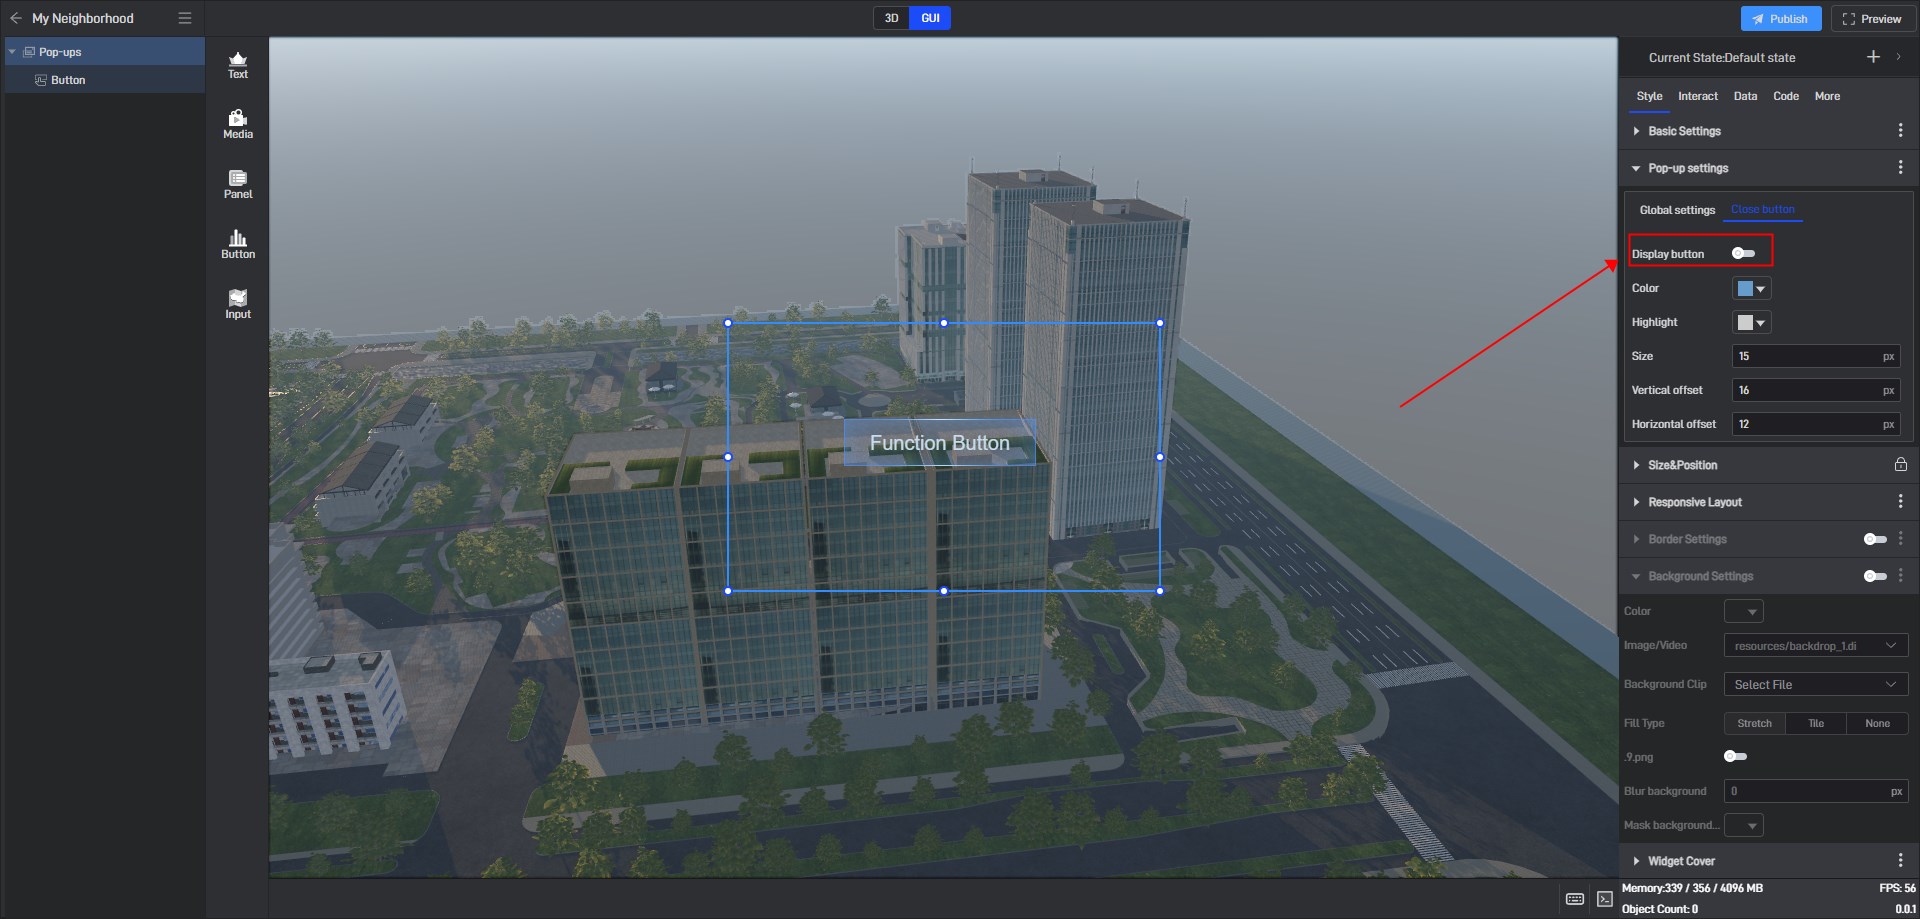
Hide the close button of the pop-up window.
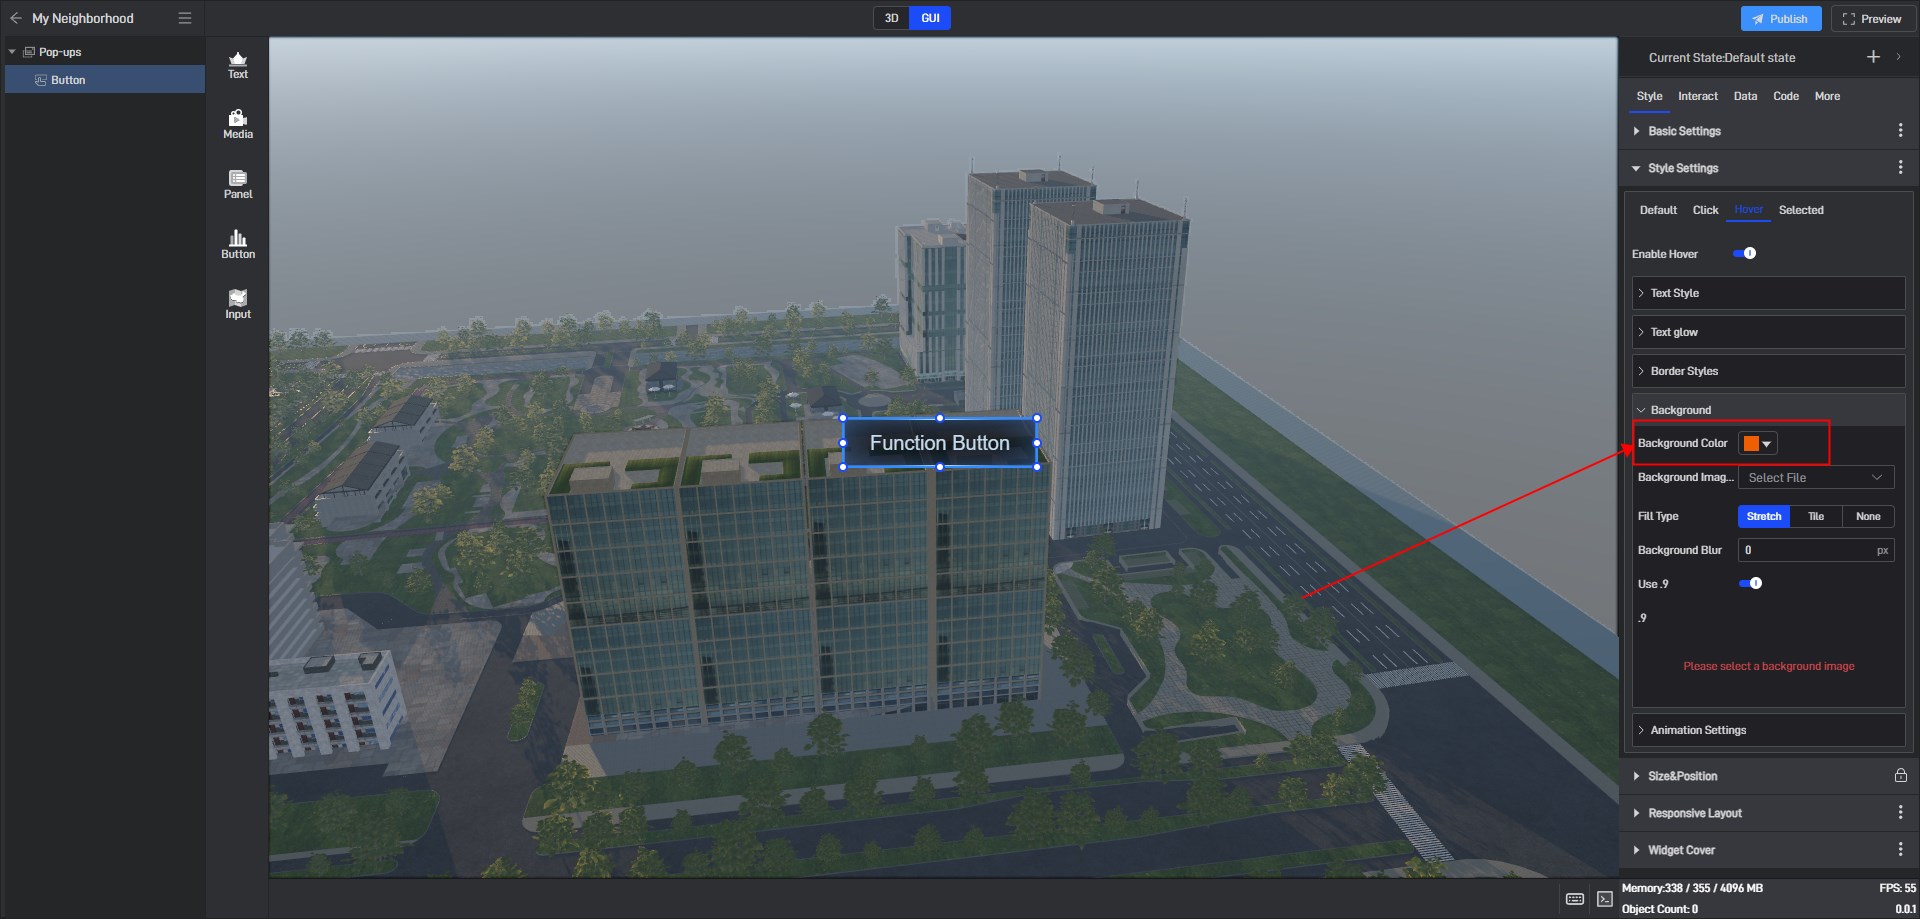
Adjust the button style to black and semi-transparent, and change it to orange and opaque when hovering.
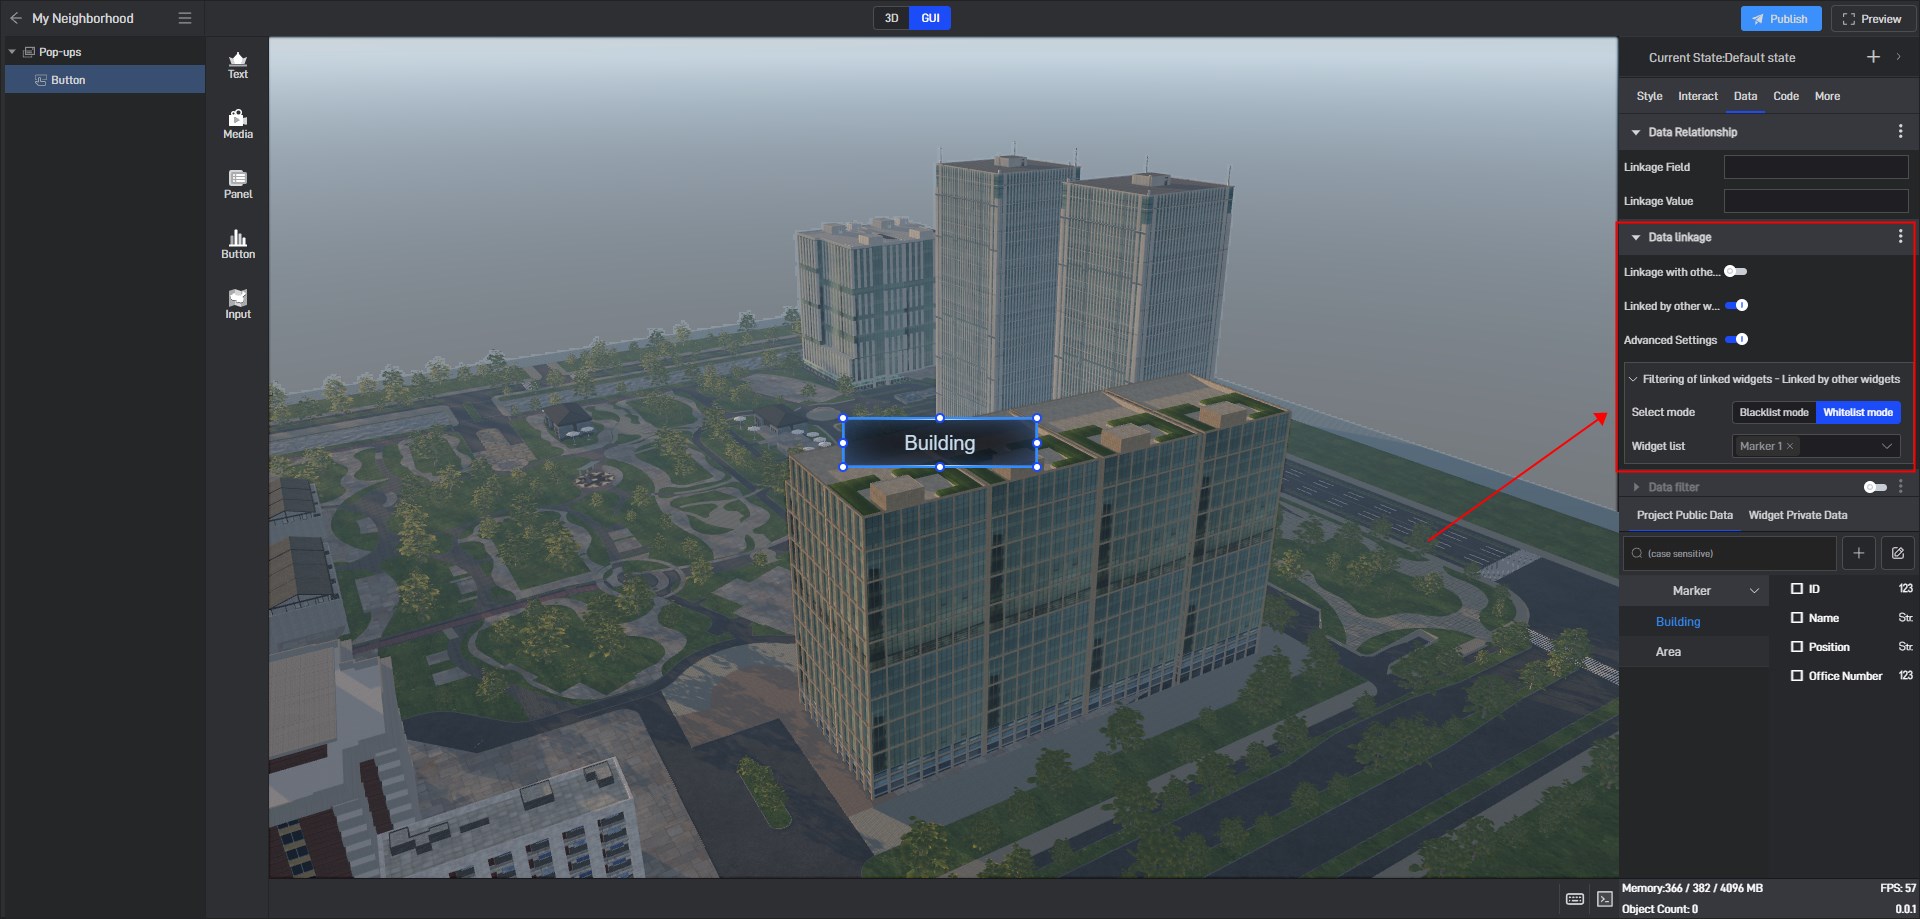
Bind data to the button text and enable “Linked by other widgets”.
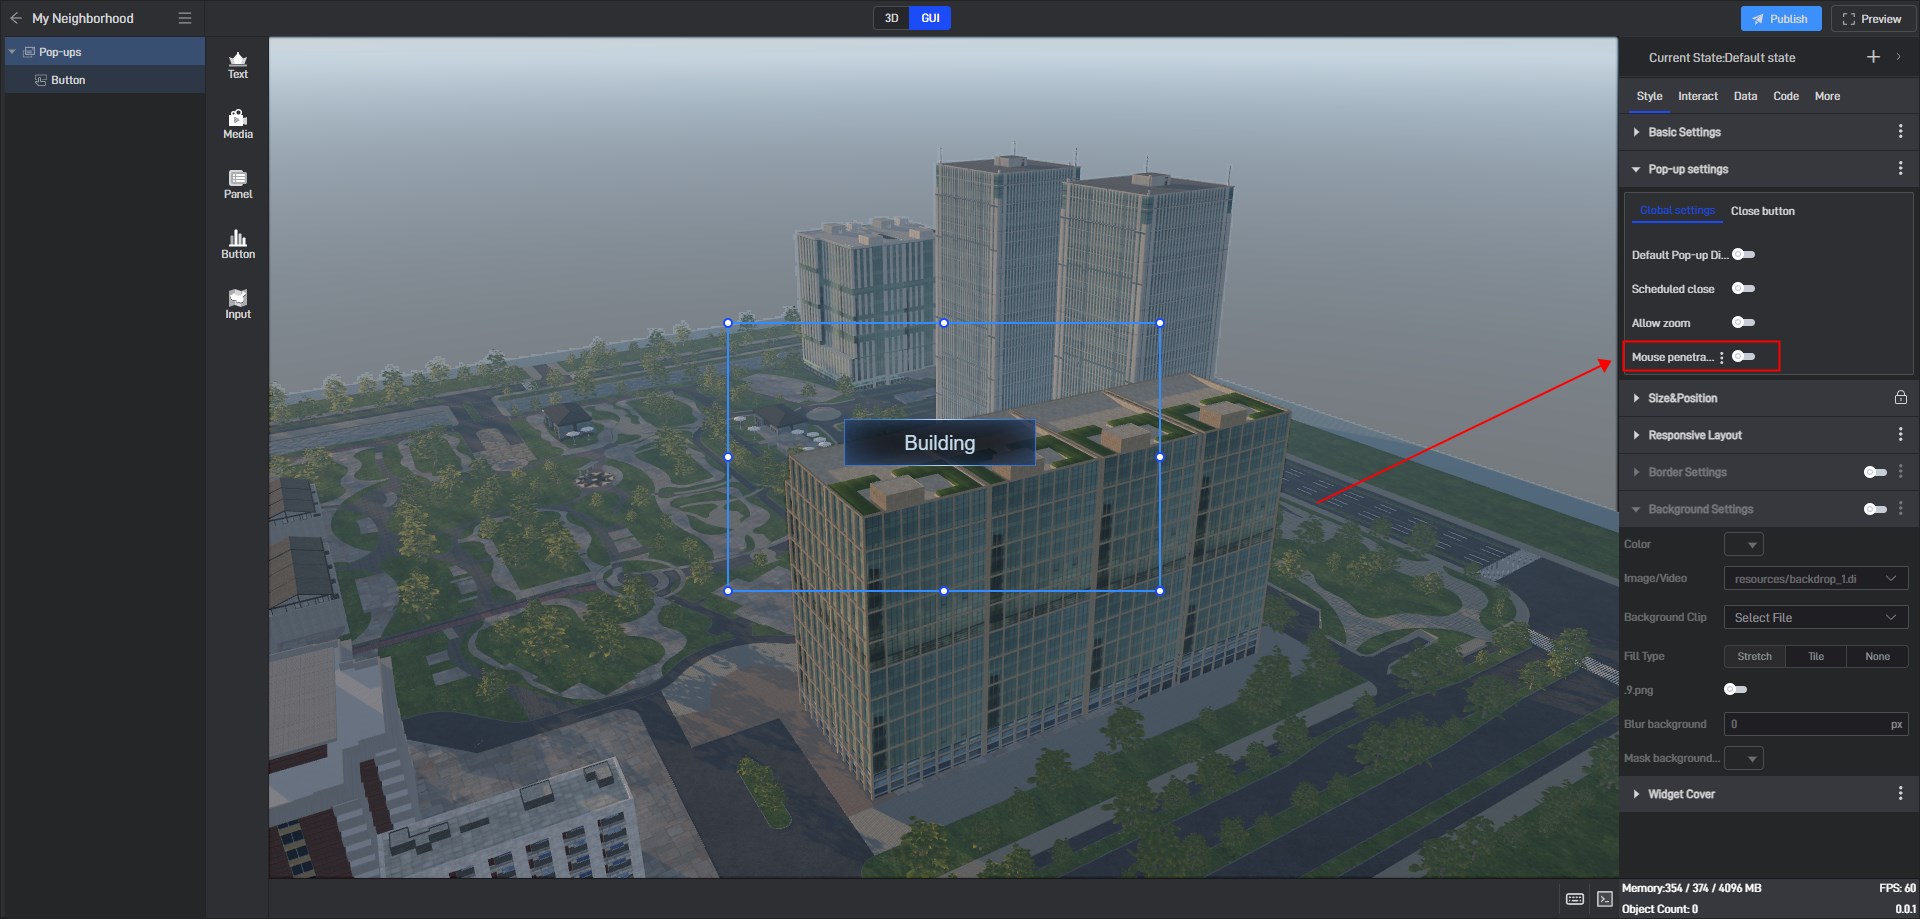
Then select the pop-up window. In order to prevent the transparent background of the pop-up window from being displayed except for mouse events, we need to enable “Mouse penetratES”.
2.2 Marker style settings
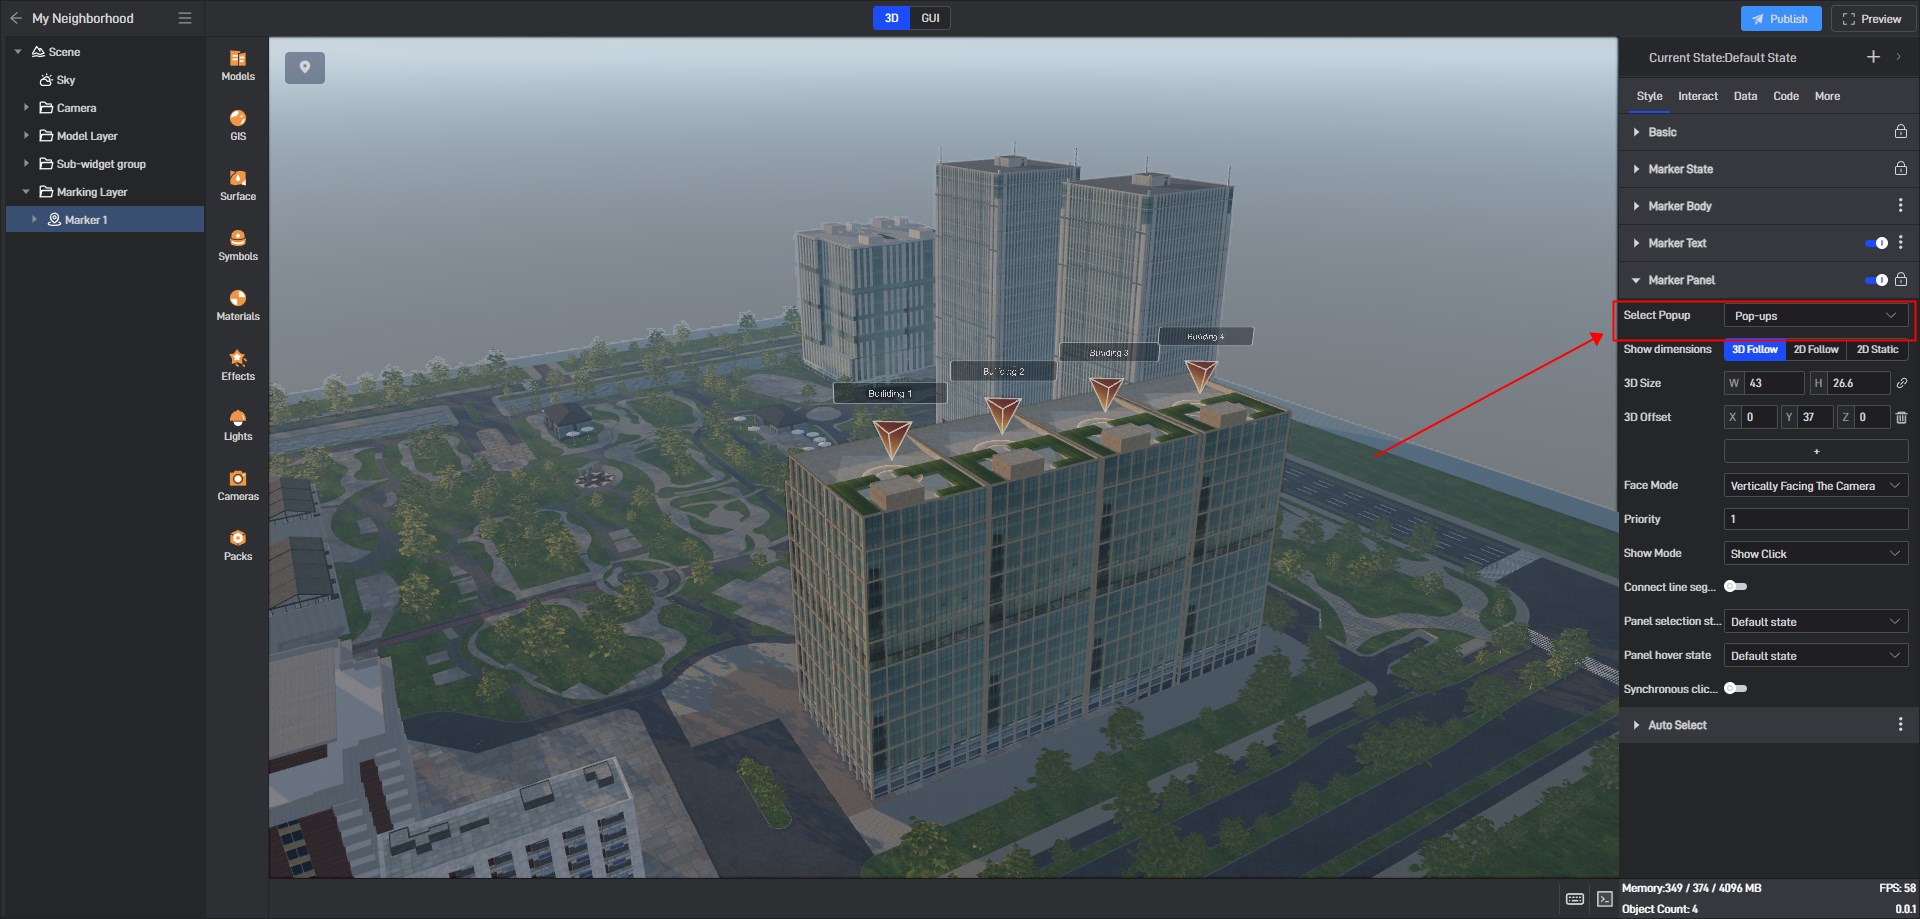
Switch to the 3D scene, select the marker group, and first change the marker group panel to the new pop-up window just set.
Then we change the show mode to “Show All”.
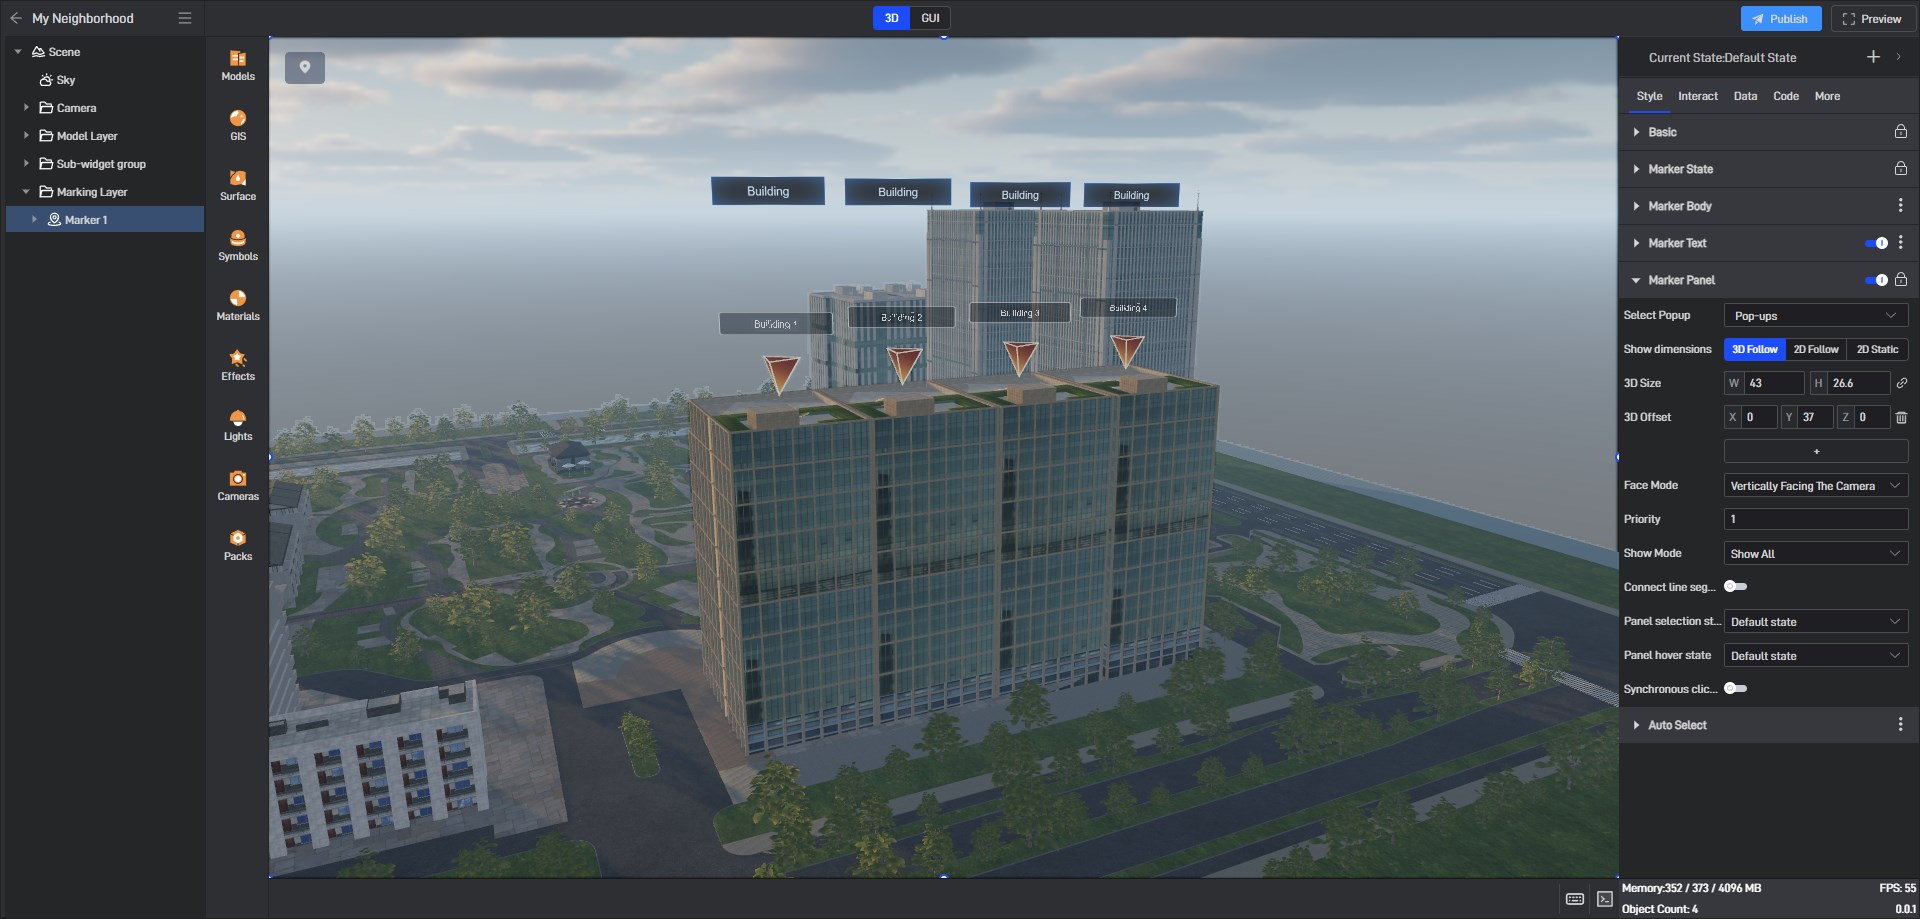
As you can see, the text in the panel is much clearer than the native one. At this time, we need to hide the original marked text. First, we disable the marked text.
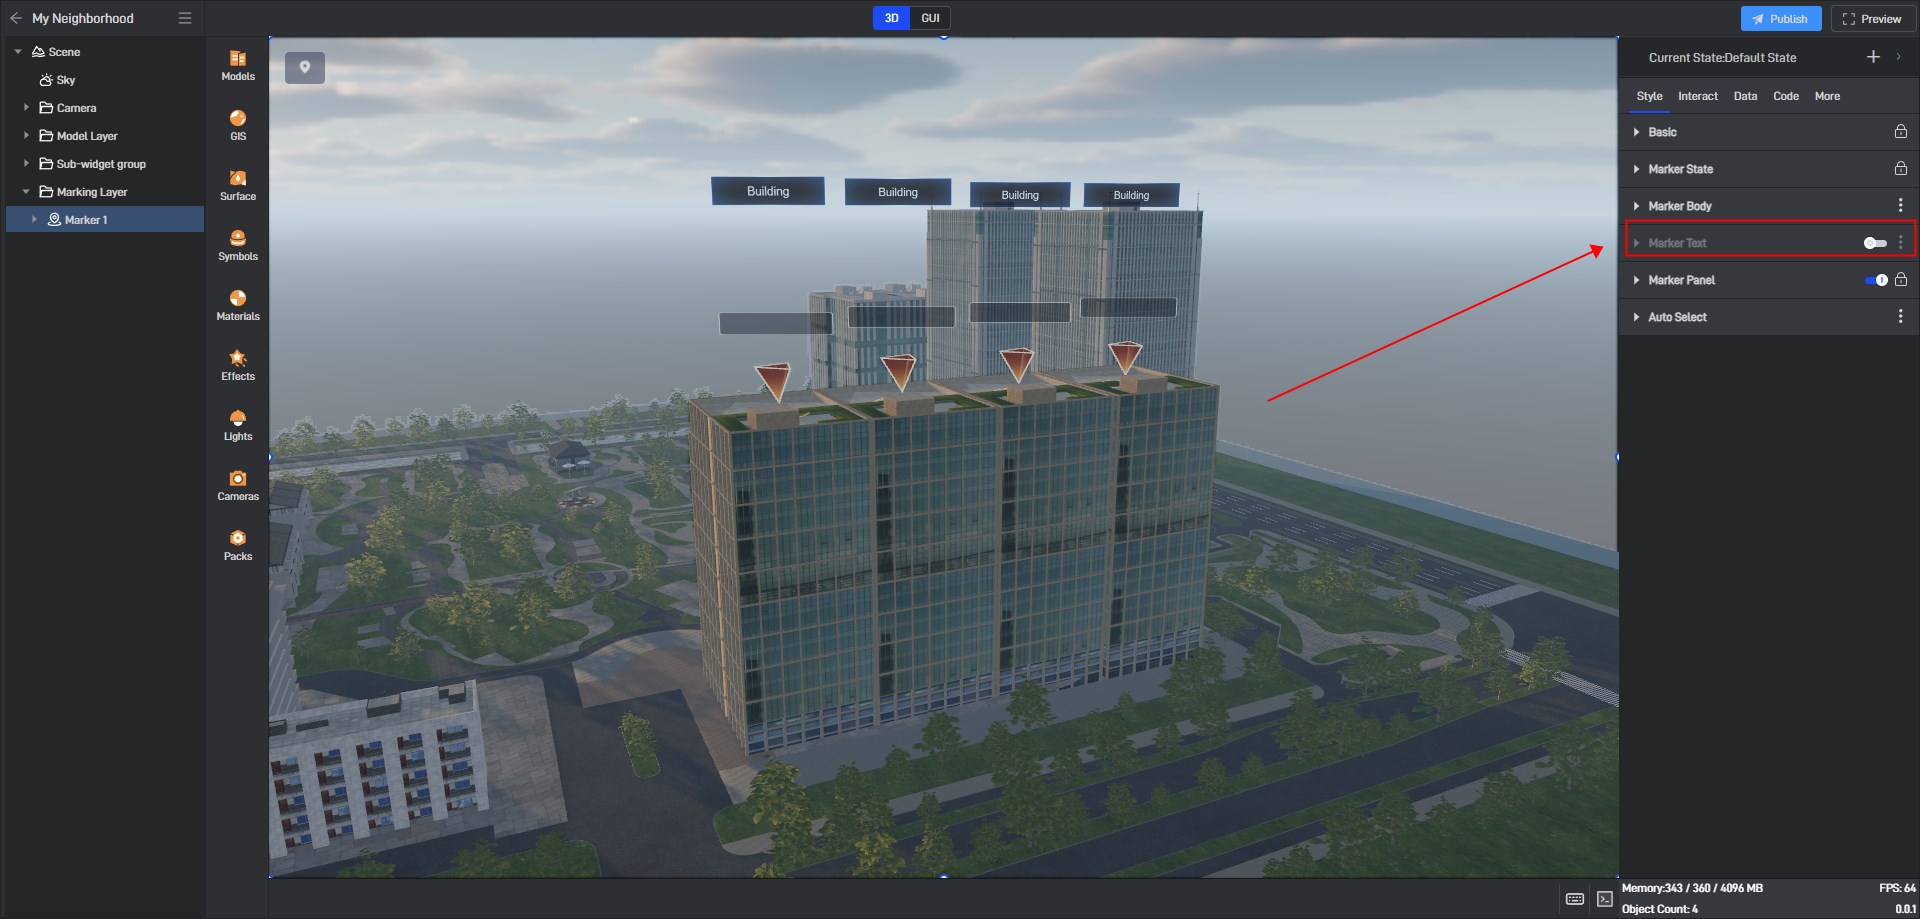
Then turn off the text background in the “Marker Body”.
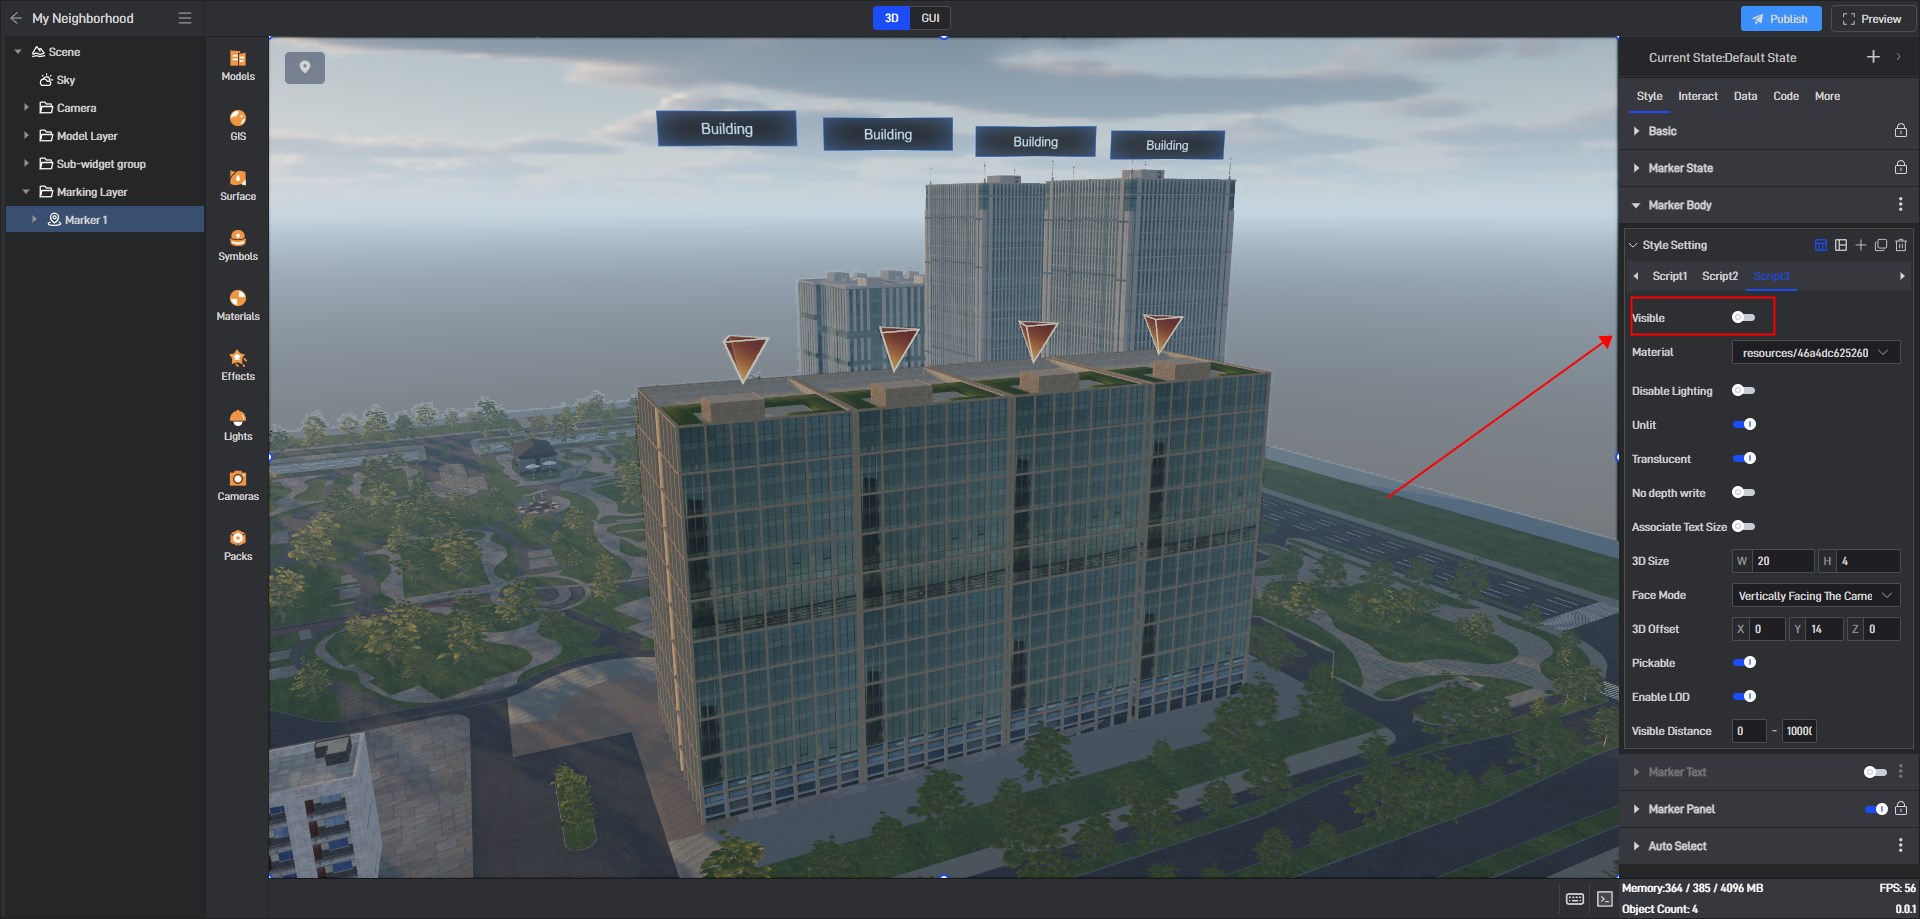
Note that we also need to turn off the text and text background in the other two states of the marker group.
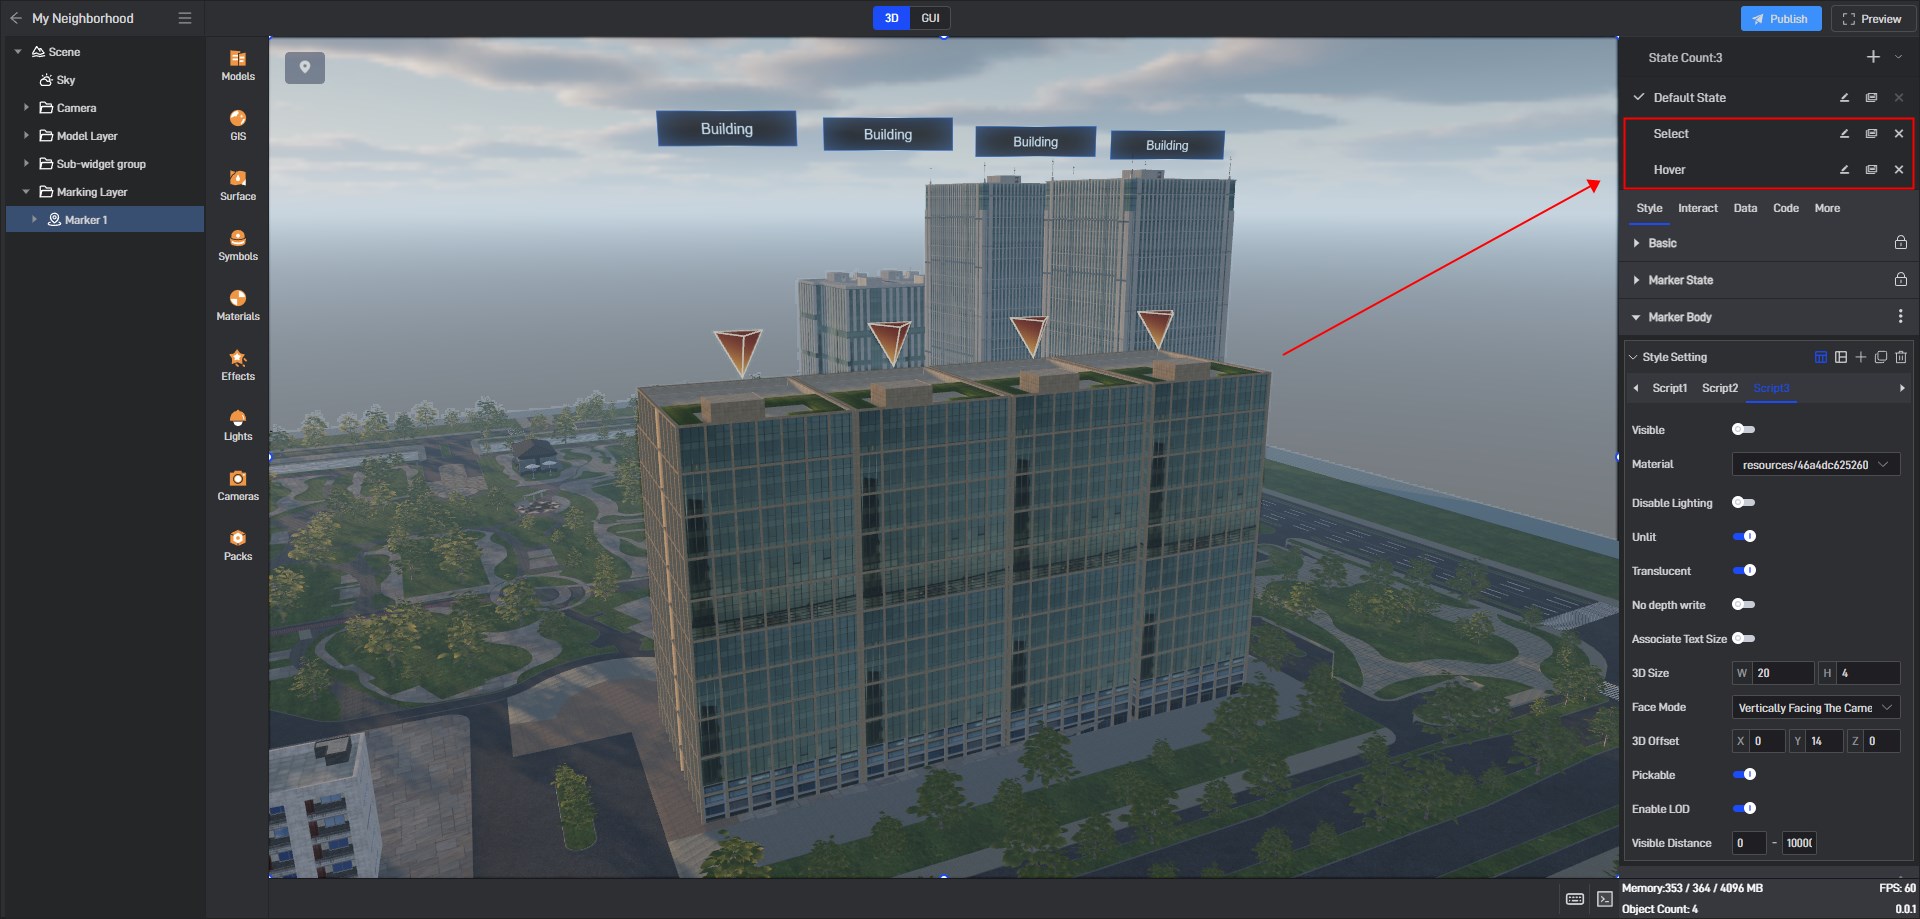
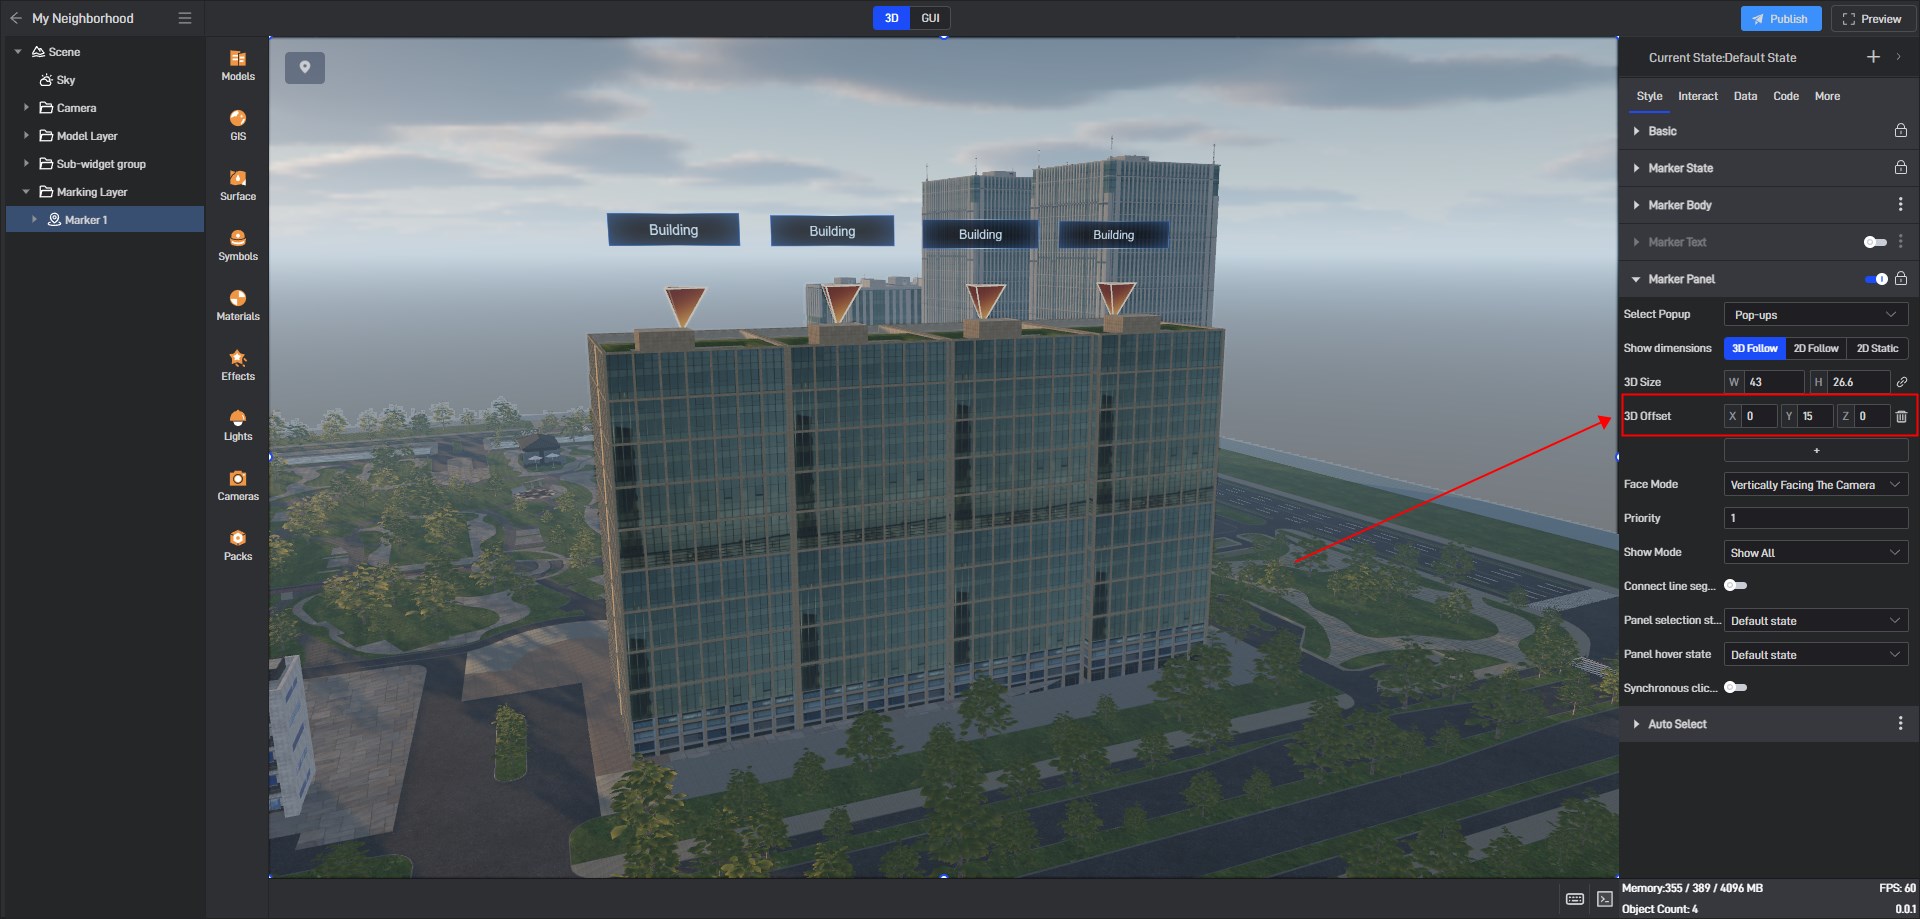
Finally, adjust the offset position of the panel to get a more suitable effect.
2.3 Panel events are passed to the markers
We have completed the effect of replacing the marker text with the panel, but when the mouse hovers over the panel text, the marker does not trigger the hover effect. When the button on the panel is clicked, the marker is not selected. At this time, you need to turn on “Synchronize click and hover”.
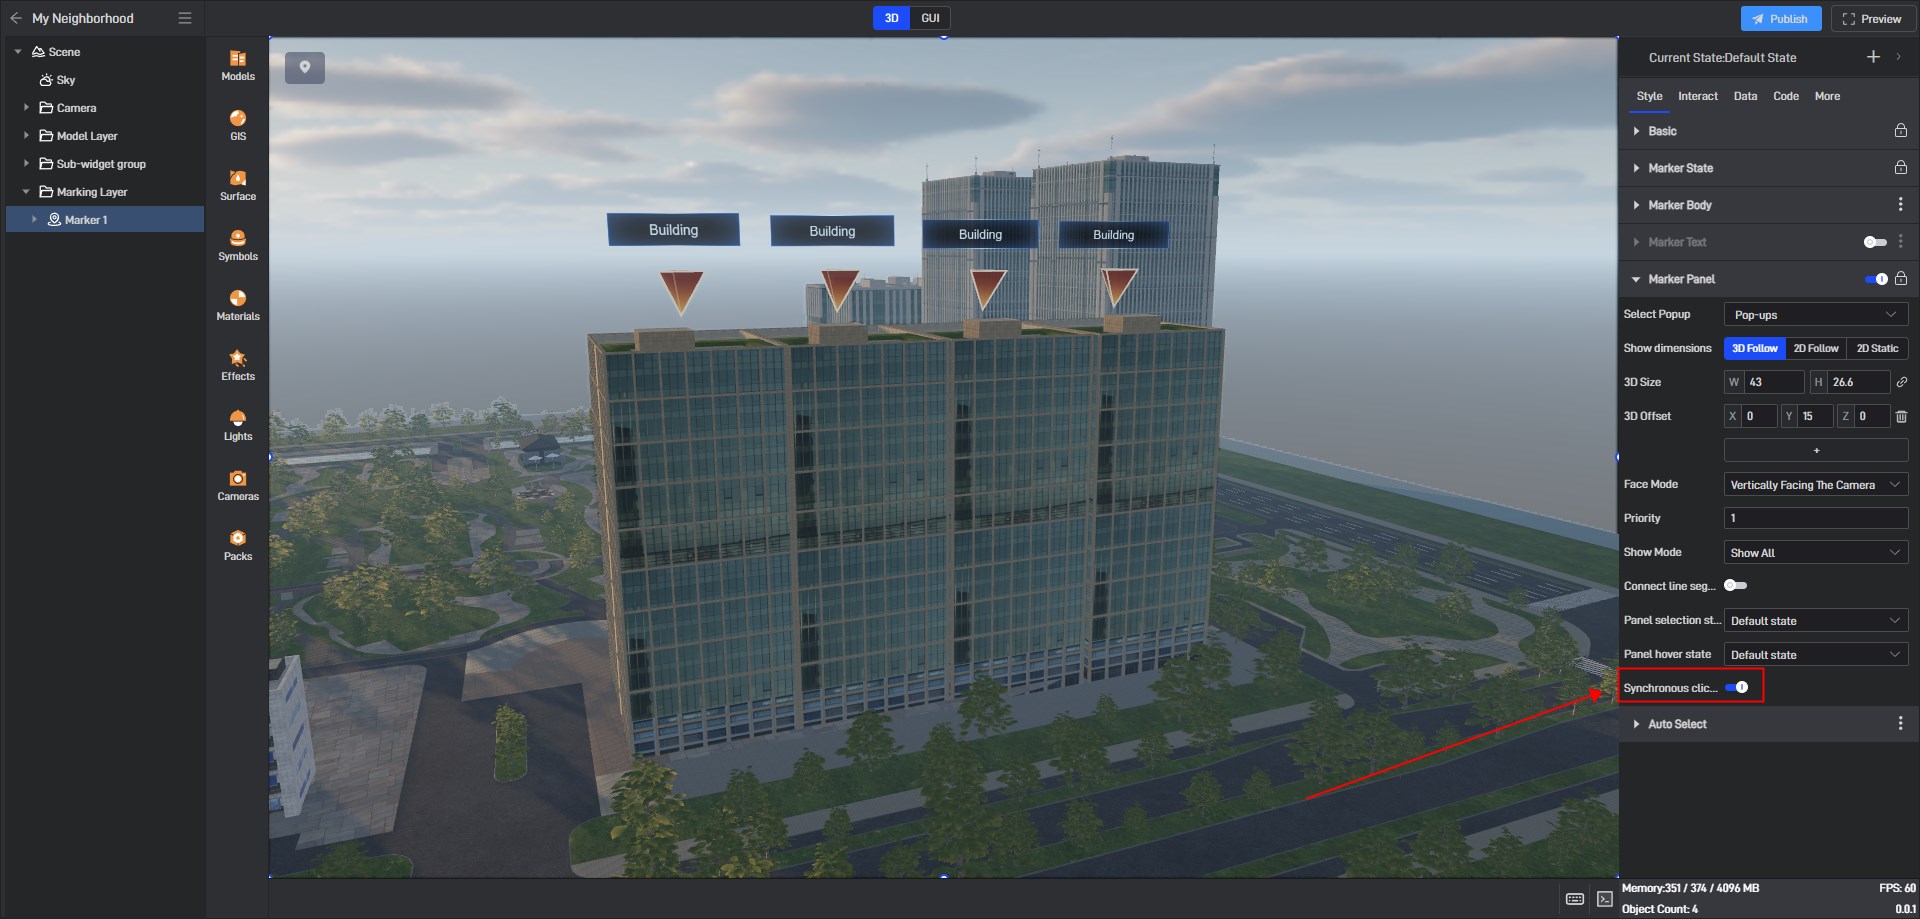
In this way, hovering and clicking in the panel will be passed to the marker, and clicking on the panel can select the marker.
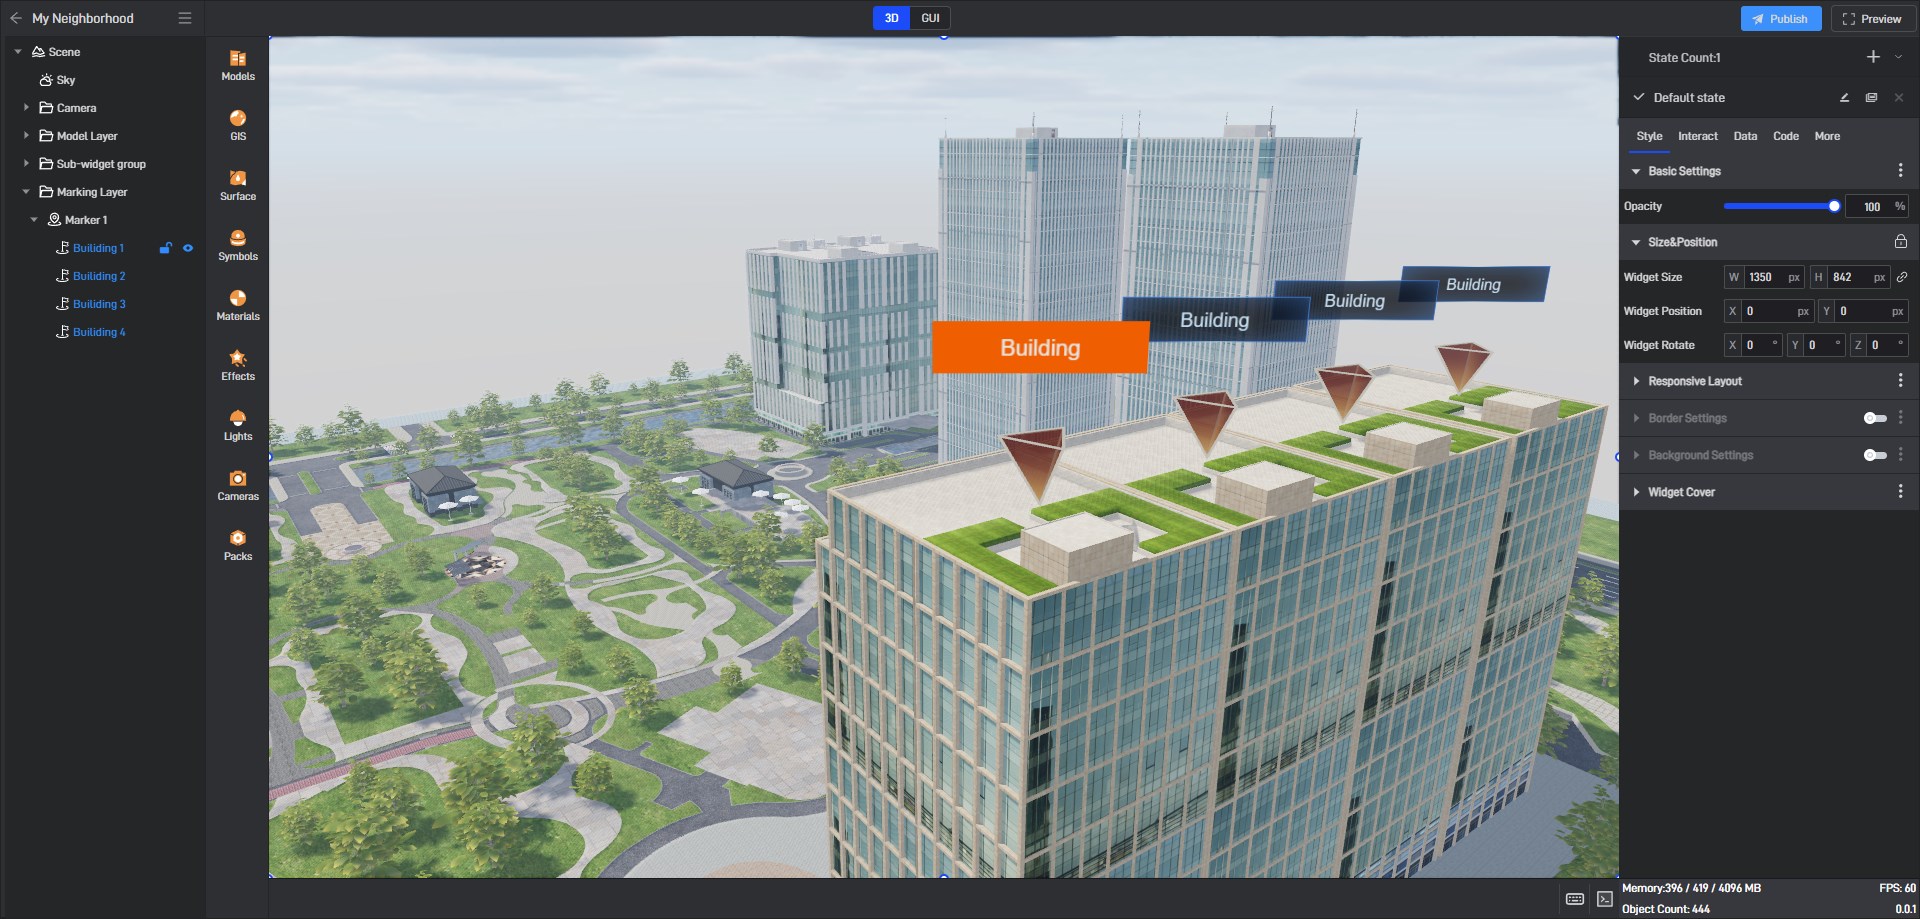
However, the hover and selection in the marker will not be passed to the panel.
2.4 Marker events are passed to the panel
If you need to hover over a marker point, the button will also trigger the hover effect. When the marker point is selected, the panel can also switch to the selected state.
Add two states to the pop-ups, “Hover” and “Select”.
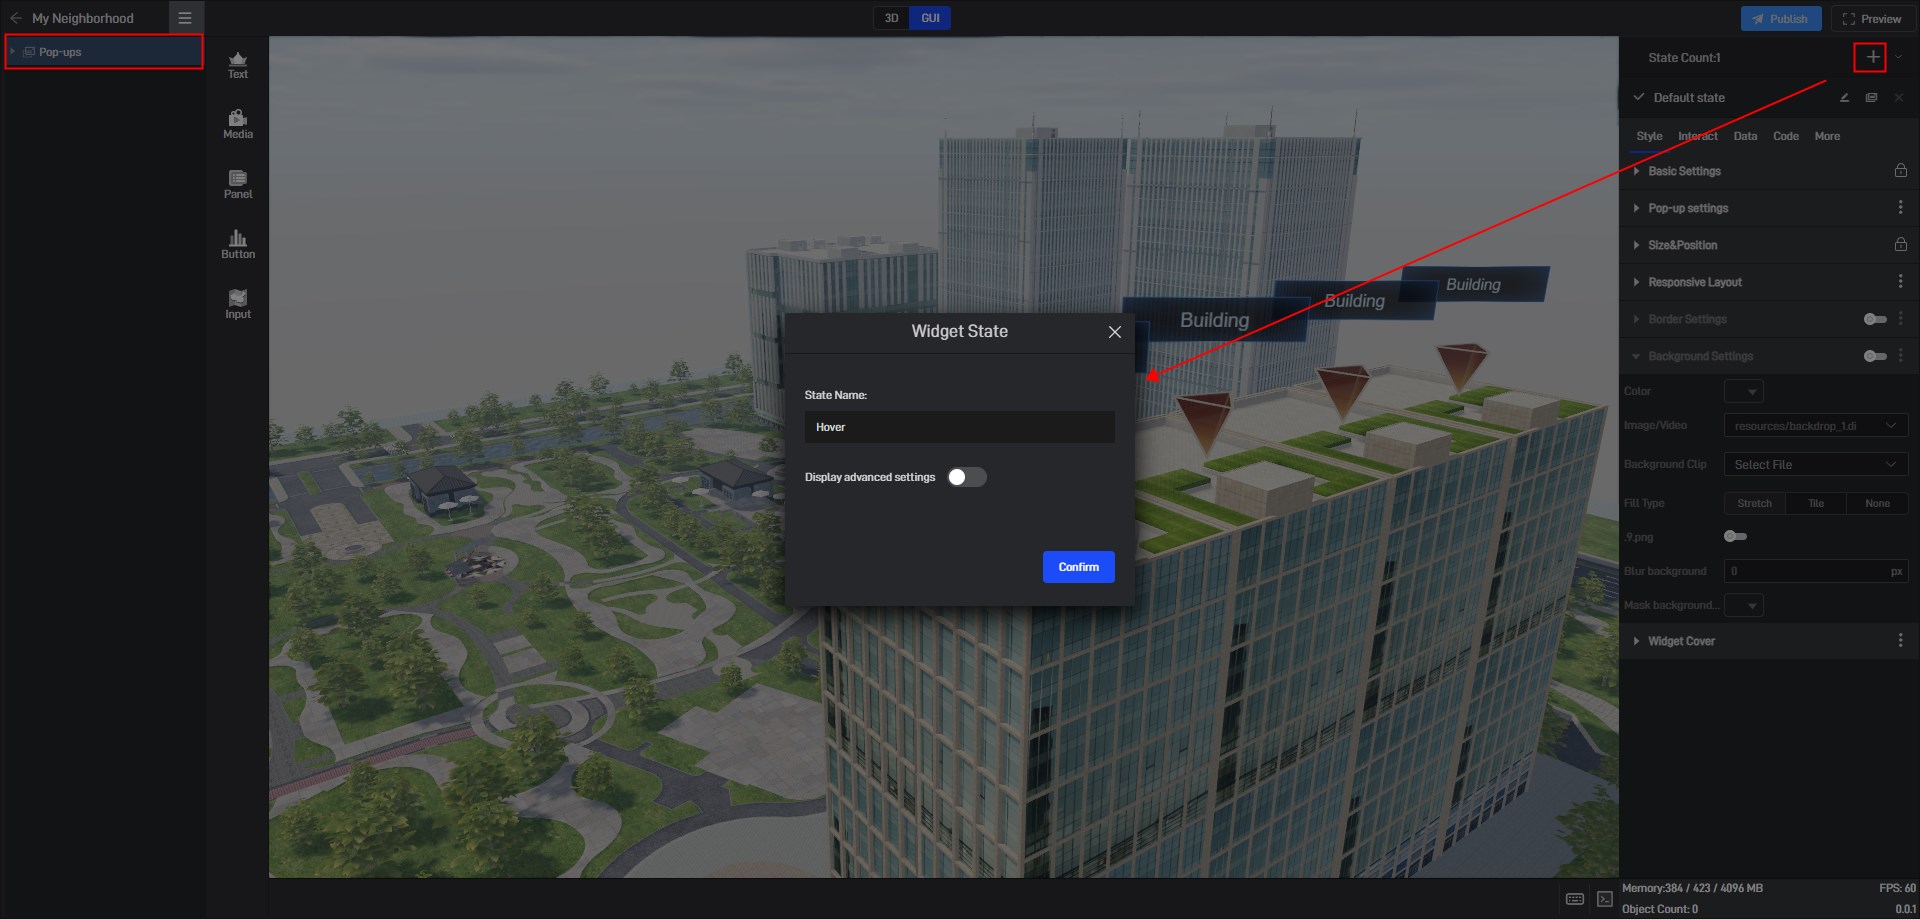
Enable “Status Follow” in basic settings.
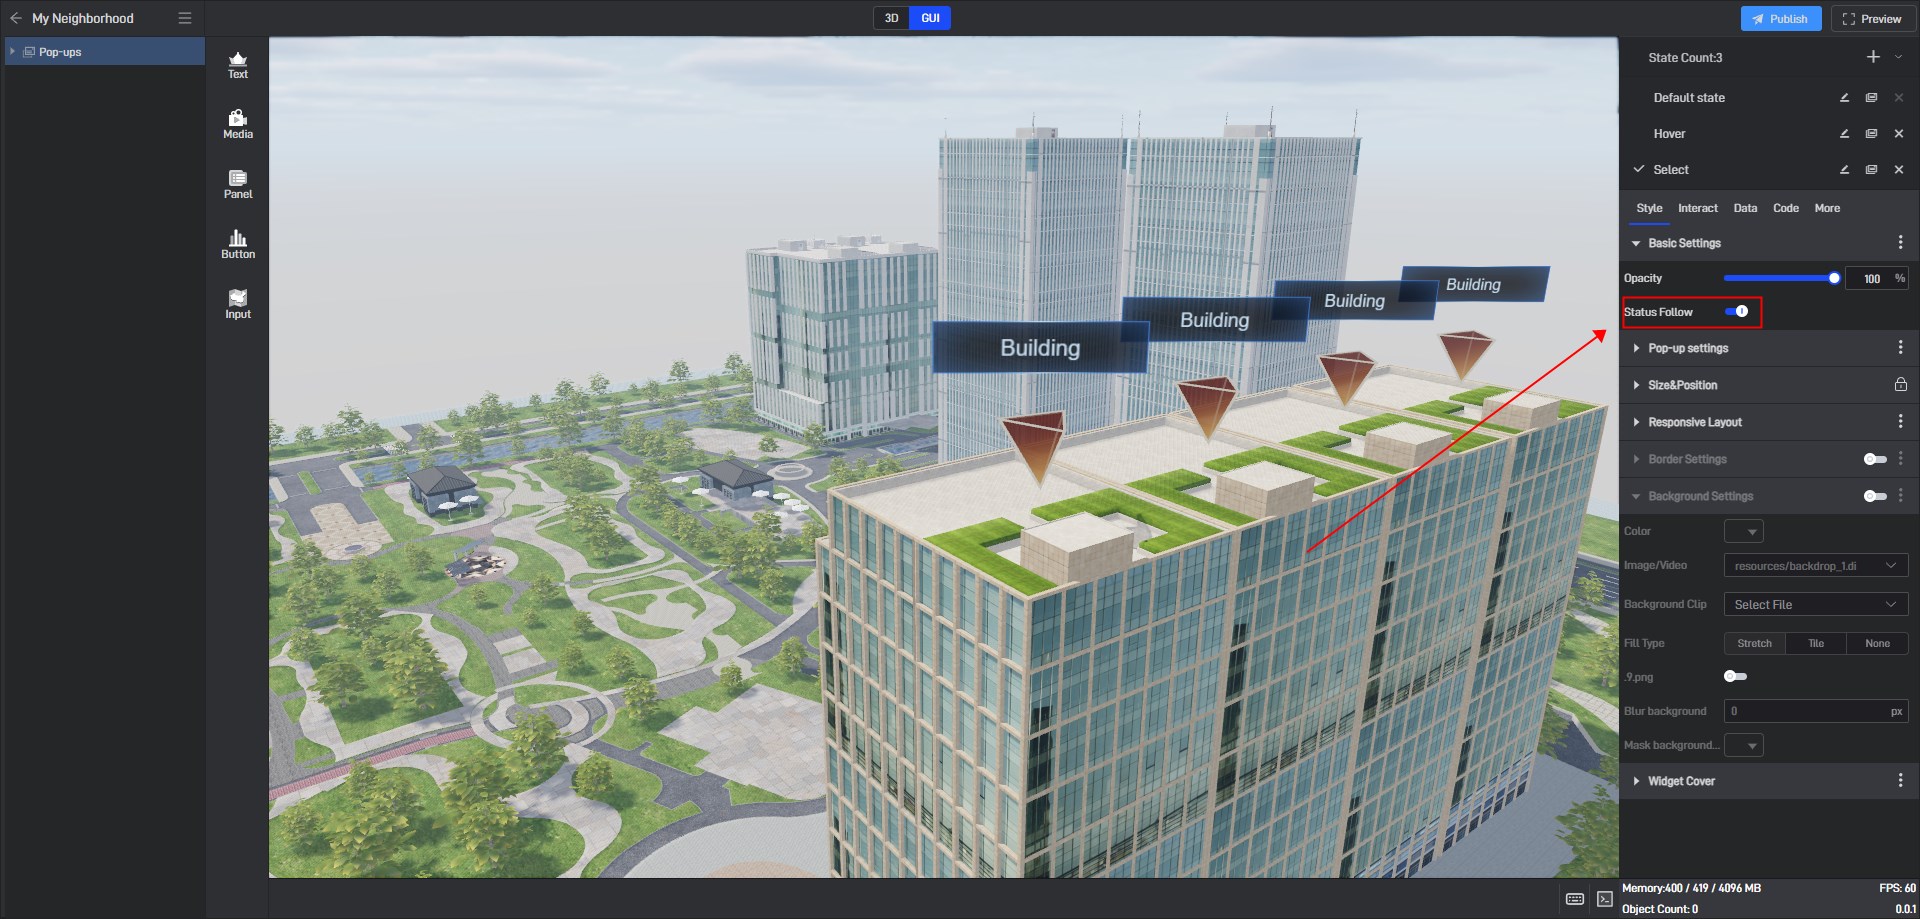
Then select the button, also add two states “Hover” and “Select”, and associate these two states with the two states on the pop-ups.
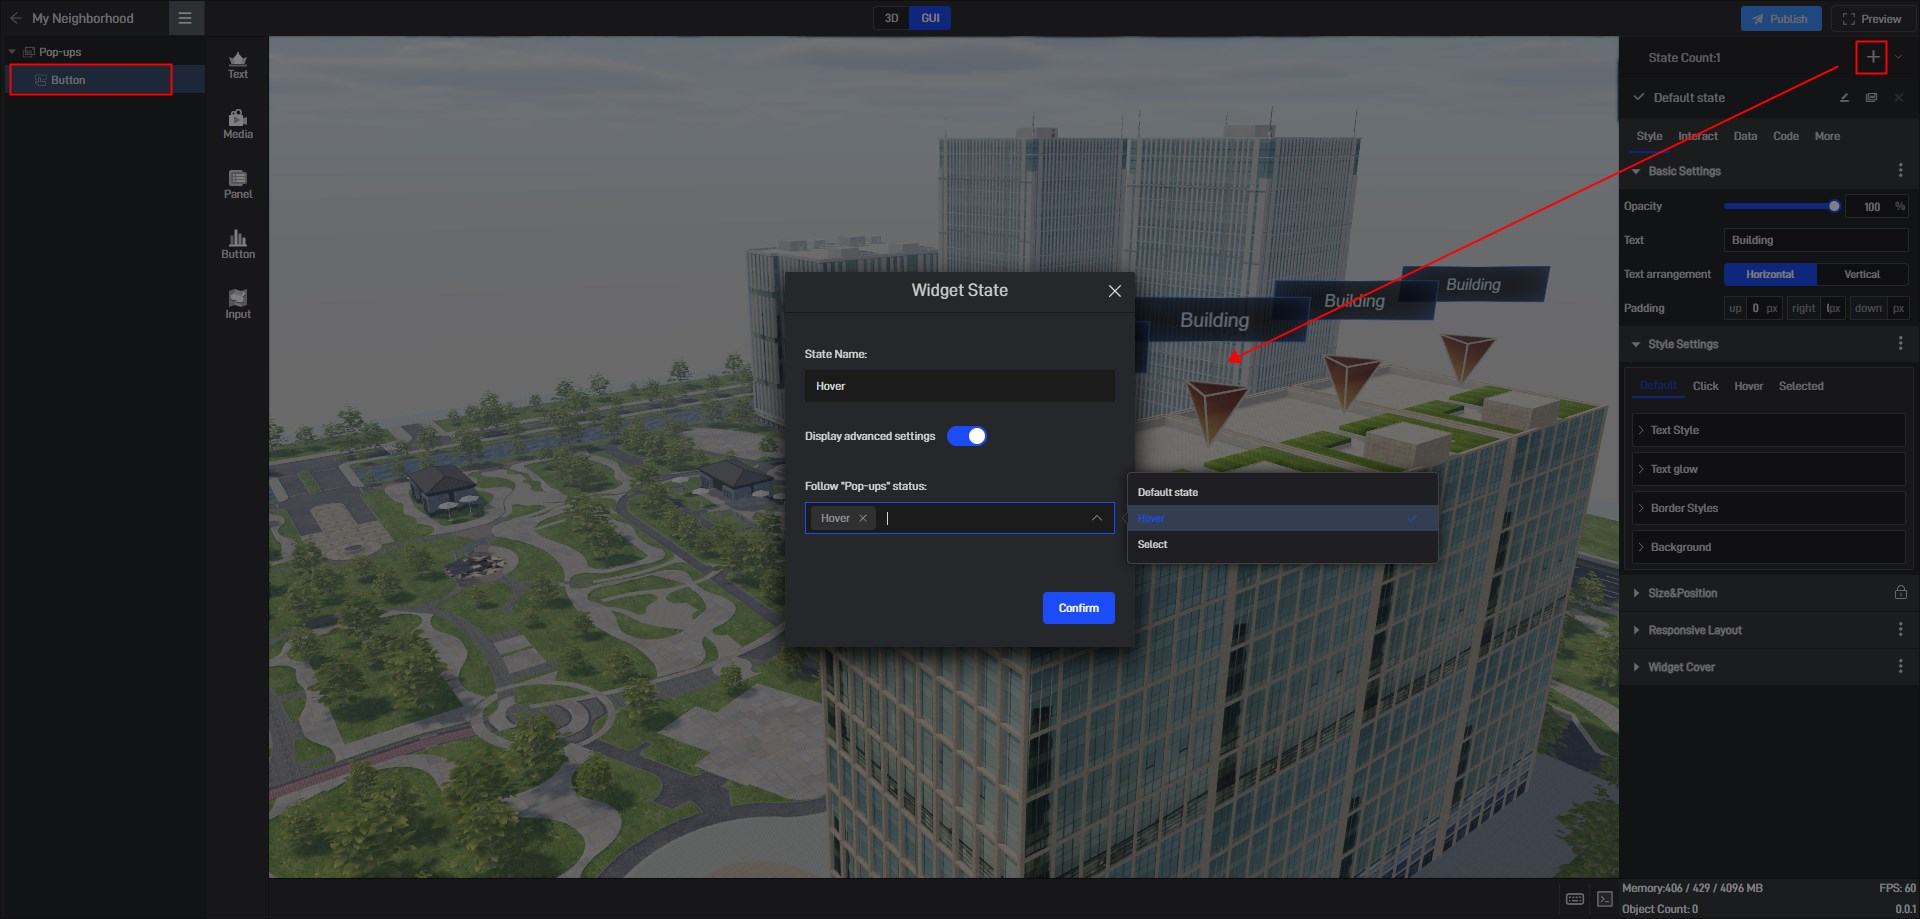
Modify the default state and associate the default state of the button with the default state of the pop-ups.
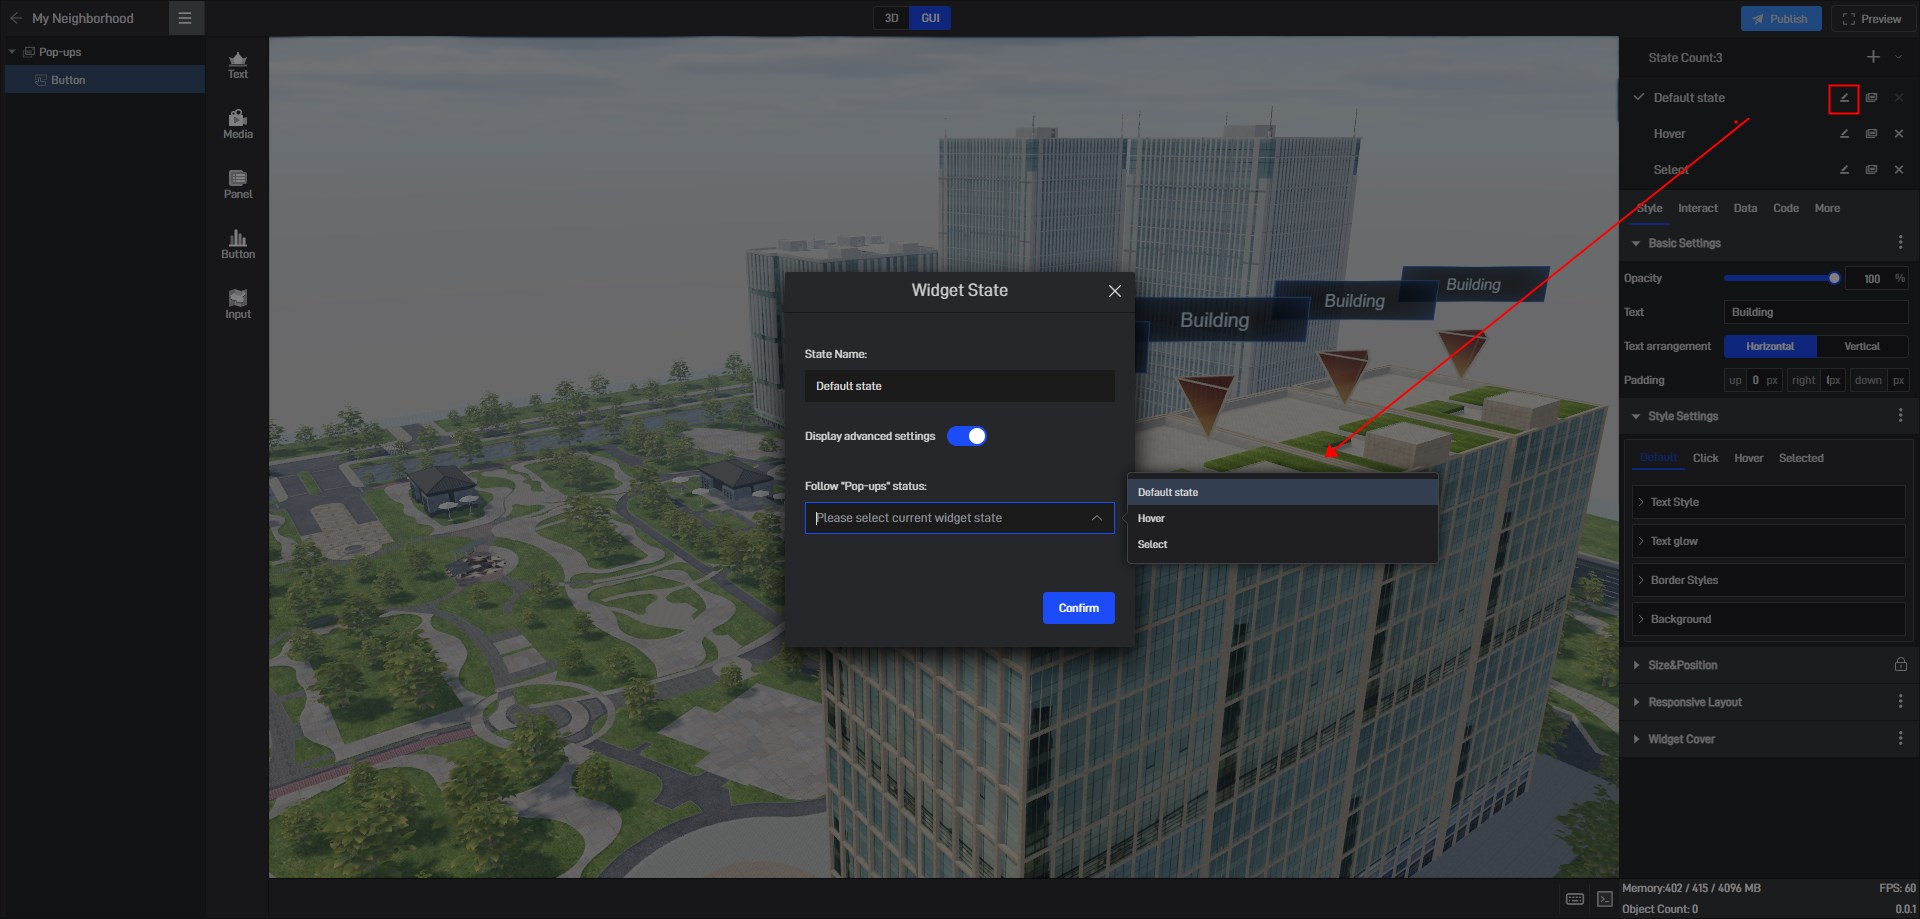
Change the default background color of the button to orange in the hover state and blue in the selected state.
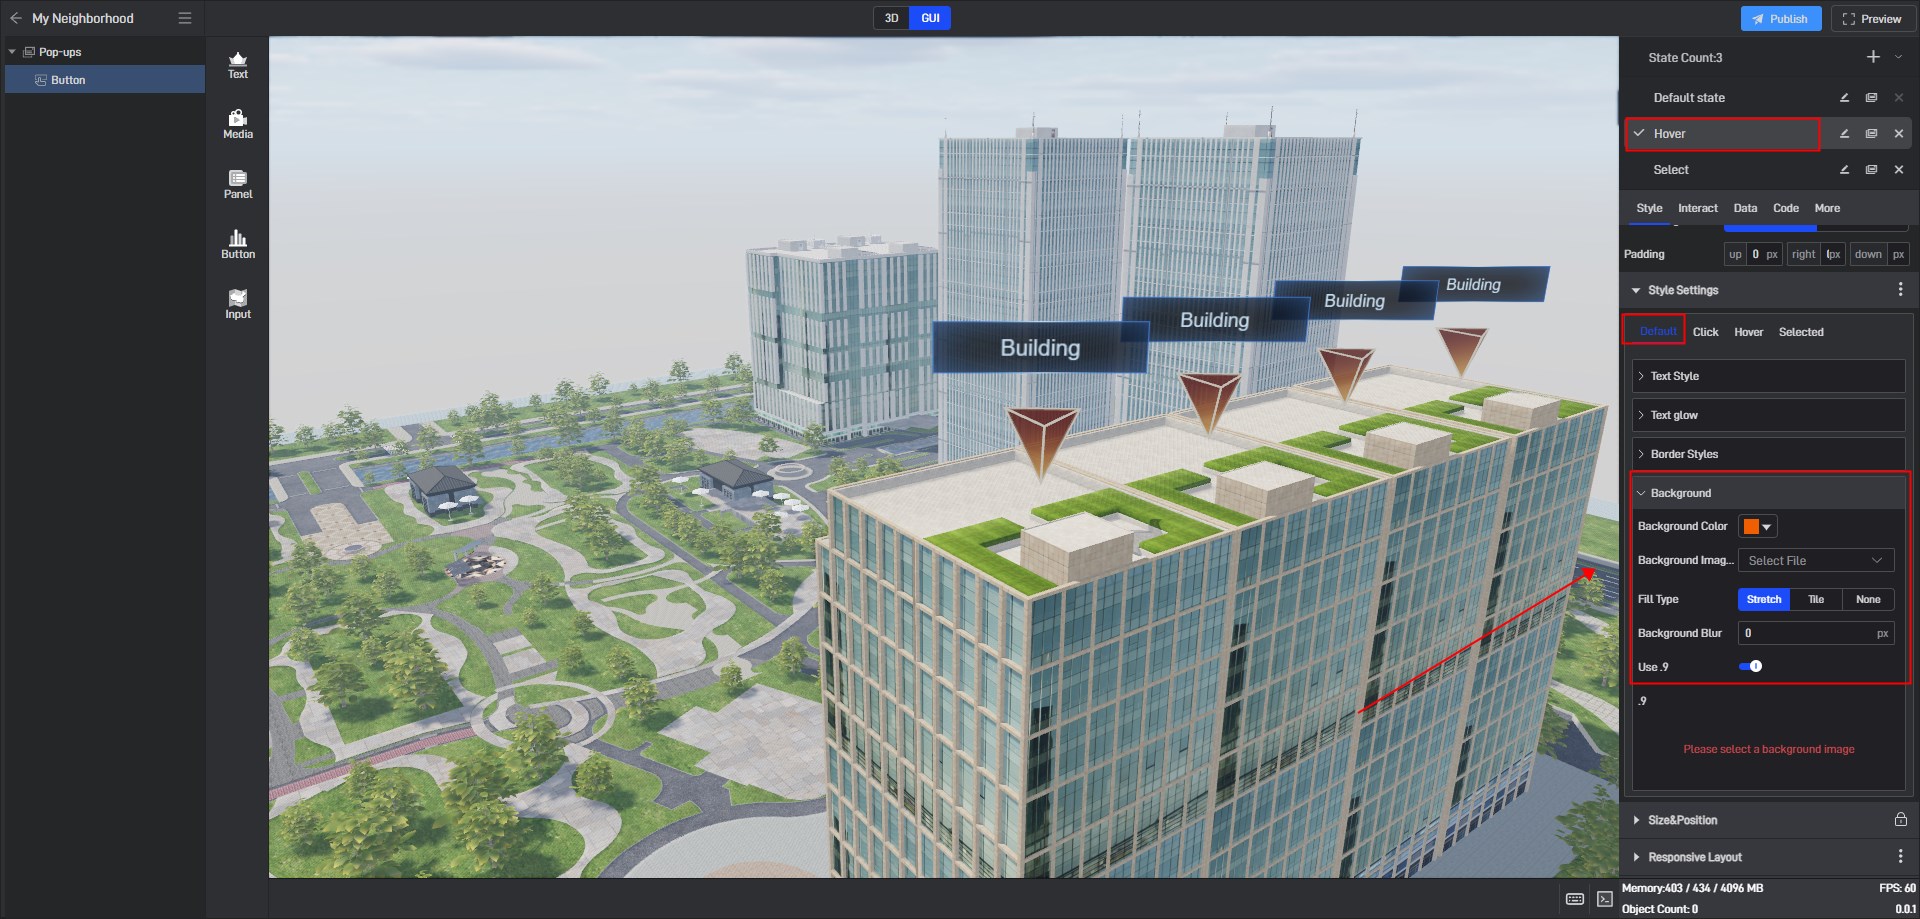
Then switch the pop-ups state back to the default state.
Switch to the 3D scene, select the marker group, and associate the hover state and selected state of the marker group with the corresponding state of the pop-ups.
