Interaction with Markers
In addition to the general interaction functionalities, markers also have specific interaction features. We’ll break these down into two sections: triggers and actions, to explore the unique interactions associated with markers.
Important Note: All interactions for markers should be set on the marker group. A group of markers shares the same set of interactions.
1. Triggers for Marker Interaction
There are three additional triggers specifically for markers: clicking on a marker, selecting a marker, and deselecting a marker.
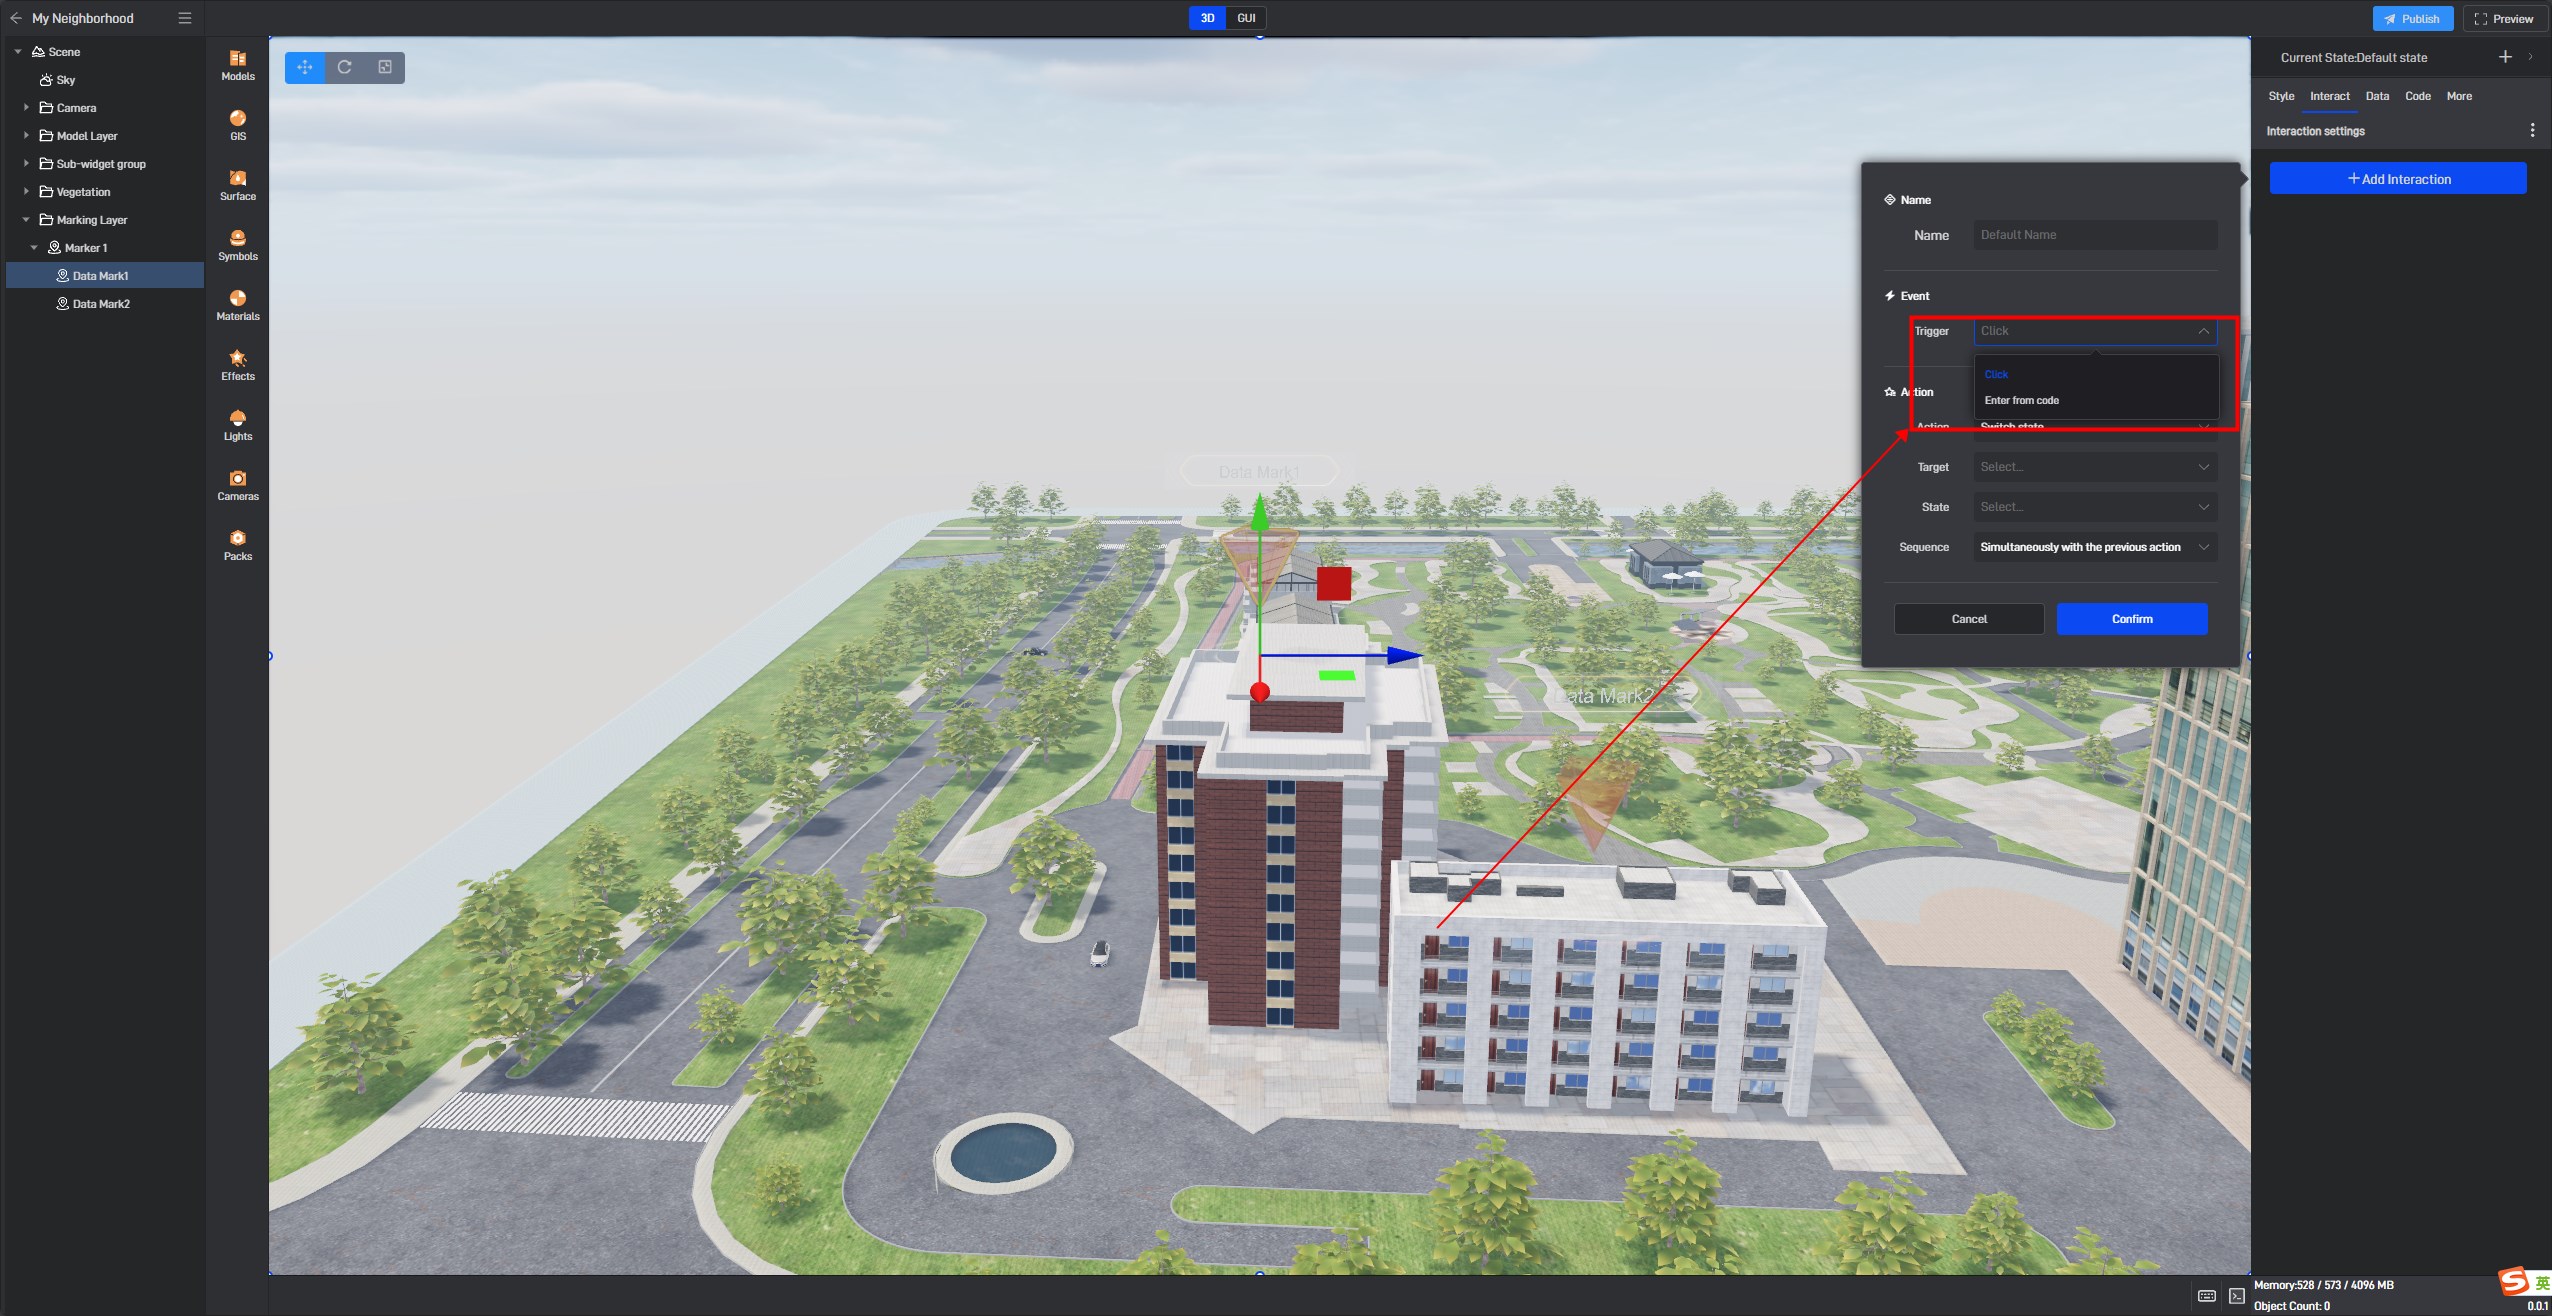
The differences between selecting a marker and clicking on a marker are:
- Selecting a Marker: This trigger can also be activated during selection propagation, while clicking cannot.
- Clicking on a Marker: This can either select the marker or deselect it.
2. Custom Actions for Markers
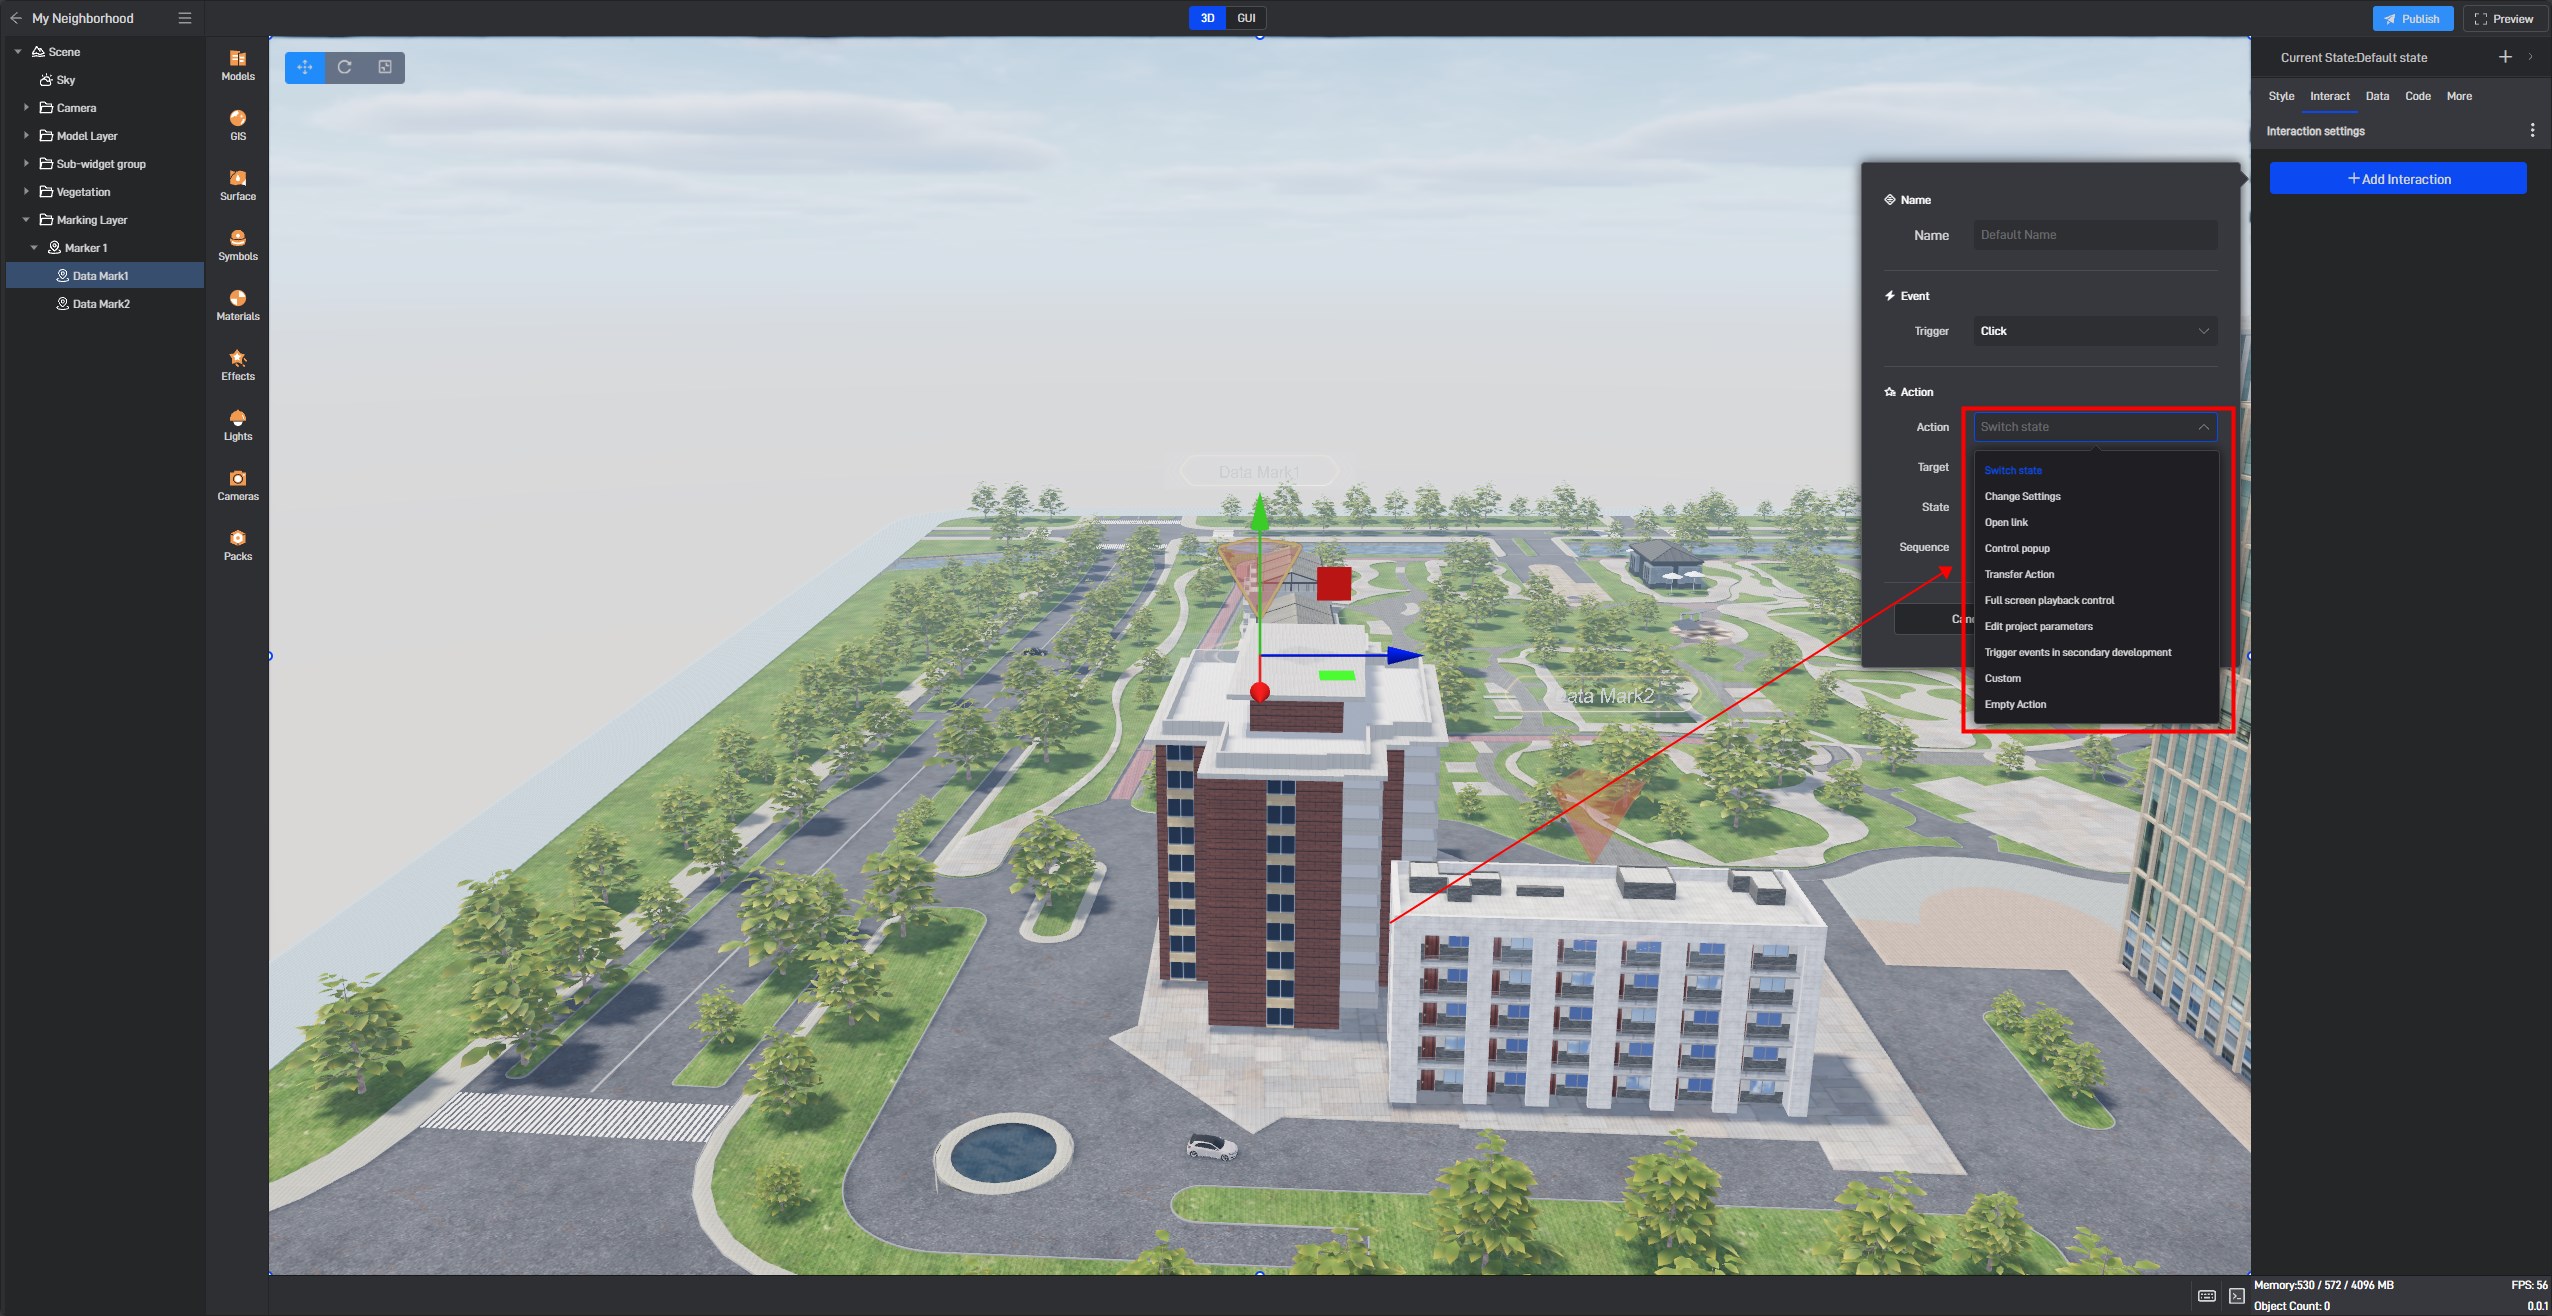
Markers have three custom actions: select a marker, deselect a marker, and switch to the marker’s viewpoint.
- Switching to the Marker’s Viewpoint: This is typically used in conjunction with the trigger for selecting a marker. When a marker is selected, the viewpoint automatically switches to that marker. It’s important to note that switching the marker’s viewpoint refers to switching to the viewpoint of the currently selected marker.
- Selecting a Marker: This is primarily done manually, but in many cases, it has been replaced by the selection propagation function.
3. Practical Examples
3.1 Switching to the Marker’s Viewpoint When Selected
This is a very common feature, and it’s automatically set for built-in markers. By selecting the marker group and clicking on the interaction tab, you can see this interaction:
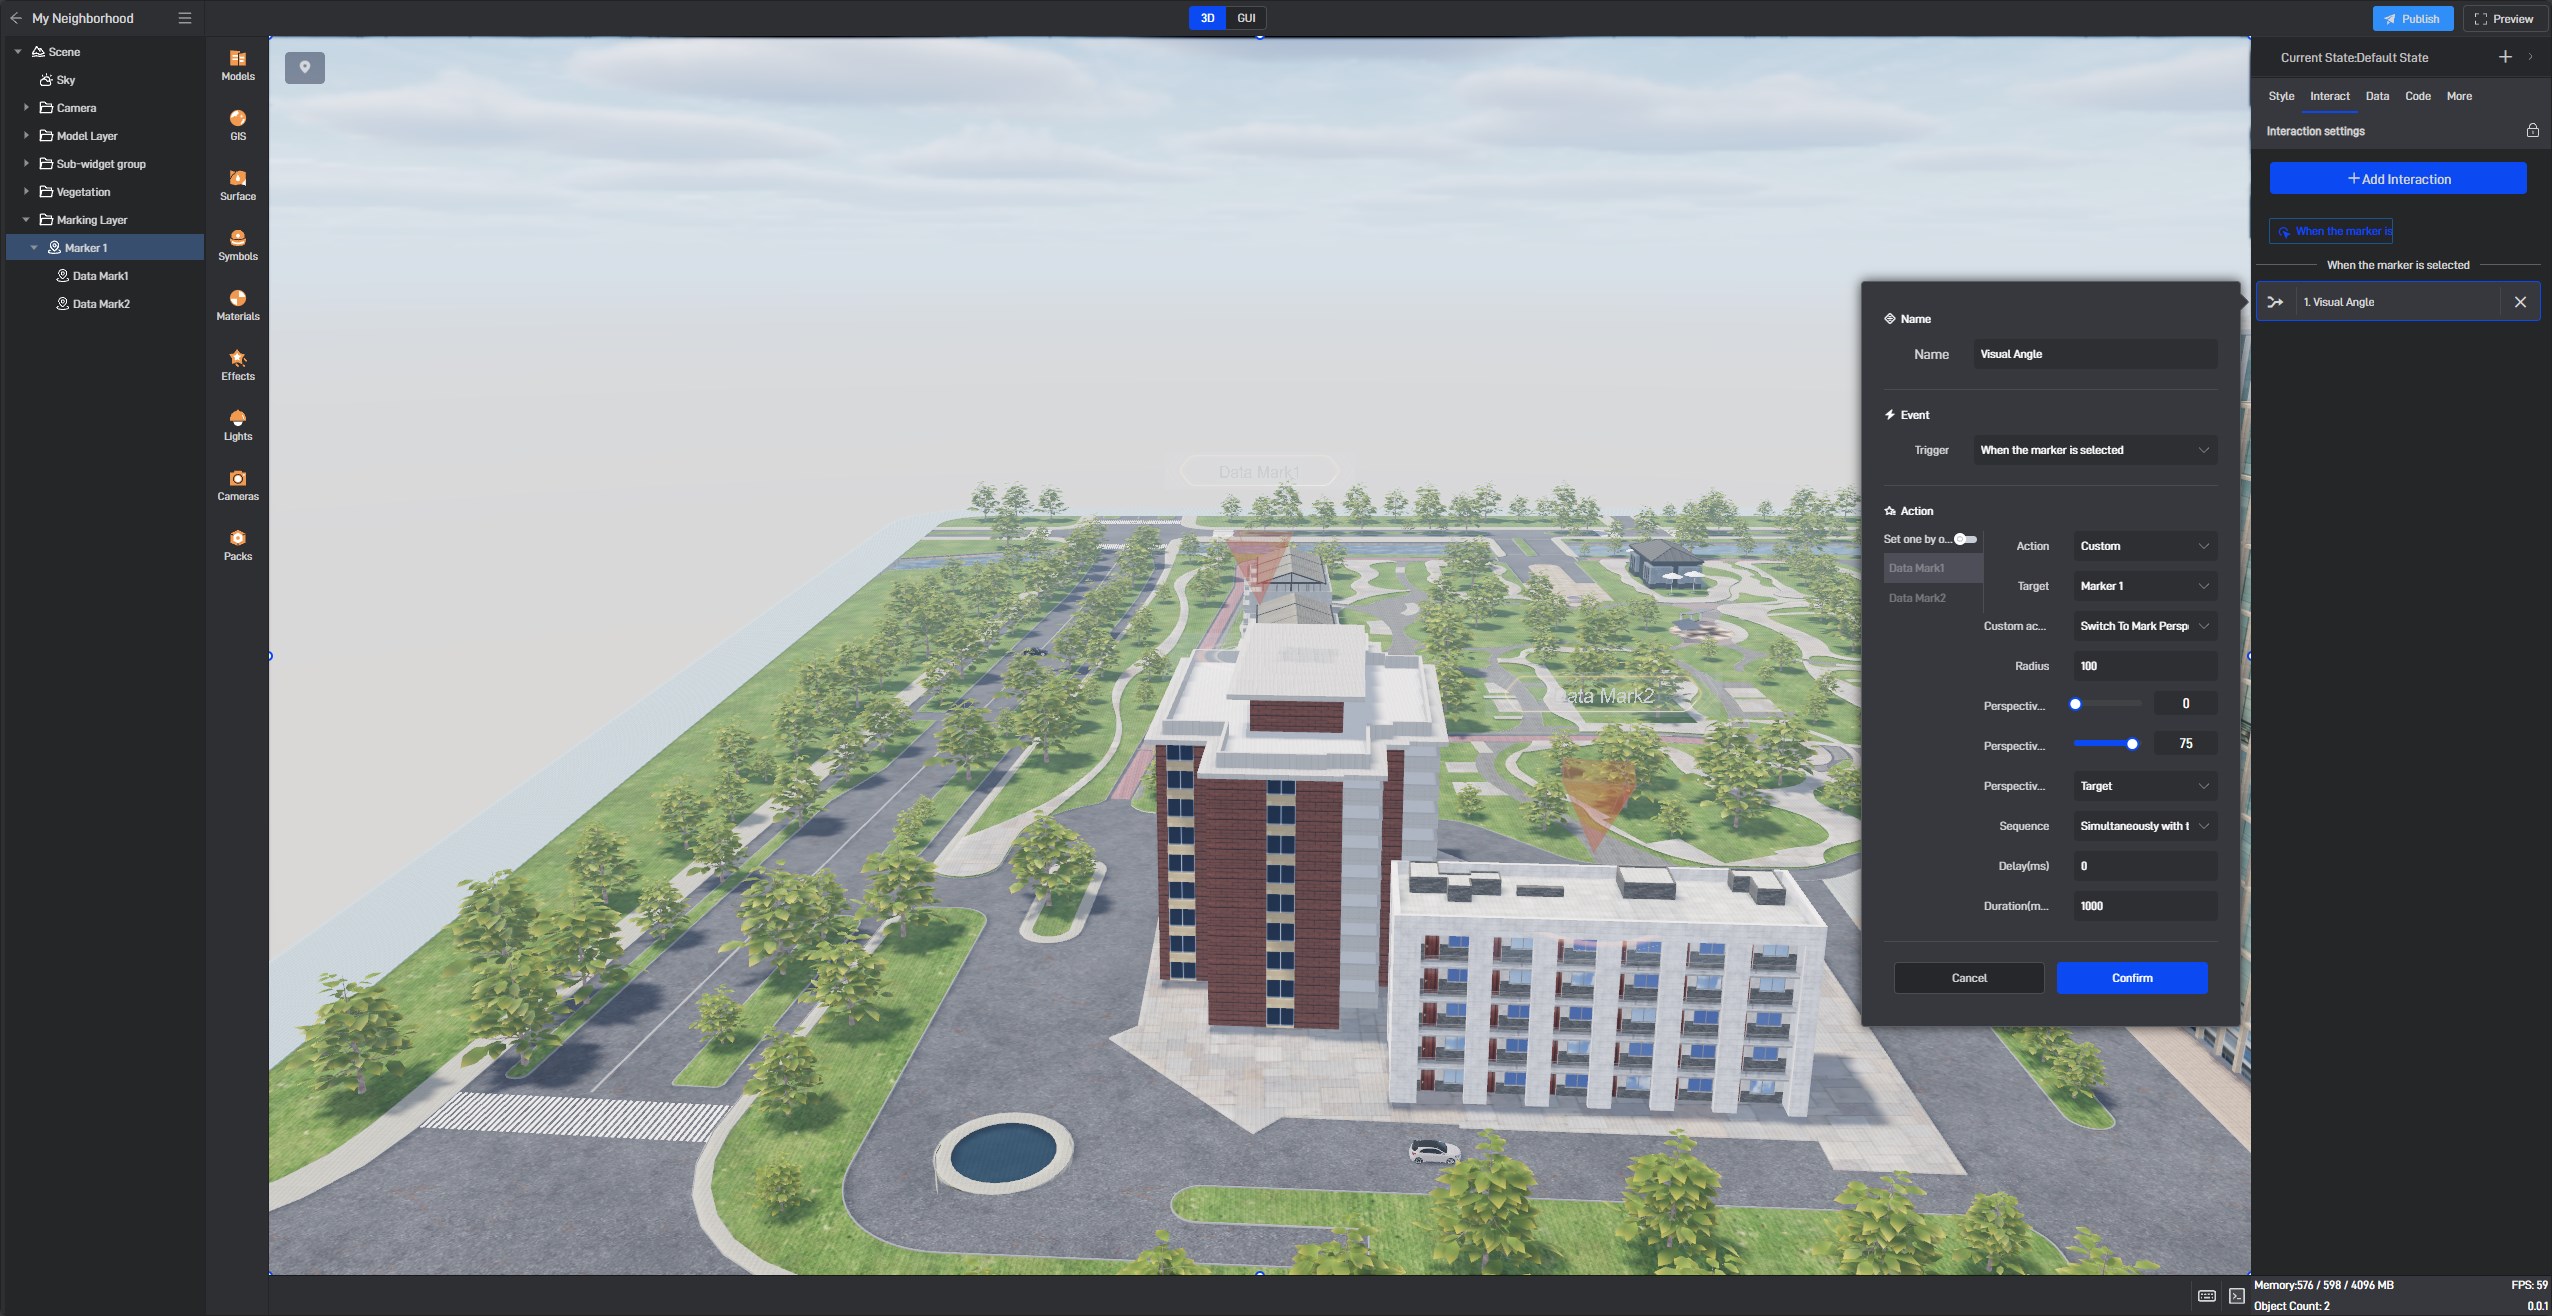
You can also change the trigger to “clicking on a marker.” In this case, the viewpoint switch interaction won’t be triggered in scenarios involving selection propagation.
3.2 Triggering Data Changes Based on the Selected Marker
There are two ways to achieve this requirement:
**Data Filtering Linkage: **This method involves loading all the data at once and filtering it on the front end, which is more suitable for scenarios with a smaller data set.
Configuring Project Parameters When Connecting to the Data Source: This method involves setting parameters when connecting to the data source and triggering changes to these parameters when a marker is clicked, which refreshes the data. This is more suitable for larger datasets. Let’s look at how to set up the second method:
First, refer to the project parameters documentation to configure the data source, which could be an API or a SQL database.
Then, convert the free markers into data markers as described in the previous document, using the marker ID as the marker key.
| Marker ID | Name | Location |
|---|---|---|
| 1 | Free Marker 1 | 155.57786501571536,17.82378078757113,8.872001663316041 |
| 2 | Free Marker 2 | 98.96489031985402,17.83004002261287,6.905201252084225 |
| 3 | Free Marker 3 | 114.65566960722208,17.83551158883627,-21.26268603373319 |
| 4 | Free Marker 4 | 174.17609843425453,18.53640503251207,-19.937132242135704 |
Next, configure dynamic data passing. First, determine the data format carried when a marker is selected. To find out what data a trigger carries, you need to add an interaction to that trigger. If it’s just for debugging, you can add an empty action. Since there is already an interaction for marker selection, you don’t need to add anything special—just click the marker and check the output in the debug window under system information.
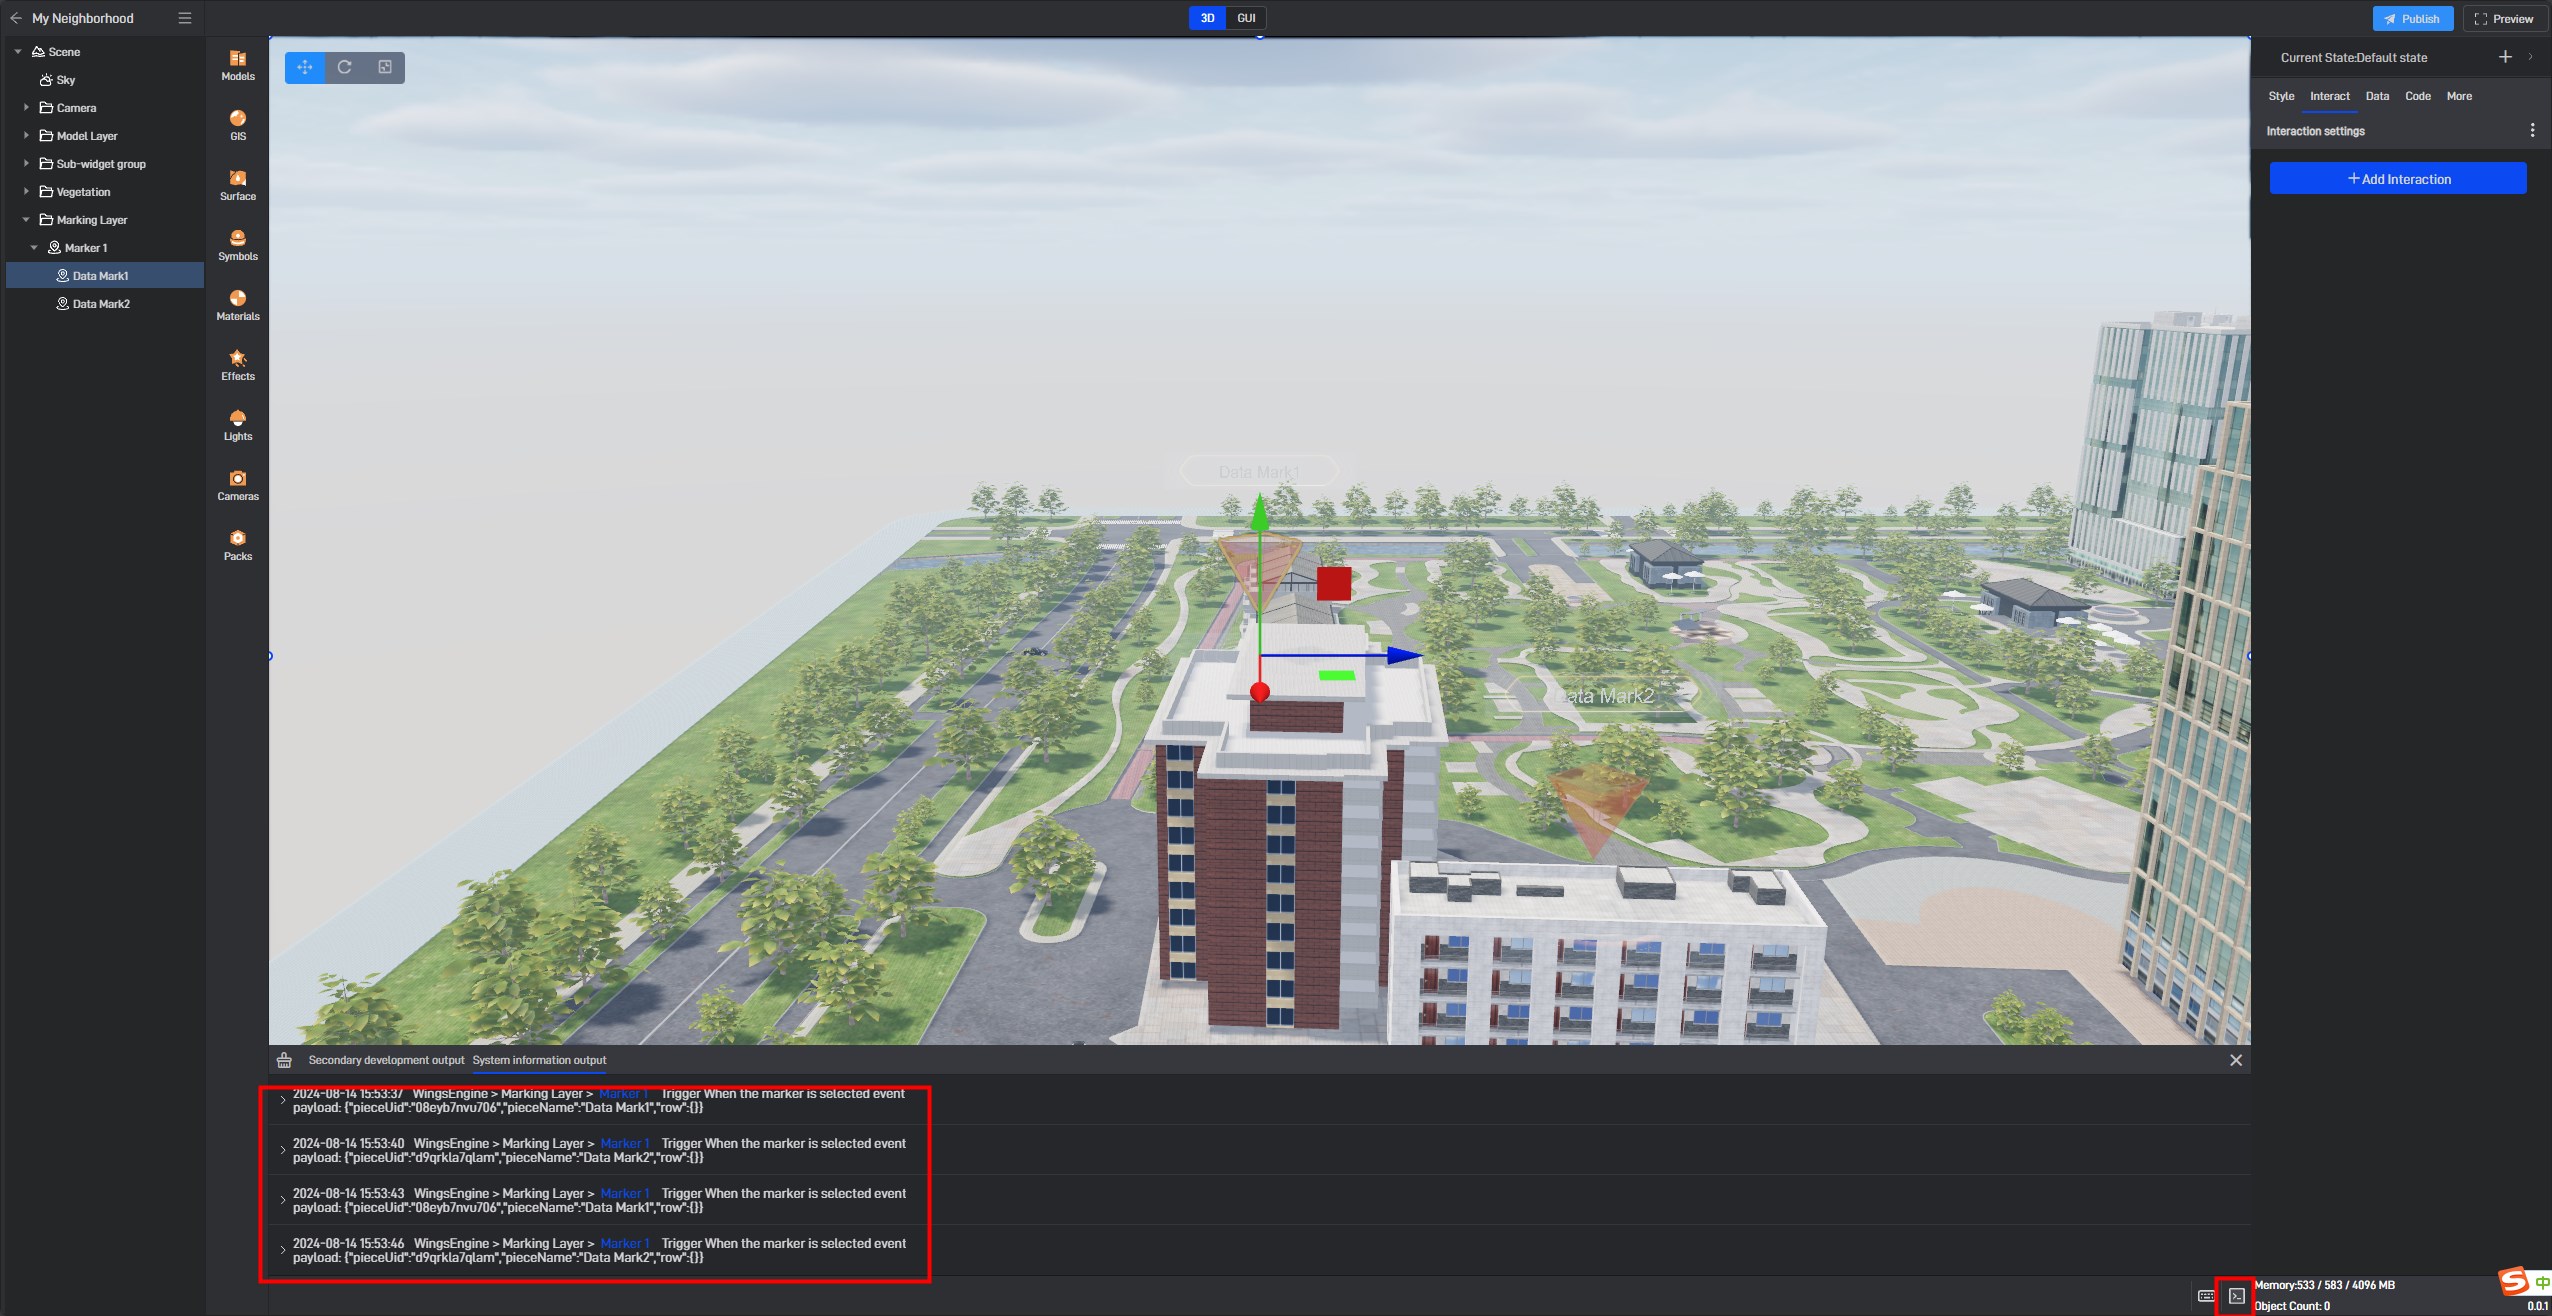
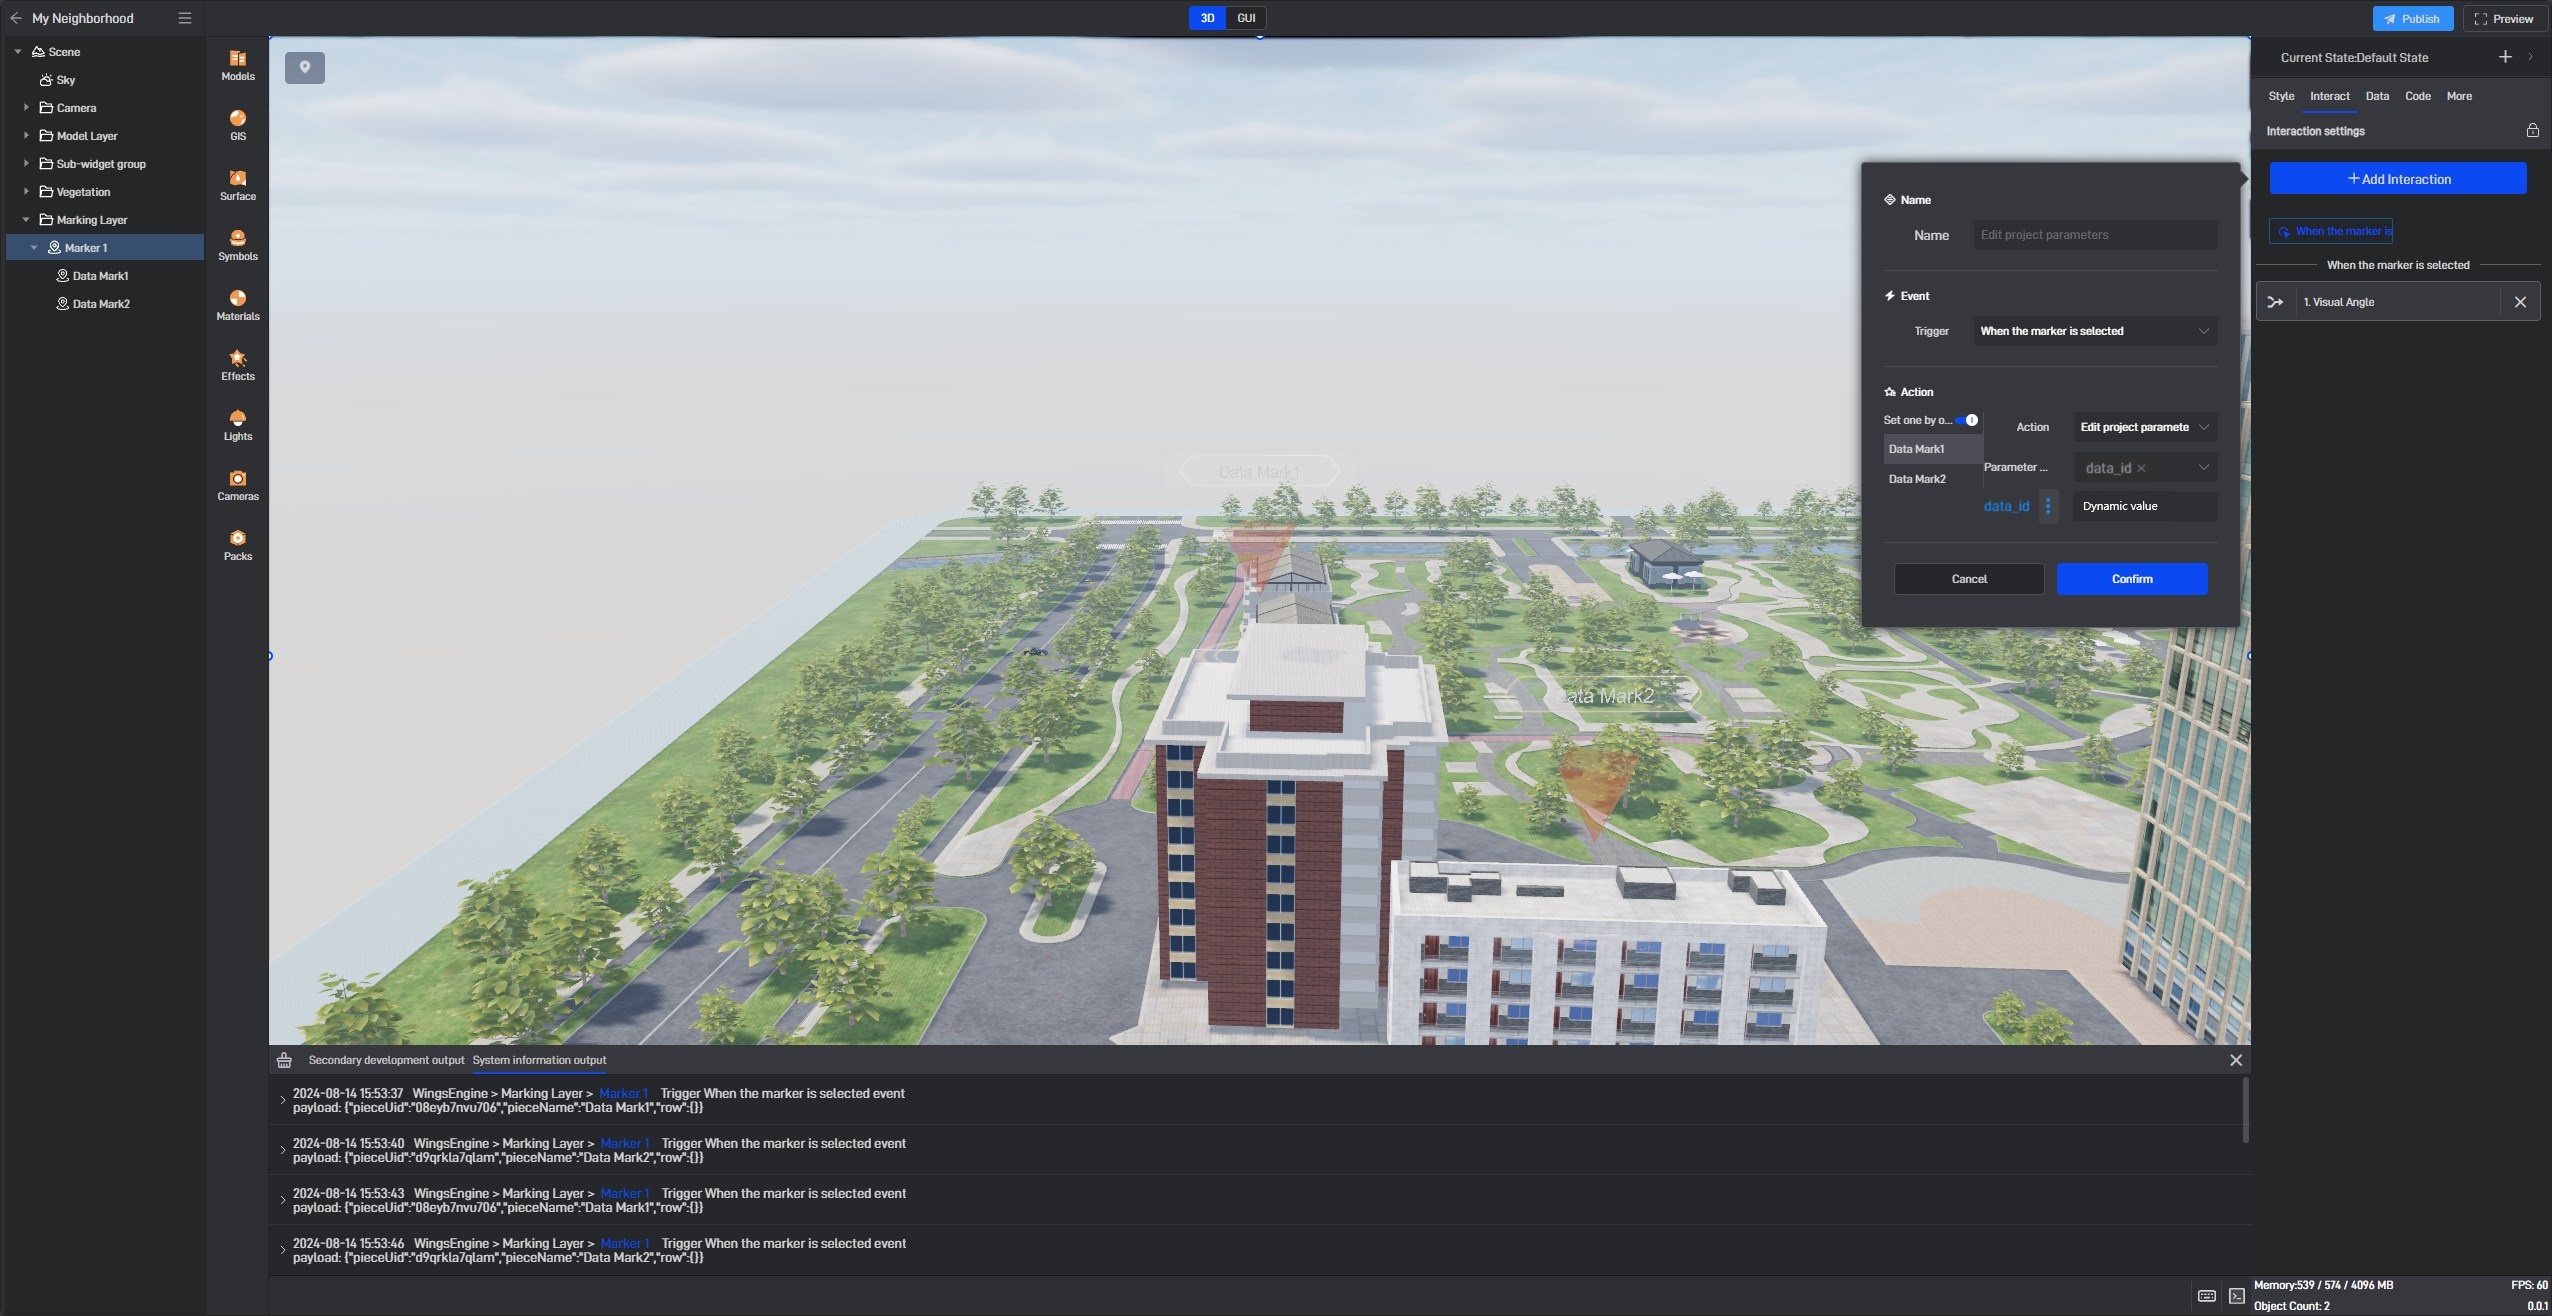
The payload is the data format being carried, which needs to be recorded. Then, add a new interaction to the marker group, where selecting a marker modifies the project parameters. Before entering specific data, change it to dynamic value:
Then, fill in the following parameters according to the data structure:
{:payload.row.markerID}
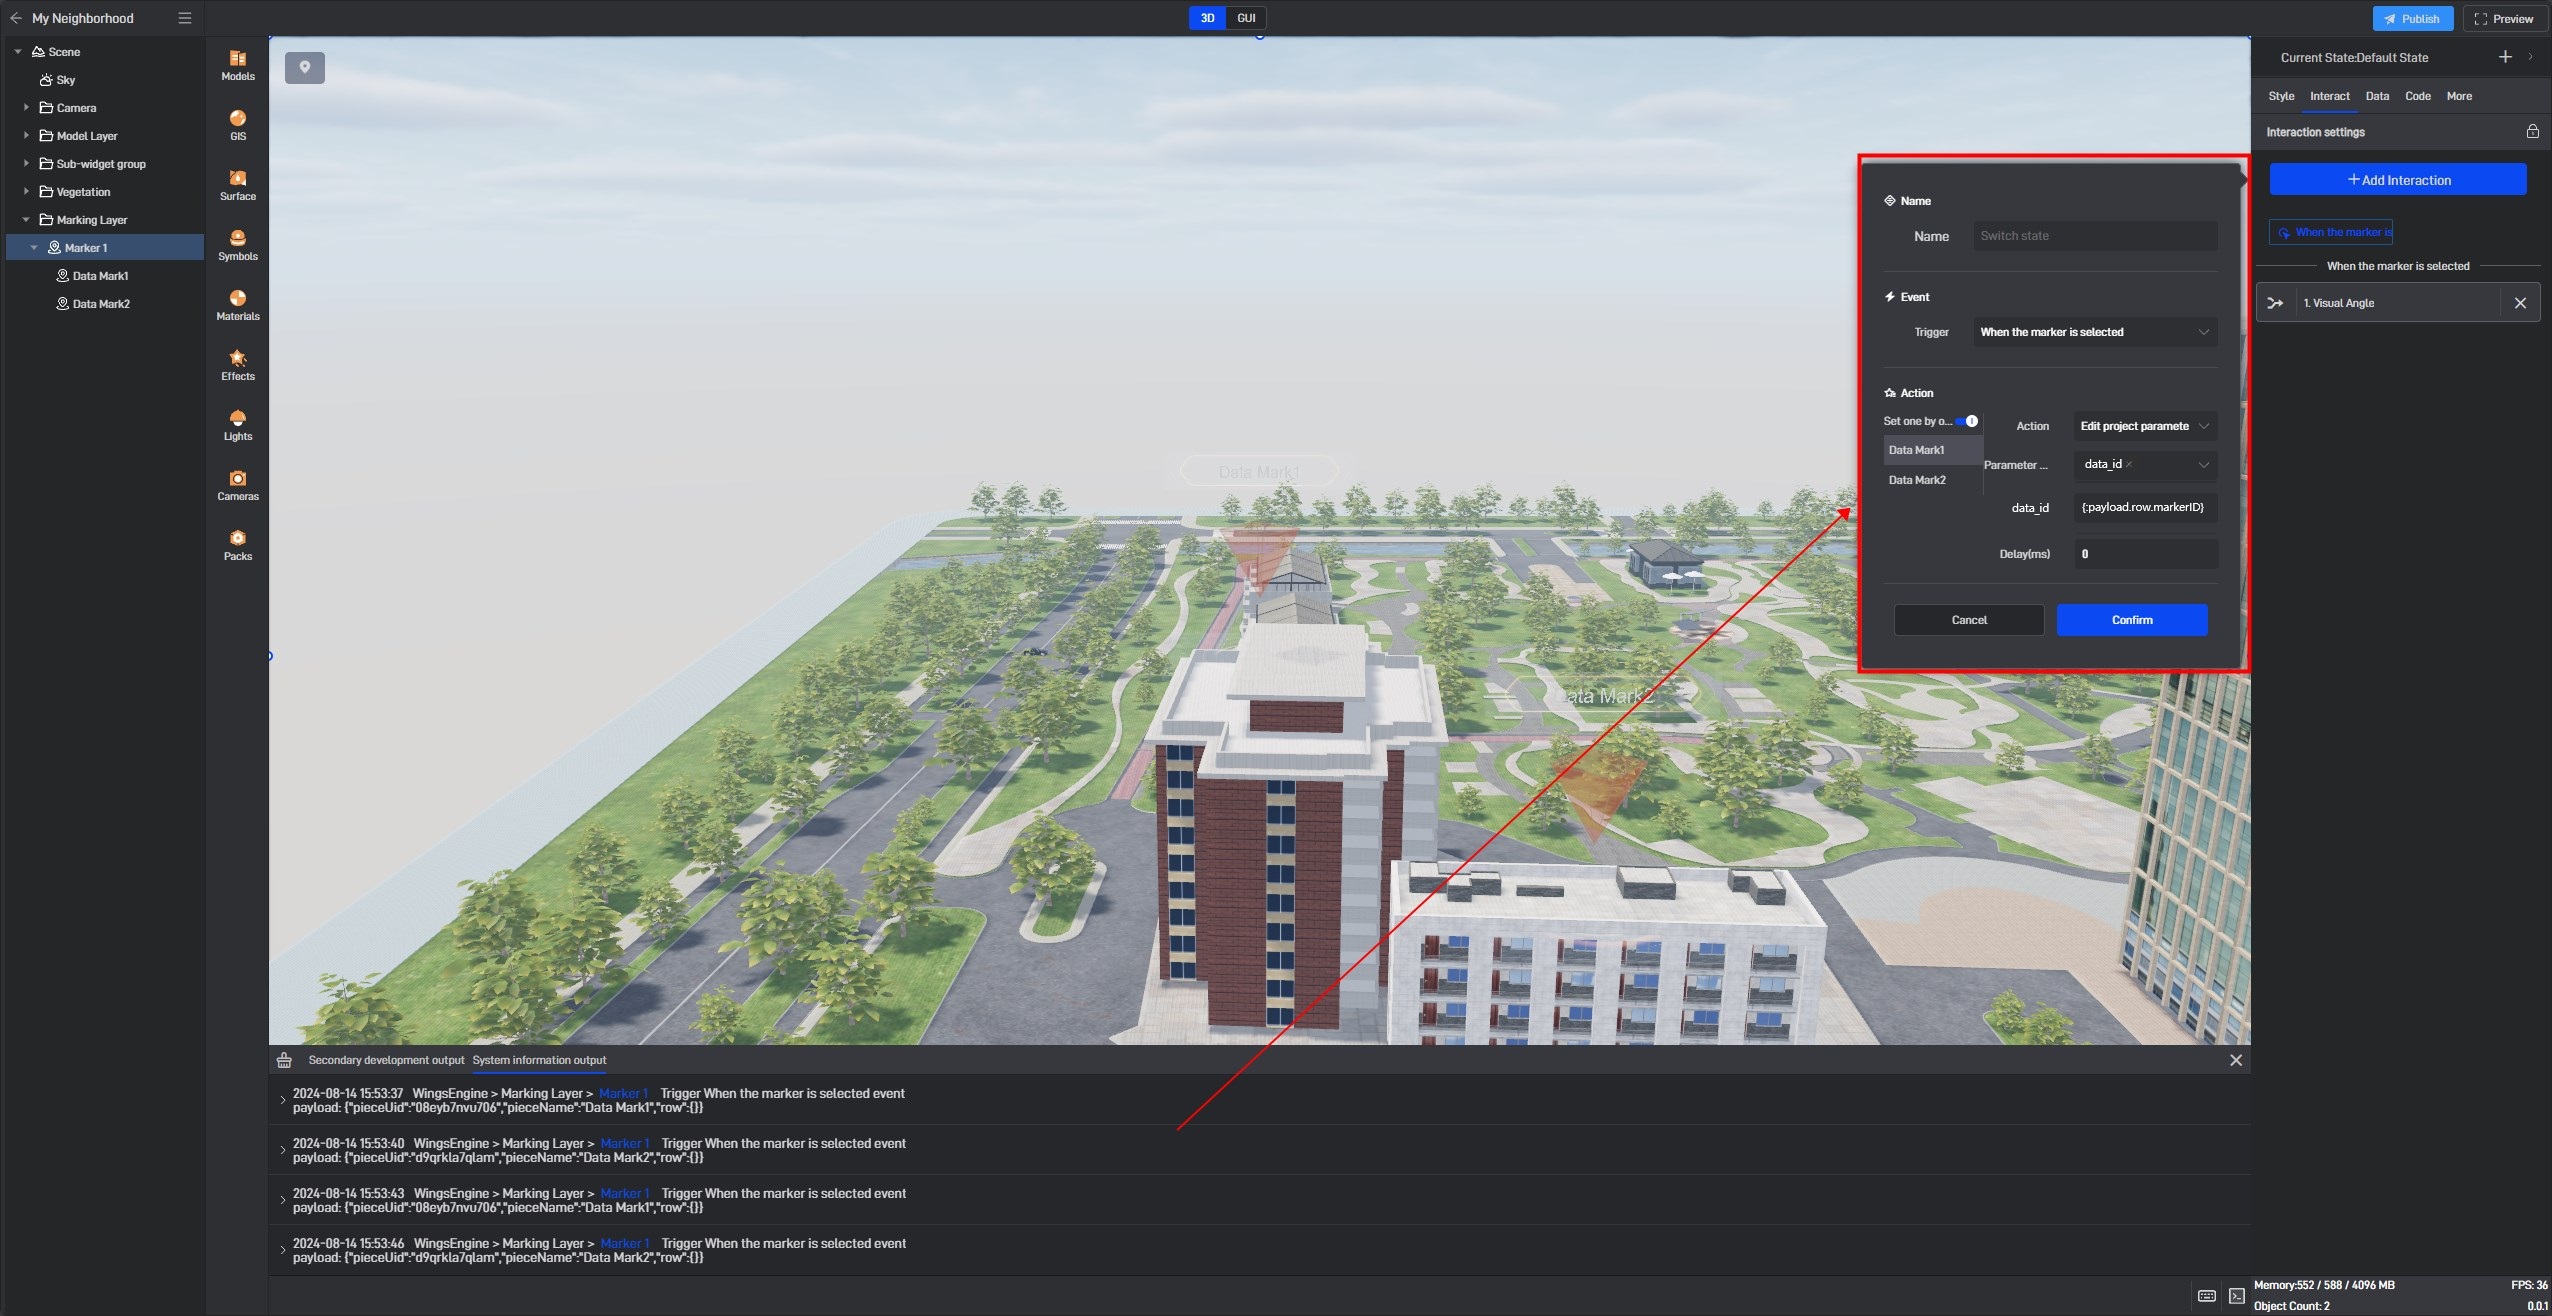
After clicking a marker, it will modify the project parameters based on its configured data, and any data connection using these project parameters will automatically refresh.